
Zesty Lemon Cream Cheese Bars Recipe for Sunny Days
Dessert lovers find pure bliss in these creamy lemon delight cream cheese bars that burst with tangy sweetness.
Silky smooth layers meld together in a perfect dance of flavor and texture.
Each bite promises a zesty adventure that dances across your taste buds.
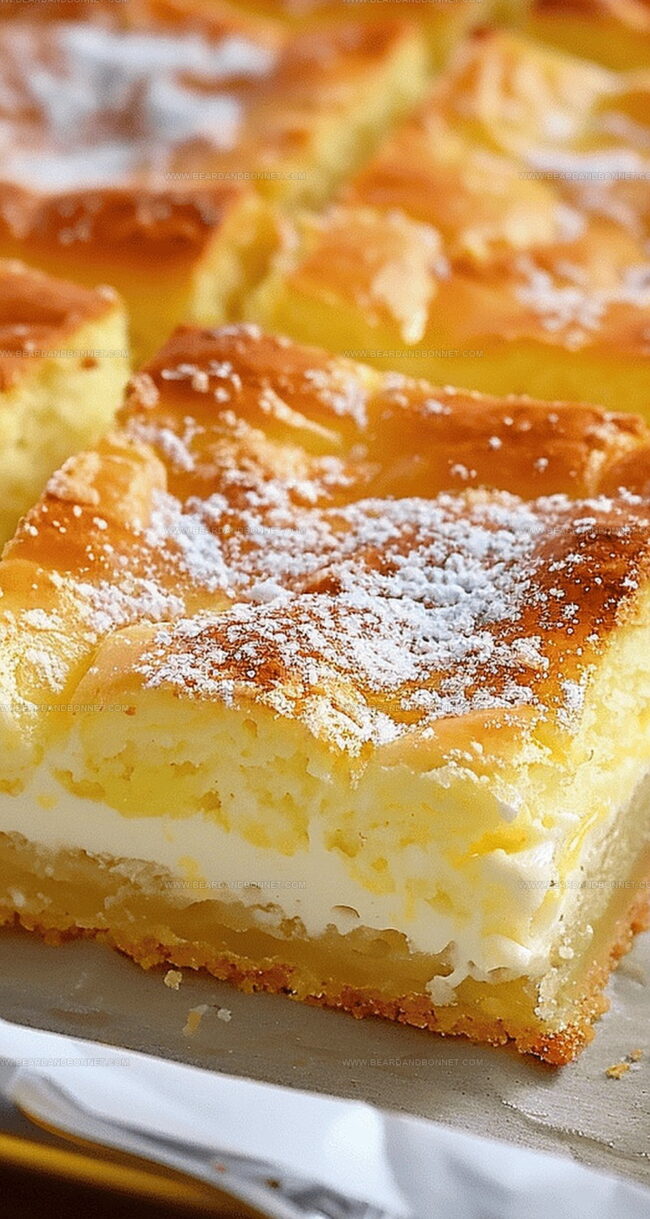
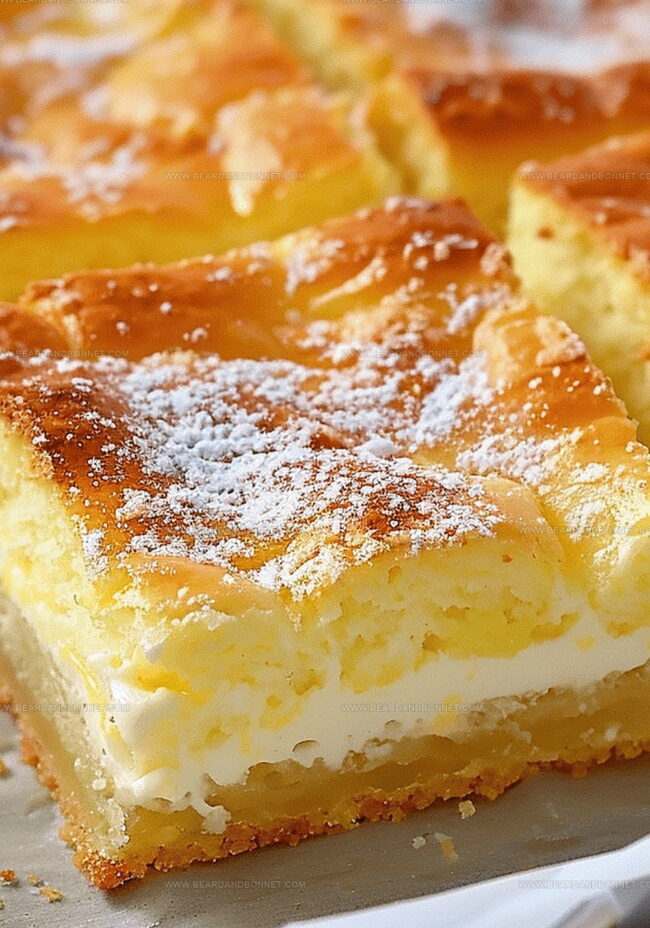
The graham cracker crust provides a delightful crunch that complements the rich, velvety filling.
Bright citrus notes cut through the creamy cheese, creating a balanced and irresistible treat.
Home bakers will fall in love with how simple these bars are to prepare.
Summer gatherings or quiet afternoon treats become extraordinary with these decadent bars.
Dive into this recipe and let the sunshine of flavor brighten your day.
Quick Recipe Overview
What Goes Into Lemon Cream Cheese Bars
For Crust and Base:For Creamy Filling:For Topping and Finishing:Equipment for Baking Tangy Cream Cheese Bars
How to Prepare Lemon Cream Cheese Bars With Ease
Get your oven warmed up to a cozy 350°F. Line a large baking pan with foil and give it a quick spray of cooking oil to prevent sticking.
Carefully spread the first layer of crescent dough across the bottom of the pan. Stretch it gently to create a smooth, even surface that covers every corner.
Grab your lemons and zest them up! Combine the bright lemon essence with cream cheese and a touch of sweetness. Whip everything together until it’s silky smooth and full of tangy flavor.
Drape the second sheet of crescent dough over the creamy filling. Make sure it reaches all the edges, creating a beautiful blanket for the lemony goodness underneath.
Brush the top with melted butter, then sprinkle a magical mixture of leftover lemon zest and sugar. This will create a crispy, golden crown that’ll make mouths water.
Pop the pan in the oven and let it transform. Watch for a gorgeous golden brown color that signals pure deliciousness is ready to emerge.
Allow the bars to cool down for a bit. Lift them out using the foil, slice into perfect squares, and let them chill in the refrigerator. The waiting is the hardest part, but trust me, it’s worth it!
Baking Tips and Lemon Flavor Boosters
Serving These Bars for Any Crowd
Storage Tips to Keep Lemon Bars Fresh
Print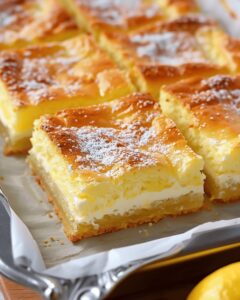
Tangy Lemon Cream Cheese Bars Recipe
- Total Time: 50 minutes
- Yield: 13 1x
Description
Creamy lemon delight cream cheese bars blend zesty citrus with rich, tangy cream cheese. Refreshing dessert bars offer a perfect balance of sweet and tart flavors you’ll savor with each delightful bite.
Ingredients
- 2 packages (8 oz / 226 g) cream cheese, softened
- 2 packages (8 oz / 226 g) refrigerated crescent roll dough
- 2 lemons, zested and juiced
- 0.5 cup white sugar
- 2 tbsps butter, melted
- 3 tbsps white sugar for topping
- Cooking spray for pan
- Lemon zest from 1.5 lemons
Instructions
- Preparation: Preheat oven to 350°F and line a 9×13-inch baking dish with aluminum foil, generously coating with cooking spray for effortless removal.
- Base Layer: Unroll first crescent roll dough, gently pressing into the dish to create a seamless, even foundation that completely covers the bottom surface.
- Cream Cheese Filling: Whip cream cheese with sugar, incorporating fresh lemon zest and juice until achieving a silky, lump-free consistency that bursts with citrusy brightness.
- Assembly: Spread the lemon-infused cream cheese mixture uniformly across the crescent roll base, ensuring complete coverage to the dish’s edges while maintaining a smooth, level surface.
- Topping and Finishing: Carefully layer the second crescent roll dough over the cream cheese filling, stretching gently to provide complete coverage, then brush melted butter across the surface and sprinkle with reserved lemon zest and sugar mixture.
- Baking: Bake in the preheated oven for 30 minutes, monitoring until the top turns a rich golden-brown and the edges appear firm and set.
- Cooling and Serving: Allow the dessert to cool at room temperature for 20 minutes, then lift from the dish using foil edges, slice into precise squares, and refrigerate for at least one hour to solidify and intensify the flavors.
Notes
- Prevent Sticky Situations: Line the baking dish with foil and spray generously to ensure effortless removal of bars after baking.
- Smooth Cream Cheese Magic: Ensure cream cheese is fully softened and mix thoroughly to eliminate lumps for a silky, creamy filling.
- Perfect Dough Technique: Gently stretch crescent roll dough to cover the entire surface without pressing too hard, maintaining a light, flaky texture.
- Chilling for Flavor Perfection: Refrigerate bars for at least one hour after cooling to allow flavors to develop and achieve the ideal slice-able consistency.
- Prep Time: 20 minutes
- Cook Time: 30 minutes
- Category: Desserts, Snacks
- Method: Baking
- Cuisine: American
Nutrition
- Serving Size: 13
- Calories: 250
- Sugar: 18 g
- Sodium: 320 mg
- Fat: 14 g
- Saturated Fat: 8 g
- Unsaturated Fat: 4 g
- Trans Fat: 0 g
- Carbohydrates: 28 g
- Fiber: 1 g
- Protein: 4 g
- Cholesterol: 45 mg
Jessica Martin
Recipe Developer & Food Writer
Expertise
Recipe Development, Food Styling and Photography, Seasonal and Local Ingredients, Vegetarian and Vegan Cuisine, Culinary Education
Education
Portland Community College
Oregon Culinary Institute
Jessica Martin is a talented food writer and recipe creator who specializes in seasonal cooking and approachable home baking.
Educated at Portland Community College with additional pastry training from Oregon Culinary Institute, Jessica’s culinary journey spans nearly a decade of creating and sharing flavorful recipes.
Her deep appreciation for local ingredients shapes each of her recipes, making them both accessible and inspiring. At Beard and Bonnet, Jessica uses her cheerful, down-to-earth writing to help readers effortlessly bring new tastes and creative dishes into their daily routines.