
Rich Midnight Cocoa Custard Pie Recipe: Silky Sweet Bliss
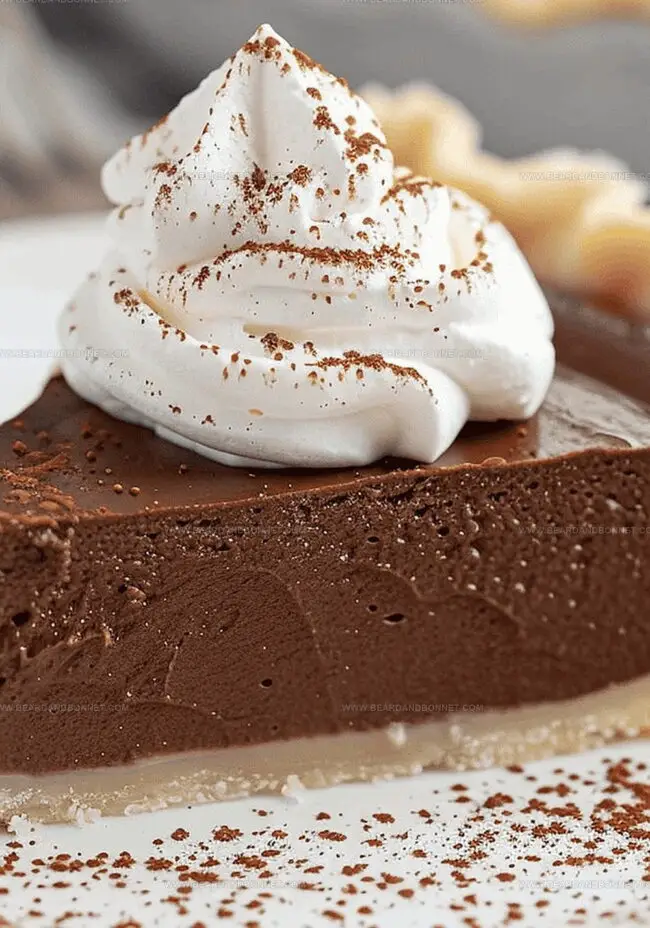
Silky smooth and rich with intense chocolate flavor, this cocoa custard pie delivers pure dessert magic.
Chocolate lovers find absolute bliss in this decadent cocoa custard pie recipe that promises pure indulgence.
Each spoonful melts like velvet across your palate, revealing layers of deep, luxurious cocoa notes.
The creamy filling nestles perfectly within a golden, buttery crust that crumbles delicately with every bite.
Hints of vanilla and dark chocolate intertwine, creating a dessert that feels simultaneously sophisticated and comforting.
Professional bakers and home cooks alike will appreciate the elegant simplicity of this recipe.
The secret lies in selecting high-quality cocoa and allowing each ingredient to shine.
Dive into this irresistible chocolate experience that transforms an ordinary evening into a gourmet celebration.
Quick Recipe Overview

Ingredients in Decadent Cocoa Custard Pie
For Base and Binding:For Chocolate Flavor and Richness:For Liquid and Protein Components:Tools You’ll Need for Cocoa Custard Pie
Baking Decadent Cocoa Custard Pie with Ease
Blend sugar, cornstarch, and rich cocoa powder in a medium saucepan, creating a smooth dry mixture that will become the heart of your decadent dessert.
Gently separate egg yolks, whisking them into creamy milk. Pour this silky blend into the saucepan, adding a knob of butter for luxurious richness.
Heat the mixture over medium flame, constantly stirring with a whisk. Watch as the liquid transforms into a luscious, thick pudding-like consistency.
Pull the saucepan from heat, introducing a pinch of salt and a splash of vanilla. If any stubborn lumps remain, use an electric mixer to create a velvety smooth texture.
Tenderly pour the glossy chocolate custard into a pre-baked pie shell, ensuring an even, inviting surface that promises pure indulgence.
Slide the pie into the refrigerator, allowing it to rest and set for a minimum of three hours. This cooling period will solidify your culinary masterpiece into a creamy, dreamy delight.
Ideas to Improve Cocoa Custard Pie Flavor
Serving Cocoa Custard Pie with Style
Storage Advice for Cocoa Custard Pie
Print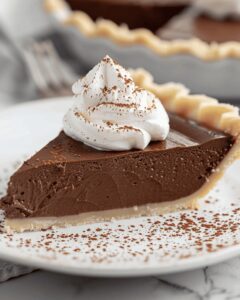
Silky Cocoa Custard Pie Recipe
- Total Time: 35 minutes
- Yield: 9 1x
Description
Rich cocoa custard pie delivers a silky chocolate experience from French culinary traditions. Chocolate lovers will savor each creamy, indulgent slice with pure dessert delight.
Ingredients
- 1 fully baked pie shell
- 3 egg yolks
- 2 cups (475 ml/16 fl oz) whole milk
- 1 cup (200 g/7.05 oz) granulated sugar
- ½ cup (43 g/1.5 oz) unsweetened cocoa powder
- ¼ cup (32 g/1.12 oz) cornstarch
- 5 tbsps (71 g/2.5 oz) butter
- 2 tsps (10 ml/0.33 fl oz) vanilla extract
- ¼ tsp (0.25 tsp) salt
Instructions
- Prep Dry Base: In a medium saucepan, meticulously blend granulated sugar, cornstarch, and unsweetened cocoa powder, eliminating any potential lumps for a smooth foundation.
- Mix Liquid Components: Whisk egg yolks with milk in a large mixing bowl until perfectly integrated, creating a homogeneous liquid foundation for the custard.
- Combine and Cook: Pour the egg-milk mixture into the saucepan with dry ingredients, adding butter, and apply medium heat while constantly whisking to prevent scorching and ensure uniform thickening.
- Perfect Consistency: Continue stirring until the mixture transforms into a dense, pudding-like texture that smoothly coats the back of a spoon, indicating optimal custard development.
- Flavor Enhancement: Remove from heat, swiftly incorporate salt and vanilla extract, using an electric mixer if necessary to achieve an ultra-smooth, silky chocolate custard with complex flavor notes.
- Pie Assembly: Carefully transfer the luscious chocolate mixture into a pre-baked pie shell, spreading evenly to ensure complete coverage and an impeccable presentation.
- Chill and Set: Refrigerate the pie for a minimum of 3 hours, allowing the custard to solidify and develop a rich, velvety texture that promises a decadent dessert experience.
Notes
- Temperature Control: Maintain medium heat and stir constantly to prevent burning and ensure smooth custard texture.
- Egg Separation Technique: Carefully separate egg yolks, avoiding any white contamination for a perfect custard consistency.
- Lump-Free Guarantee: Use an electric mixer or fine-mesh strainer to eliminate any potential clumps in the custard mixture.
- Chilling Crucial Step: Refrigerate for at least 3 hours to allow complete setting and develop rich, velvety texture that enhances flavor depth.
- Prep Time: 20 minutes
- Cook Time: 15 minutes
- Category: Desserts
- Method: Mixing
- Cuisine: American
Nutrition
- Serving Size: 9
- Calories: 320
- Sugar: 22 g
- Sodium: 90 mg
- Fat: 17 g
- Saturated Fat: 10 g
- Unsaturated Fat: 7 g
- Trans Fat: 0 g
- Carbohydrates: 38 g
- Fiber: 2 g
- Protein: 4 g
- Cholesterol: 90 mg
Jessica Martin
Recipe Developer & Food Writer
Expertise
Recipe Development, Food Styling and Photography, Seasonal and Local Ingredients, Vegetarian and Vegan Cuisine, Culinary Education
Education
Portland Community College
Oregon Culinary Institute
Jessica Martin is a talented food writer and recipe creator who specializes in seasonal cooking and approachable home baking.
Educated at Portland Community College with additional pastry training from Oregon Culinary Institute, Jessica’s culinary journey spans nearly a decade of creating and sharing flavorful recipes.
Her deep appreciation for local ingredients shapes each of her recipes, making them both accessible and inspiring. At Beard and Bonnet, Jessica uses her cheerful, down-to-earth writing to help readers effortlessly bring new tastes and creative dishes into their daily routines.