Spooky & Sweet: Easy Peanut Butter Mummy No Bake Bars Recipe
Creamy peanut butter mummy bars offer a spooky-sweet twist on classic dessert treats that everyone craves during Halloween season.
These delightful no-bake bars combine rich, smooth textures with playful seasonal decorations.
Ghoulish white chocolate drizzles elevate ordinary ingredients into something magical and memorable.
Soft, chewy layers promise an indulgent experience that satisfies sugar cravings without complicated kitchen techniques.
Kids and adults alike will love the whimsical presentation that turns a simple snack into a festive celebration.
Halloween parties become instantly more exciting with these eye-catching confections that require minimal effort.
Grab your ingredients and get ready to wow friends and family with this wickedly delicious dessert.
Peanut Butter Mummy Bars Everyone Can Make
No-Bake Ingredients You’ll Need for Mummy Bars
No Bake Base:Sweeteners:Chocolate Coating:Finishing Touches:How to Assemble and Chill These Halloween Treats
Step 1: Prepare the Baking Pan
Line an 8×8 inch pan with parchment paper, allowing extra paper to hang over the sides for easy removal later.
Step 2: Create Creamy Base
In a large mixing bowl, combine:Stir until smooth and well blended.
Step 3: Add Powdered Sugar
Gradually mix in powdered sugar until the mixture becomes thick and holds together easily.
Step 4: Press Into Pan
Transfer the mixture to the prepared pan. Use a spatula or your hands to press it down evenly and firmly.
Step 5: Chill the Bars
Place the pan in the refrigerator and let it cool for about 30 minutes until the mixture becomes firm.
Step 6: Melt White Chocolate
In a microwave-safe bowl, melt white chocolate in 15-second intervals, stirring between each interval to prevent burning.
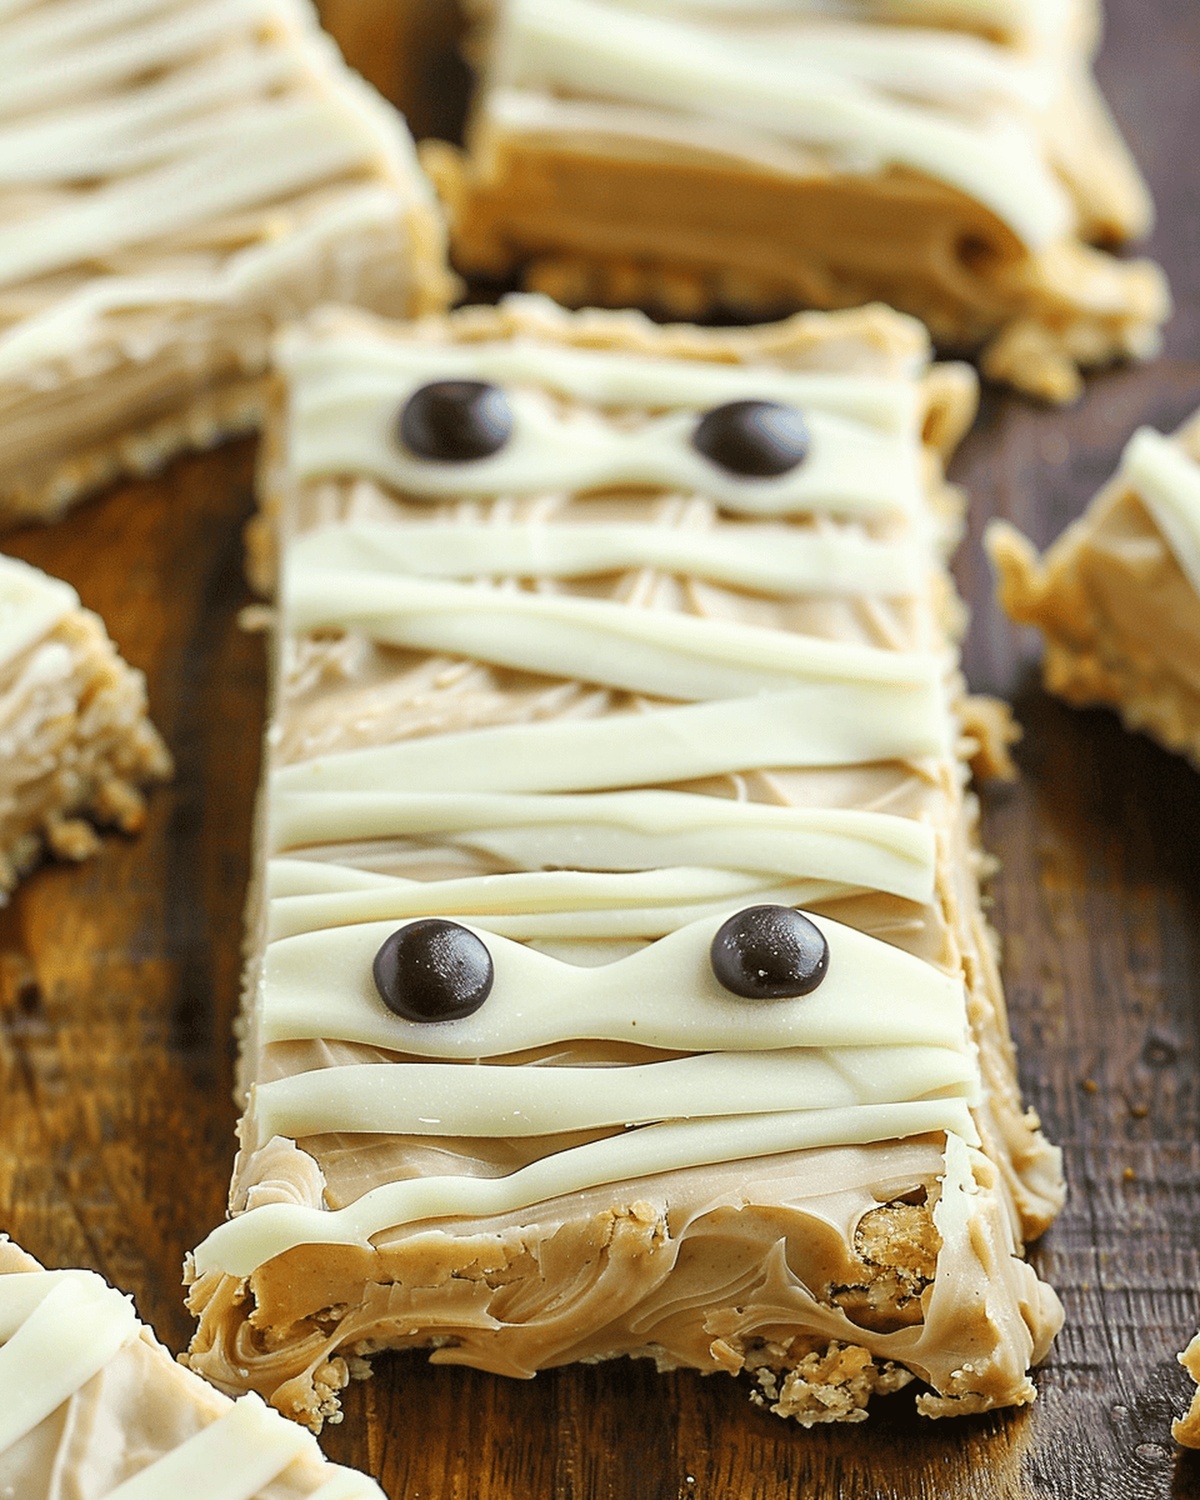
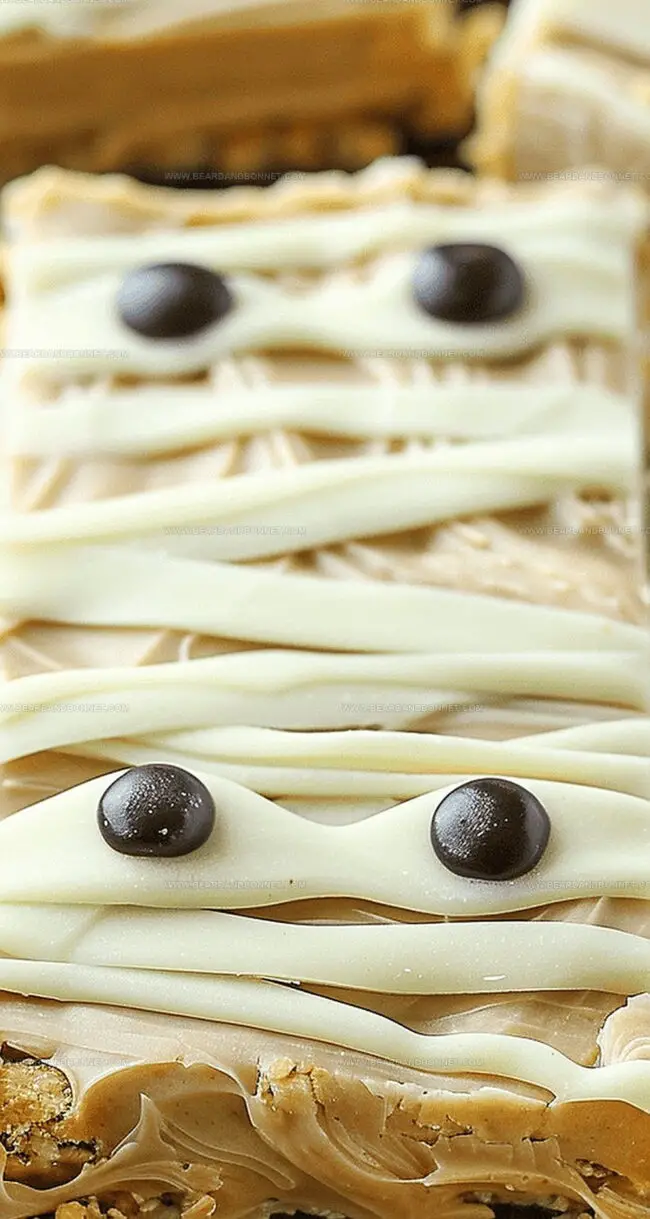
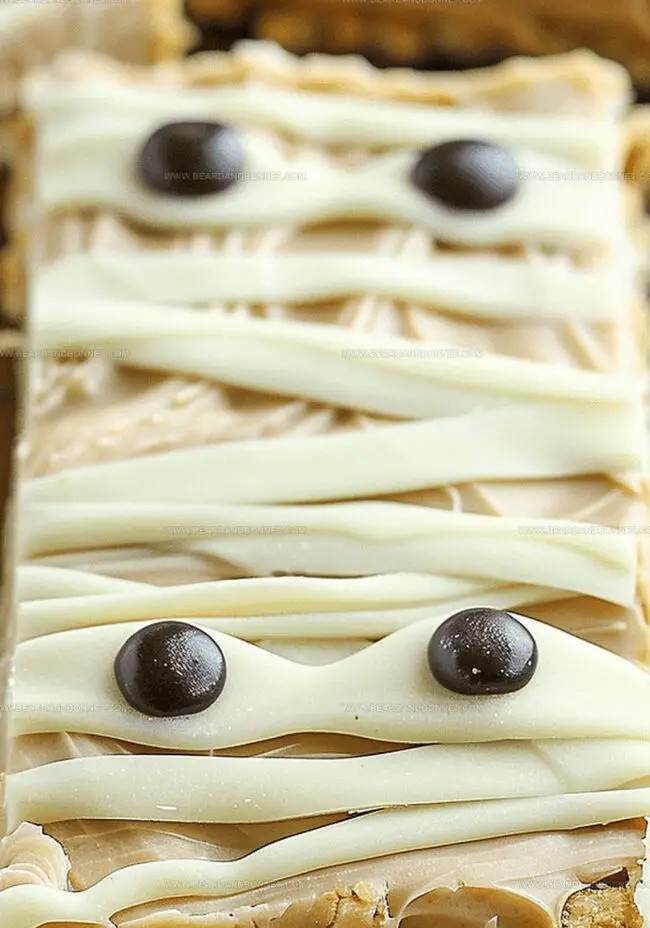
Step 7: Create Mummy Design
Drizzle melted white chocolate over the chilled bars in zigzag patterns to create bandage-like decorations.
Step 8: Add Candy Eyes
Place small candy eyes on the bars to create a fun mummy face.
Step 9: Final Chill
Return the bars to the refrigerator for 10-15 minutes to set the chocolate completely.
Step 10: Cut and Serve
Remove the bars from the pan using the parchment paper. Cut into squares and serve chilled.
Decorating and Layering Tips You’ll Appreciate
Storage Tips for Your No-Bake Peanut Butter Bars
Sweet Pairings to Serve with These Themed Bars
Creative Spooky Versions to Try This Season
Print
Peanut Butter Mummy No Bake Bars Recipe
- Total Time: 15 minutes
- Yield: 12 1x
Description
Spooky Halloween peanut butter mummy bars deliver ghoulish delight with creamy layers and ghostly white chocolate drizzle. Chocolate cookie base and smooth peanut butter filling create a wickedly easy treat perfect for haunting dessert tables.
Ingredients
Main Ingredients:
- 1 cup creamy peanut butter
- 2 cups powdered sugar
- ¼ cup unsalted butter, melted
For white chocolate decoration:
- 2 cups white chocolate chips, separated
- ¼ cup non-marking chocolate chips
Additional Ingredients:
- 2 teaspoons vanilla extract
- 1 pinch of salt
Instructions
- Prepare the pan by carefully lining an 8×8 inch dish with parchment paper, ensuring the edges extend over the sides for easy removal later.
- In a large mixing bowl, combine peanut butter, melted butter, vanilla extract, and a pinch of salt, stirring until the mixture becomes smooth and well-integrated.
- Gradually incorporate powdered sugar into the wet ingredients, mixing thoroughly until the consistency becomes thick and moldable.
- Transfer the mixture into the prepared pan, pressing it down evenly and firmly to create a compact base layer.
- Place the pan in the freezer for approximately 15-20 minutes, allowing the mixture to firm up and become more stable.
- Remove from freezer and slice the chilled mixture into rectangular bar shapes using a sharp knife.
- Melt white chocolate in a microwave-safe bowl, heating in short intervals and stirring between each to prevent burning.
- Drizzle the melted white chocolate over the bars, creating thin bandage-like patterns to mimic a mummy’s wrapping.
- Add small chocolate chips or candy eyes to create facial features for a playful mummy effect.
- Return the decorated bars to the refrigerator for a final 10 minutes to set the chocolate completely.
- Once firm, carefully lift the bars out using the parchment paper edges and serve chilled.
Notes
- Prepare a parchment-lined pan with overhanging sides for easy removal.
- Blend peanut butter, melted butter, and powdered sugar in a mixing bowl until smooth and creamy.
- Freeze the mixture until firm, then cut into rectangular shapes for mummy-like bars.
- Melt white chocolate in short intervals, drizzling carefully over bars to create bandage-like designs.
- Prep Time: 15 minutes
- Cook Time: 0 minutes
- Category: Snacks, Desserts
- Method: Freezing
- Cuisine: American
Nutrition
- Serving Size: 12
- Calories: 240
- Sugar: 16 g
- Sodium: 75 mg
- Fat: 14 g
- Saturated Fat: 4 g
- Unsaturated Fat: 8 g
- Trans Fat: 0 g
- Carbohydrates: 27 g
- Fiber: 1 g
- Protein: 6 g
- Cholesterol: 0 mg
Alex Reed
Founder & Lead Content Writer
Expertise
Recipe Development and Testing, Culinary Education, Food Writing and Blogging, Sustainable Cooking Practices, Global Cuisine Exploration
Education
Johnson & Wales University
Le Cordon Bleu Paris
Alex Reed is an inventive chef and food creator with a passion for dishes that balance taste, health, and sustainability.
Trained at Portland Community College and holding an Advanced Pastry Arts certificate from Oregon Culinary Institute, Alex brings more than 10 years of practical culinary experience to every recipe he develops.
His background uniquely blends traditional cooking skills with modern, mindful eating principles. As the founder of Beard and Bonnet, Alex creates recipes that encourage readers to cook confidently.