
The Most Flavorful Mexican Burrito Roll Ups Recipe Ever
Mexican burrito roll ups tantalize taste buds with their vibrant blend of flavors and textures.
Bold spices and fresh ingredients dance together in these compact culinary delights.
Rolled tortillas embrace a symphony of savory fillings that promise excitement in every bite.
Soft yet sturdy wraps craft simple components into a mouthwatering meal that speaks to comfort and creativity.
Hearty and satisfying, these roll ups represent more than just food—they embody a cultural celebration of culinary artistry.
Home cooks can craft these delectable parcels with minimal effort and maximum enjoyment.
Grab your ingredients and let your kitchen become a playground of delicious possibilities.
Why People Crave Mexican Burrito Roll Ups
Burrito Roll Up Ingredients at a Glance
Tortilla Base:Filling Ingredients:Serving Accompaniment:How to Wrap and Slice Mexican Burrito Roll Ups
Step 1: Create Creamy Bean Filling
In a medium bowl, thoroughly mix:Blend until the mixture becomes smooth and well combined.
Step 2: Spread and Prepare Tortillas
Take each tortilla and evenly spread a thin layer of the bean mixture across the surface.
Step 3: Roll and Secure Tortillas
Carefully roll each tortilla tightly, similar to a jelly roll.
Place the rolled tortillas seam-side down on a serving tray.
Step 4: Chill and Set
Refrigerate the rolled tortillas for a minimum of 30 minutes.
This allows flavors to blend and filling to firm up.
Step 5: Slice and Serve
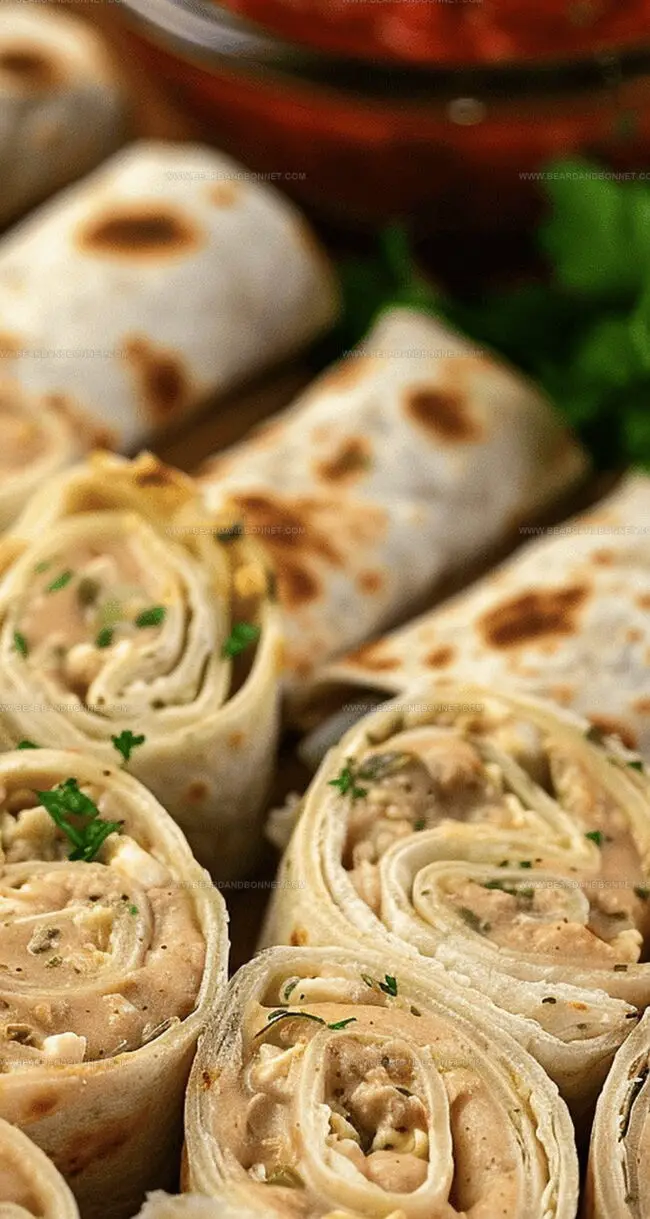
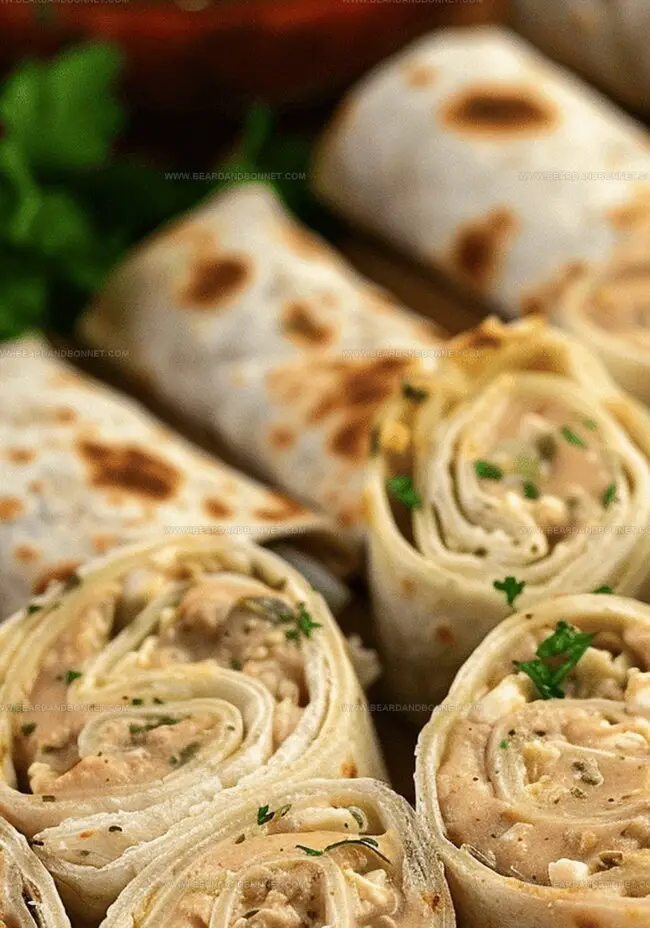
Just before serving, cut the rolled tortillas into half-inch sections.
Arrange the slices attractively on a platter.
Serve with fresh salsa on the side for dipping.
Enjoy your delicious Mexican Burrito Roll Ups!
Burrito Roll Up Tips for Clean Presentation
Saving and Warming Leftovers from Burrito Roll Ups
Burrito Roll Up Pairing Ideas
Twist Options for Mexican Burrito Roll Ups
Print
Mexican Burrito Roll Ups Recipe
- Total Time: 15 minutes
- Yield: 8 1x
Description
Zesty Mexican burrito roll ups bring explosive flavor to your table with minimal effort. Creamy cheese, spicy jalapeños, and savory meats combine in these quick, irresistible appetizers that will make you the star of any gathering.
Ingredients
Main Ingredients:
- 16 ounces (454 grams) refried beans
- 8 ounces (227 grams) cream cheese, softened
- 1 package burrito-size tortillas
Vegetable Ingredients:
- 4 ounces (113 grams) diced green chiles
Serving Ingredient:
- Salsa, for serving
Instructions
- Prepare a creamy, zesty filling by thoroughly mixing refried beans, diced green chiles, and cream cheese in a medium mixing bowl until achieving a uniform, silky texture.
- Carefully spread the prepared bean mixture in a thin, even layer across each tortilla, ensuring complete coverage from edge to edge.
- Tightly roll each tortilla into a compact cylinder, similar to a jelly roll technique, applying gentle, consistent pressure to maintain a uniform shape.
- Position the rolled tortillas seam-side down on a clean tray, preventing unraveling and maintaining their structural integrity.
- Chill the rolled tortillas in the refrigerator for a minimum of 30 minutes, allowing the flavors to harmonize and the filling to slightly firm up.
- Immediately prior to serving, slice the chilled tortilla rolls into precise half-inch sections, creating bite-sized appetizer portions.
- Artfully arrange the cut sections on a serving platter, accompanied by a vibrant salsa for dipping, creating an appealing and inviting presentation.
Notes
- Chill the rolled tortillas for at least 30 minutes to help them hold their shape and blend the flavors together.
- Use room temperature cream cheese for easier mixing and a smoother consistency with the refried beans and green chiles.
- Choose soft, fresh tortillas that are pliable to make rolling easier and prevent cracking.
- Slice the roll-ups just before serving to keep them fresh and prevent the edges from drying out.
- Prepare these appetizers in advance for stress-free entertaining, as they can be refrigerated for several hours before slicing.
- Pair with your favorite salsa or hot sauce to add an extra kick of flavor and spice.
- Prep Time: 15 minutes
- Cook Time: 0 minutes
- Category: Lunch, Snacks
- Method: Blending
- Cuisine: Mexican
Nutrition
- Serving Size: 8
- Calories: 320
- Sugar: 2 g
- Sodium: 600 mg
- Fat: 18 g
- Saturated Fat: 10 g
- Unsaturated Fat: 6 g
- Trans Fat: 0 g
- Carbohydrates: 36 g
- Fiber: 8 g
- Protein: 12 g
- Cholesterol: 40 mg
Alex Reed
Founder & Lead Content Writer
Expertise
Recipe Development and Testing, Culinary Education, Food Writing and Blogging, Sustainable Cooking Practices, Global Cuisine Exploration
Education
Johnson & Wales University
Le Cordon Bleu Paris
Alex Reed is an inventive chef and food creator with a passion for dishes that balance taste, health, and sustainability.
Trained at Portland Community College and holding an Advanced Pastry Arts certificate from Oregon Culinary Institute, Alex brings more than 10 years of practical culinary experience to every recipe he develops.
His background uniquely blends traditional cooking skills with modern, mindful eating principles. As the founder of Beard and Bonnet, Alex creates recipes that encourage readers to cook confidently.