
Sweet & Nutty Homemade Peanut Butter Balls Recipe
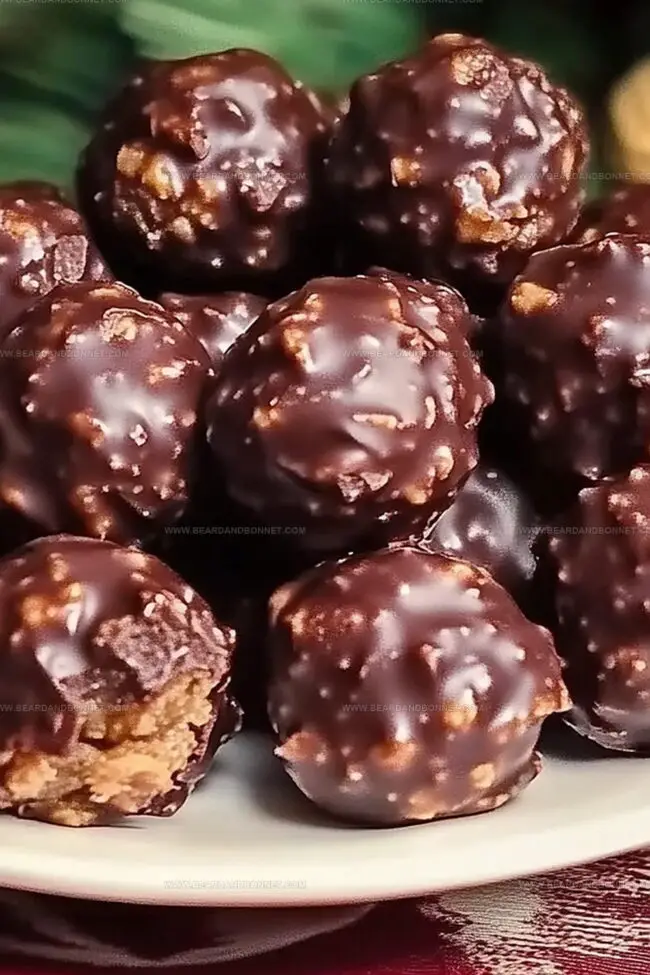
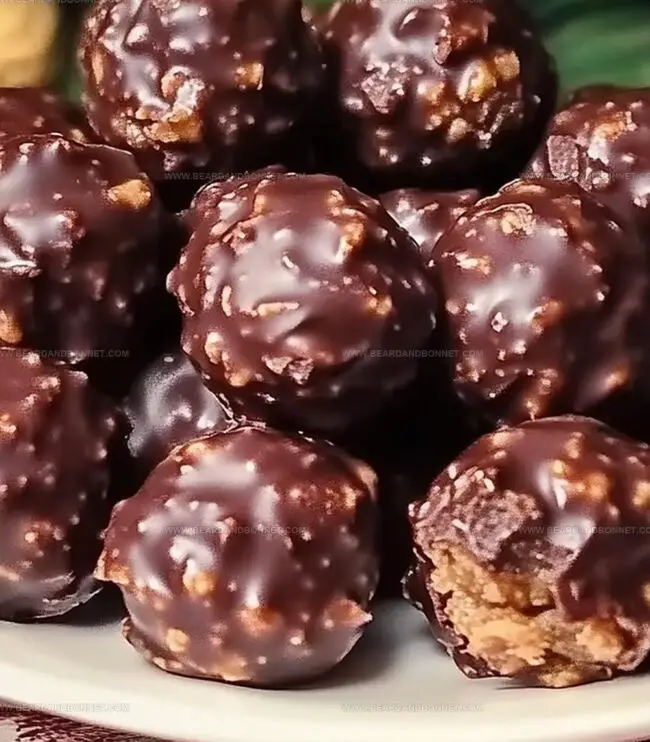
Chocolate-coated peanut butter balls dance with delightful nostalgia, capturing childhood memories in every sweet peanut butter balls recipe bite.
These irresistible treats blend creamy peanut butter with powdered sugar and rich chocolate for an indulgent experience.
No complex techniques stand between you and these delectable spheres of pure happiness.
A few simple ingredients merge to create magic in your kitchen.
Each ball offers a perfect balance of smooth peanut butter and decadent chocolate coating.
Rolling these treats becomes a joyful moment of culinary creativity.
Dive into this easy recipe and unleash a wave of sweet, nutty bliss that will leave everyone craving more.
Quick Recipe Overview
All Ingredients For Peanut Butter Balls
For Filling Base:For Coating:For Optional Garnish:Things You Need For Peanut Butter Balls
Directions To Make Peanut Butter Balls
Whip together creamy peanut butter with soft butter, powdered sugar, and a splash of vanilla. The mixture should feel like a rich, moldable dough that holds its shape perfectly when rolled.
Gently roll the mixture into small, uniform spheres. Place these delicate orbs on a chilled parchment-lined tray. Pop them in the refrigerator to firm up and become more manageable.
Melt chocolate chips with a touch of coconut oil in smooth, gentle intervals. Stir carefully to create a glossy, silky chocolate bath that will embrace each peanut butter sphere.
Carefully dunk each peanut butter ball into the warm chocolate, ensuring a complete and elegant chocolate jacket. Tap off excess chocolate and return each coated treasure to the chilled tray.
Allow the chocolate-covered delights to rest in the refrigerator until the coating becomes firm and glossy. This magical transformation takes about 30 minutes.
Transfer these decadent treats to an airtight container. They’ll happily wait in the refrigerator for up to two weeks or can be frozen for longer enjoyment.
Tricks And Mix-Ins For Peanut Butter Balls
How To Serve Peanut Butter Balls
Peanut Butter Balls Storage And Planning Tips
Print
Heavenly Peanut Butter Balls Recipe
- Total Time: 1 hour 20 minutes
- Yield: 19 1x
Description
Irresistible chocolate-coated peanut butter balls deliver sweet nostalgia from childhood desserts. Homemade treats combine creamy peanut butter, powdered sugar, and rich chocolate for a delightful snack you’ll crave again and again.
Ingredients
- 1 cup creamy peanut butter
- 2 cups powdered sugar
- ¼ cup unsalted butter, softened
- 2 cups semi-sweet chocolate chips
- 2 tablespoons (2 tbsps) coconut oil or vegetable shortening
- 1 teaspoon (1 tsp) vanilla extract
Instructions
- Mixture Preparation: Combine peanut butter, softened butter, powdered sugar, and vanilla extract in a large mixing bowl, blending thoroughly until a uniform, pliable consistency forms.
- Sphere Shaping and Chilling: Mold the mixture into marble-sized spheres, arranging them on a parchment-lined tray. Refrigerate for 45 minutes to set and stabilize the shape.
- Chocolate Coating: Melt chocolate chips with coconut oil in a microwave-safe bowl, stirring periodically to create a smooth, glossy chocolate mixture.
- Enrobing and Finishing: Using a fork, dip each chilled peanut butter ball into the melted chocolate, ensuring complete coverage. Place the chocolate-coated spheres back on the parchment-lined tray, maintaining spacing between each piece.
- Final Chilling and Storage: Return the chocolate-covered balls to the refrigerator for 30-40 minutes until the chocolate hardens completely. Transfer to an airtight container and store in the refrigerator for up to two weeks or freeze for three months.
Notes
- Chill Before Coating: Refrigerate peanut butter balls for 45 minutes to help maintain shape and prevent crumbling during chocolate dipping.
- Smooth Chocolate Technique: Melt chocolate chips slowly and stir frequently to avoid burning, creating a glossy and even coating for perfect texture.
- Size Consistency: Use a small cookie scoop or melon baller to create uniform-sized balls, ensuring even chilling and consistent chocolate coverage.
- Storage Hack: Layer parchment paper between balls when storing to prevent sticking and maintain their pristine chocolate shell appearance.
- Prep Time: 20 minutes
- Cook Time: 1 hour
- Category: Snacks, Desserts
- Method: Mixing
- Cuisine: American
Nutrition
- Serving Size: 19
- Calories: 178
- Sugar: 13 g
- Sodium: 36 mg
- Fat: 10 g
- Saturated Fat: 4 g
- Unsaturated Fat: 6 g
- Trans Fat: 0 g
- Carbohydrates: 20 g
- Fiber: 0.5 g
- Protein: 3 g
- Cholesterol: 2 mg
Jessica Martin
Recipe Developer & Food Writer
Expertise
Recipe Development, Food Styling and Photography, Seasonal and Local Ingredients, Vegetarian and Vegan Cuisine, Culinary Education
Education
Portland Community College
Oregon Culinary Institute
Jessica Martin is a talented food writer and recipe creator who specializes in seasonal cooking and approachable home baking.
Educated at Portland Community College with additional pastry training from Oregon Culinary Institute, Jessica’s culinary journey spans nearly a decade of creating and sharing flavorful recipes.
Her deep appreciation for local ingredients shapes each of her recipes, making them both accessible and inspiring. At Beard and Bonnet, Jessica uses her cheerful, down-to-earth writing to help readers effortlessly bring new tastes and creative dishes into their daily routines.