
Irresistible Danish Butter Cookie Recipe in Minutes
Buttery, delicate, and irresistibly crisp, these Danish butter cookies dance on the taste buds with nostalgic charm.
A treasured Danish butter cookie recipe brings memories of cozy afternoons and sweet childhood moments.
Each golden, perfectly shaped cookie promises a melt-in-your-mouth experience that connects generations through simple, elegant ingredients.
Classic European baking techniques shine through in this straightforward yet magical treat.
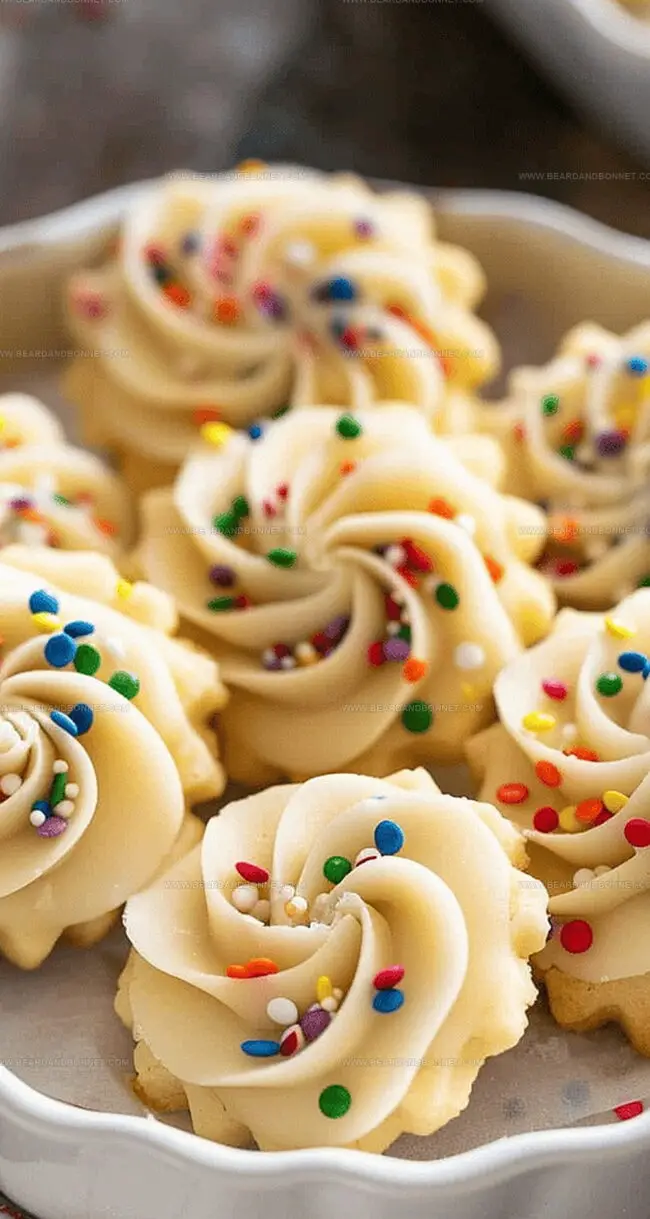
Delicate sugar crystals add a delightful crunch to the tender cookie base.
Rich, high-quality butter creates a luxurious texture that makes these cookies truly special.
Bake a batch and watch as everyone falls in love with this timeless Danish delicacy.
Quick Recipe Overview
Danish Butter Cookie Ingredient Guide
For Base Ingredients:For Liquid Binding Ingredients:For Dry Structural Ingredients:Must-Have Tools for Buttery Cookie Making
How to Shape and Bake Danish Butter Cookies

Danish Butter Cookie Magic
Create a cozy baking environment by warming your oven and preparing clean baking surfaces. Set the temperature to a perfect golden heat that promises delicious results.
Whip butter into a cloud-like texture, blending it with sweet sugar until the mixture becomes light and dreamy. This magical process creates the foundation of your delightful cookies.
Gently introduce vanilla and egg into the buttery mixture, stirring with care to create a smooth, harmonious blend that promises rich flavor in every bite.
Tenderly fold flour into the creamy mixture, treating the dough with gentle strokes. The key is a soft touch that keeps the cookies light and tender.
Use a piping bag with a elegant star tip to create beautiful swirls of dough on your baking sheet. Each cookie becomes a delicate work of art, promising a visual and taste sensation.
Bake until the edges transform into a gorgeous golden hue, watching carefully to capture the perfect moment of cookie perfection. The aroma will fill your kitchen with irresistible warmth.
Once cooled, add a touch of elegance with a drizzle of white chocolate or a sprinkle of delicate decorations. These cookies are not just a treat, but a moment of pure joy to share.
Flavor Tips and Butter Cookie Upgrades
Serving These Cookies for Holiday Cheer
Save and Store Butter Cookies the Smart Way
Print
Heavenly Danish Butter Cookie Recipe
- Total Time: 35 minutes
- Yield: 25 1x
Description
Danish butter cookies embody pure Danish culinary tradition with simple ingredients creating nostalgic sweetness. Delicate rounds melt in your palate, connecting generations through classic comfort and buttery perfection that calls you home.
Ingredients
- 2 cups (240 grams / 8.5 oz) flour
- ½ cup (100 grams / 3.5 oz) sugar
- 1 cup (226 grams / 8 oz) European style butter, room temperature
- 1 egg, room temperature
- 1 tbsp (15 mL / 0.5 fl oz) vanilla extract
- 1/8 tsp (0.6 grams) salt
- white chocolate (optional)
- M&M’s (optional)
- sprinkles (optional)
Instructions
- Preparation: Ignite oven to 350°F and line baking sheets with parchment paper, creating an ideal non-stick landscape for delicate cookie crafting.
- Mixing Base: Utilize stand mixer to harmonize butter, sugar, and salt into a cloud-like, pillowy consistency that promises an ethereal cookie texture.
- Binding Elements: Incorporate vanilla extract and egg, blending with precision until the mixture achieves a seamless, uniform composition, meticulously scraping mixer walls to integrate every morsel.
- Flour Integration: Delicately fold flour into wet ingredients, using gentle motions that preserve the cookie’s signature tenderness, ceasing mixer immediately upon complete incorporation.
- Shaping Technique: Transfer dough to piping bag fitted with an elegant star tip, ready to sculpt classic Danish cookie silhouettes with artistic precision.
- Cookie Formation: Pipe elegant swirls onto prepared sheets, maintaining strategic spacing to accommodate graceful expansion during baking process.
- Baking Performance: Slide into preheated oven, monitoring closely for 12-15 minutes until edges transform into a soft, inviting golden embrace, signaling peak perfection.
- Cooling Strategy: Momentarily rest cookies on baking sheets to stabilize structural integrity, then transition to wire rack for complete cooling.
- Finishing Touch: Optionally embellish with melted white chocolate drizzle, decorative sprinkles, or vibrant candy accents while cookies retain gentle warmth.
Notes
- Butter Quality Matters: Use high-fat European-style butter for authentic Danish cookie richness and superior flavor profile.
- Piping Precision: Chill dough for 15-20 minutes before piping to maintain crisp swirl shapes and prevent spreading during baking.
- Temperature Control: Watch cookies carefully between 12-15 minute mark, as ovens vary and golden edges indicate perfect doneness.
- Storage Secrets: Store completely cooled cookies in airtight containers with parchment between layers to maintain crispness for up to 7 days.
- Prep Time: 20 minutes
- Cook Time: 15 minutes (per batch)
- Category: Desserts, Snacks
- Method: Baking
- Cuisine: Danish
Nutrition
- Serving Size: 25
- Calories: 172
- Sugar: 4 g
- Sodium: 1 mg
- Fat: 10 g
- Saturated Fat: 6 g
- Unsaturated Fat: 4 g
- Trans Fat: 0 g
- Carbohydrates: 18 g
- Fiber: 0.5 g
- Protein: 2 g
- Cholesterol: 33 mg
Jessica Martin
Recipe Developer & Food Writer
Expertise
Recipe Development, Food Styling and Photography, Seasonal and Local Ingredients, Vegetarian and Vegan Cuisine, Culinary Education
Education
Portland Community College
Oregon Culinary Institute
Jessica Martin is a talented food writer and recipe creator who specializes in seasonal cooking and approachable home baking.
Educated at Portland Community College with additional pastry training from Oregon Culinary Institute, Jessica’s culinary journey spans nearly a decade of creating and sharing flavorful recipes.
Her deep appreciation for local ingredients shapes each of her recipes, making them both accessible and inspiring. At Beard and Bonnet, Jessica uses her cheerful, down-to-earth writing to help readers effortlessly bring new tastes and creative dishes into their daily routines.