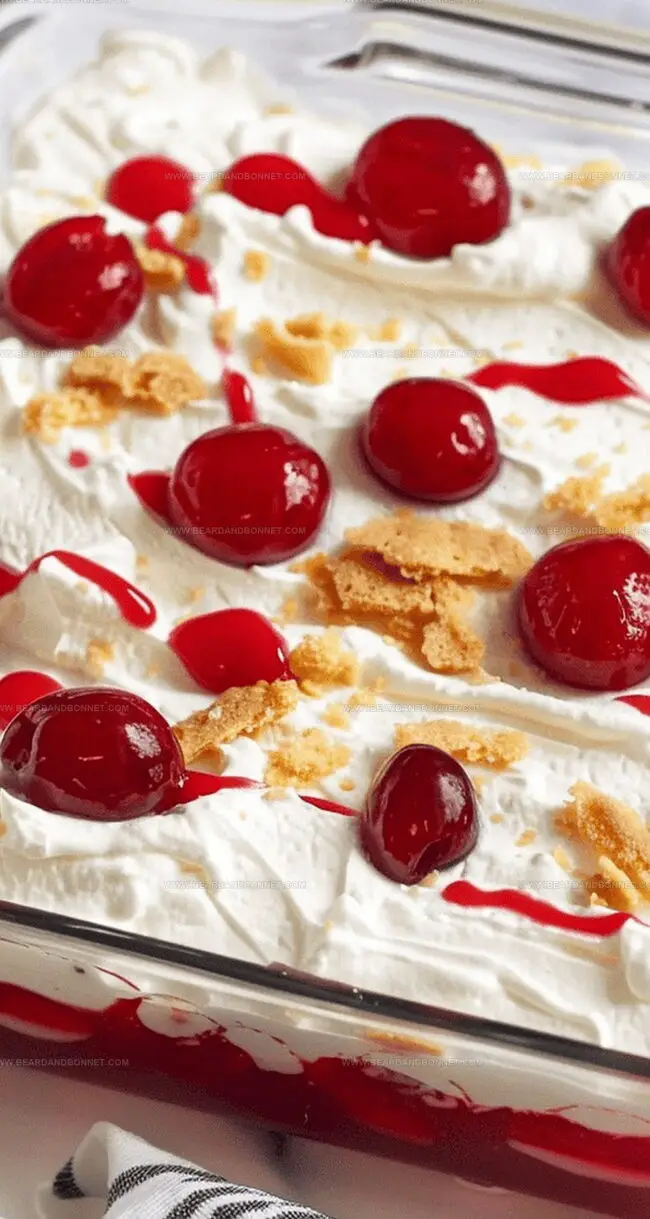
Remaining Cherry Pie Filling: Enhances visual appeal and intensifies cherry flavor, spoon carefully for elegant presentation.
Cake Tools That Make Cherry Baking Easier
9×13-inch baking dish: Perfect for layering and assembling the entire dessert.
Medium mixing bowl: Essential for combining pudding, milk, and sour cream smoothly.
Mixing spoon or spatula: Needed for stirring ingredients and spreading layers evenly.
Measuring cups: Help accurately measure milk and other liquid ingredients.
Knife: Useful for cutting angel food cake into cubes and slicing the final dessert.
Mixing and Baking Cherry Cake the Easy Way
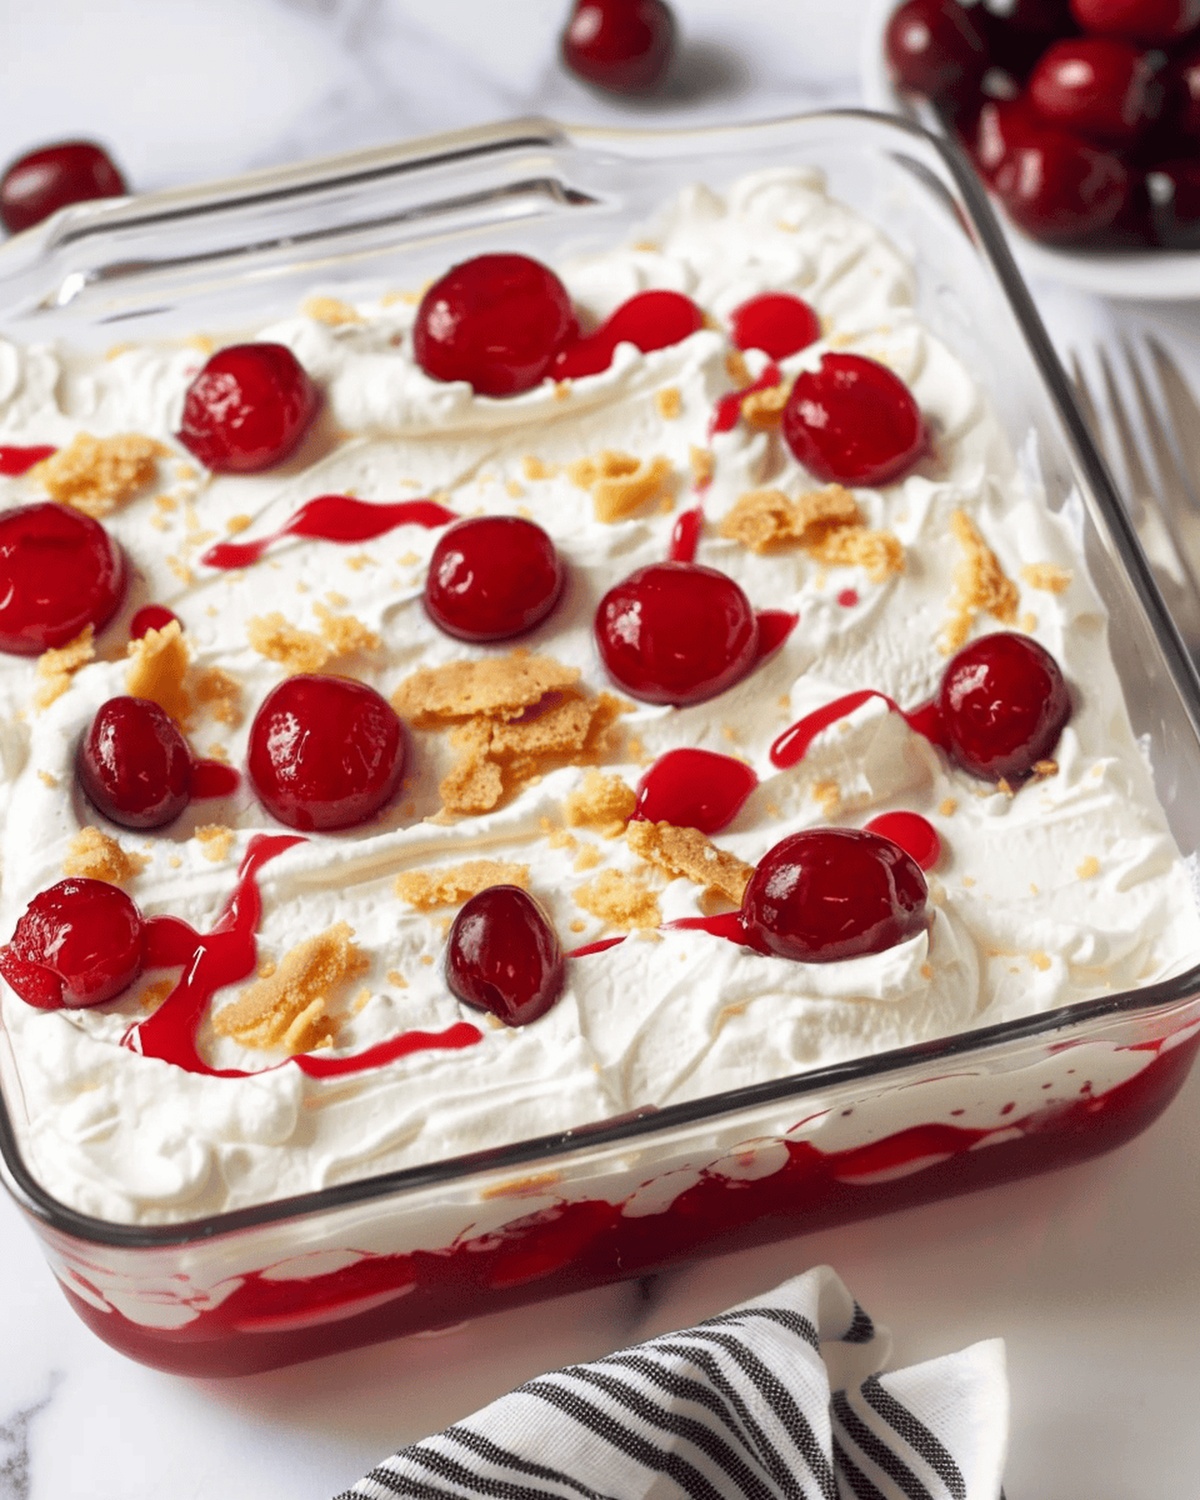
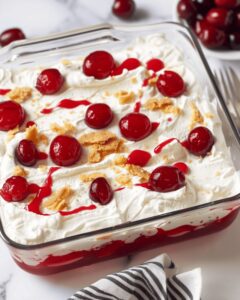
Cherry Bliss Symphony
Cake Foundation Gently nestle soft angel food cake cubes across the bottom of a spacious baking dish, creating a pillowy base that will cradle the luscious layers to come.
Cherry Cascade Lovingly drape two-thirds of the vibrant cherry pie filling over the cake, allowing the ruby-red sauce to cascade and embrace each crumb.
Second Cake Layer Delicately arrange the remaining cake pieces, transforming the dessert into a tantalizing landscape of texture and flavor.
Creamy Fusion Whisk together the pudding mix, silky milk, and tangy sour cream until a velvety smooth mixture emerges, ready to blanket the cake with its luxurious essence.
Whipped Cloud Crown Gently spread the thawed, billowy cool whip across the surface, creating a cloud-like canopy that promises pure indulgence.
Final Cherry Kiss Dot the top with remaining cherry filling, adding a playful and colorful finale to this dessert masterpiece.
Flavor Harmony Tuck the creation into the refrigerator, allowing the layers to mingle and harmonize for 4-5 hours before unveiling this spectacular sweet sensation.
Flavor Ideas to Sweeten the Cherry Note
Perfect Pudding Placement: Gently smooth the pudding layer with the back of a spoon to create an even surface without disturbing the cake cubes underneath.
Chilling Secrets: For best results, let the dessert rest in the refrigerator overnight, allowing flavors to develop and layers to set completely for a more intense taste experience.
Fruity Flavor Boost: Experiment with different pie fillings like blueberry or strawberry to create unique variations that match your mood or seasonal preferences.
Make-Ahead Magic: This dessert can be prepared up to two days in advance, making it an ideal option for stress-free entertaining or potluck gatherings. Cover tightly with plastic wrap to maintain freshness.
Texture Twist: For added crunch, sprinkle crushed graham crackers or toasted almond slivers between layers or on top of the cool whip for an extra delightful texture contrast.
How to Present Cherry Cake Elegantly
Party Perfect Presentation: Slice this cherry delight cake into elegant rectangular pieces for a stunning dessert table centerpiece.
Elegant Dessert Companion: Pair each slice with a small scoop of vanilla bean ice cream to enhance the creamy texture and add a cool contrast.
Beverage Pairing Bliss: Serve alongside a steaming cup of dark roast coffee or a chilled glass of champagne to complement the sweet cherry flavors.
Festive Topping Option: Sprinkle some toasted almond slivers or chocolate shavings on top for an extra layer of crunch and visual appeal.
Tips for Storing Cherry Cake
Tasty Storage Solutions: Keeping Your Cherry Delight Fresh
Chilled Sanctuary: Store the cake in an airtight container in the refrigerator for up to 3-4 days, maintaining its creamy texture and vibrant flavor.
Freezing Magic: Wrap individual slices in plastic wrap, then place in a freezer-safe container. Frozen dessert stays delicious for 2 weeks, perfect for sudden sweet cravings.
Smart Serving Strategy: Cut servings right before enjoying to prevent liquid separation and keep each slice looking picture-perfect.
Temperature Wisdom: Always keep the cake cold, allowing ingredients to stay firm and prevent potential dairy spoilage.
Grandma’s cherry delight cake balances sweet cherries with delicate layers of moist vanilla sponge. Homemade comfort shines through rich frosting and bright fruit, inviting warmth and nostalgia with each delectable slice.
Ingredients
Scale
1 (14 oz / 396 g) angel food cake, cut into 1-inch cubes
1 (3.5 oz / 99 g) instant vanilla pudding box
1 ½ cups milk
1 cup sour cream
1 (8 oz / 226 g) cool whip, thawed
1 (21 oz / 595 g) cherry pie filling can
Instructions
Cake Foundation: Crumble half of the angel food cake into a 9×13-inch dish, ensuring complete coverage of the bottom surface with an even layer of soft cake pieces.
Cherry Layer: Distribute two-thirds of the cherry pie filling across the cake cubes, spreading thoroughly to reach all corners of the dish with vibrant fruity goodness.
Secondary Cake Layer: Position the remaining cake pieces over the cherry filling, creating a complete covering that blends seamlessly with the previous fruity foundation.
Pudding Preparation: Blend pudding mix, milk, and sour cream in a mixing bowl until achieving a silky-smooth texture free of any persistent lumps or inconsistencies.
Pudding Application: Pour the creamy mixture over the cake layers, using a spatula to generate a uniform, glossy surface that completely envelops all cake fragments.
Topping Technique: Spread the thawed cool whip across the pudding layer, generating a cloud-like topping that conceals the intricate layers beneath.
Final Flourish: Drizzle the remaining cherry pie filling over the cool whip, creating an artistic pattern that introduces a vibrant splash of color and additional fruity intensity.
Chilling Phase: Refrigerate the dessert for 4 to 5 hours, allowing the layers to harmonize and develop a refreshing, cohesive flavor profile.
Notes
Cake Base Technique: Crumble angel food cake evenly to create a uniform, soft foundation that absorbs flavors and provides delicate texture.
Filling Distribution Strategy: Spread cherry pie filling carefully to ensure every bite contains balanced fruity sweetness and prevents dry spots.
Pudding Mixing Tip: Whisk pudding ingredients thoroughly to eliminate lumps, guaranteeing a silky smooth consistency that blends seamlessly with cake layers.
Chilling Importance: Refrigerate dessert for recommended time to allow layers to set, flavors to develop, and create a perfectly cohesive, refreshing treat.
Recipe Development, Food Styling and Photography, Seasonal and Local Ingredients, Vegetarian and Vegan Cuisine, Culinary Education
Education
Portland Community College
Degree: Associate of Applied Science in Culinary Arts
Focus: Comprehensive training in culinary techniques, kitchen management, and food safety. Gained hands-on experience in preparing diverse cuisines and understanding flavor profiles
Oregon Culinary Institute
Program: Baking and Pastry Certificate
Focus: Specialized education in baking fundamentals, pastry arts, and dessert presentation. Emphasized creativity and precision in crafting baked goods.
Jessica Martin is a talented food writer and recipe creator who specializes in seasonal cooking and approachable home baking.
Educated at Portland Community College with additional pastry training from Oregon Culinary Institute, Jessica’s culinary journey spans nearly a decade of creating and sharing flavorful recipes.
Her deep appreciation for local ingredients shapes each of her recipes, making them both accessible and inspiring. At Beard and Bonnet, Jessica uses her cheerful, down-to-earth writing to help readers effortlessly bring new tastes and creative dishes into their daily routines.

Jessica Martin
Recipe Developer & Food Writer
Expertise
Recipe Development, Food Styling and Photography, Seasonal and Local Ingredients, Vegetarian and Vegan Cuisine, Culinary Education
Education
Portland Community College
Oregon Culinary Institute
Jessica Martin is a talented food writer and recipe creator who specializes in seasonal cooking and approachable home baking.
Educated at Portland Community College with additional pastry training from Oregon Culinary Institute, Jessica’s culinary journey spans nearly a decade of creating and sharing flavorful recipes.
Her deep appreciation for local ingredients shapes each of her recipes, making them both accessible and inspiring. At Beard and Bonnet, Jessica uses her cheerful, down-to-earth writing to help readers effortlessly bring new tastes and creative dishes into their daily routines.