Festive Rice Krispie Holiday Treats Recipe: Snap, Crackle, Joy
Sticky, gooey, and irresistibly sweet, these rice Krispie holiday treats sparkle with festive cheer.
Melted marshmallows bind crisp cereal into delightful squares that shimmer with seasonal magic.
Colorful sprinkles dance across the surface, turning simple ingredients into a spectacular dessert.
Kids and adults alike will swoon over these nostalgic squares bursting with childhood memories.
Soft, chewy, and packed with sugary delight, these treats come together in minutes with just a few pantry staples.
The secret lies in perfectly melted marshmallows and gentle mixing that ensures each bite is a perfect balance of crunch and sweetness.
Deck your holiday table with these crowd-pleasing squares that promise to vanish faster than snowflakes in sunlight.
Quick Recipe Overview
Ingredients to Use for Rice Krispie Holiday Treats
For Base and Binding:For Crunchy Element:For Decorative Touches:Tools to Prep Rice Krispie Holiday Treats
Instructions for Making Rice Krispie Holiday Treats
Gently warm milk chocolate and butter in a saucepan, creating a silky smooth base. Blend mini marshmallows into the warm mixture until everything melts together into a luxurious cream.
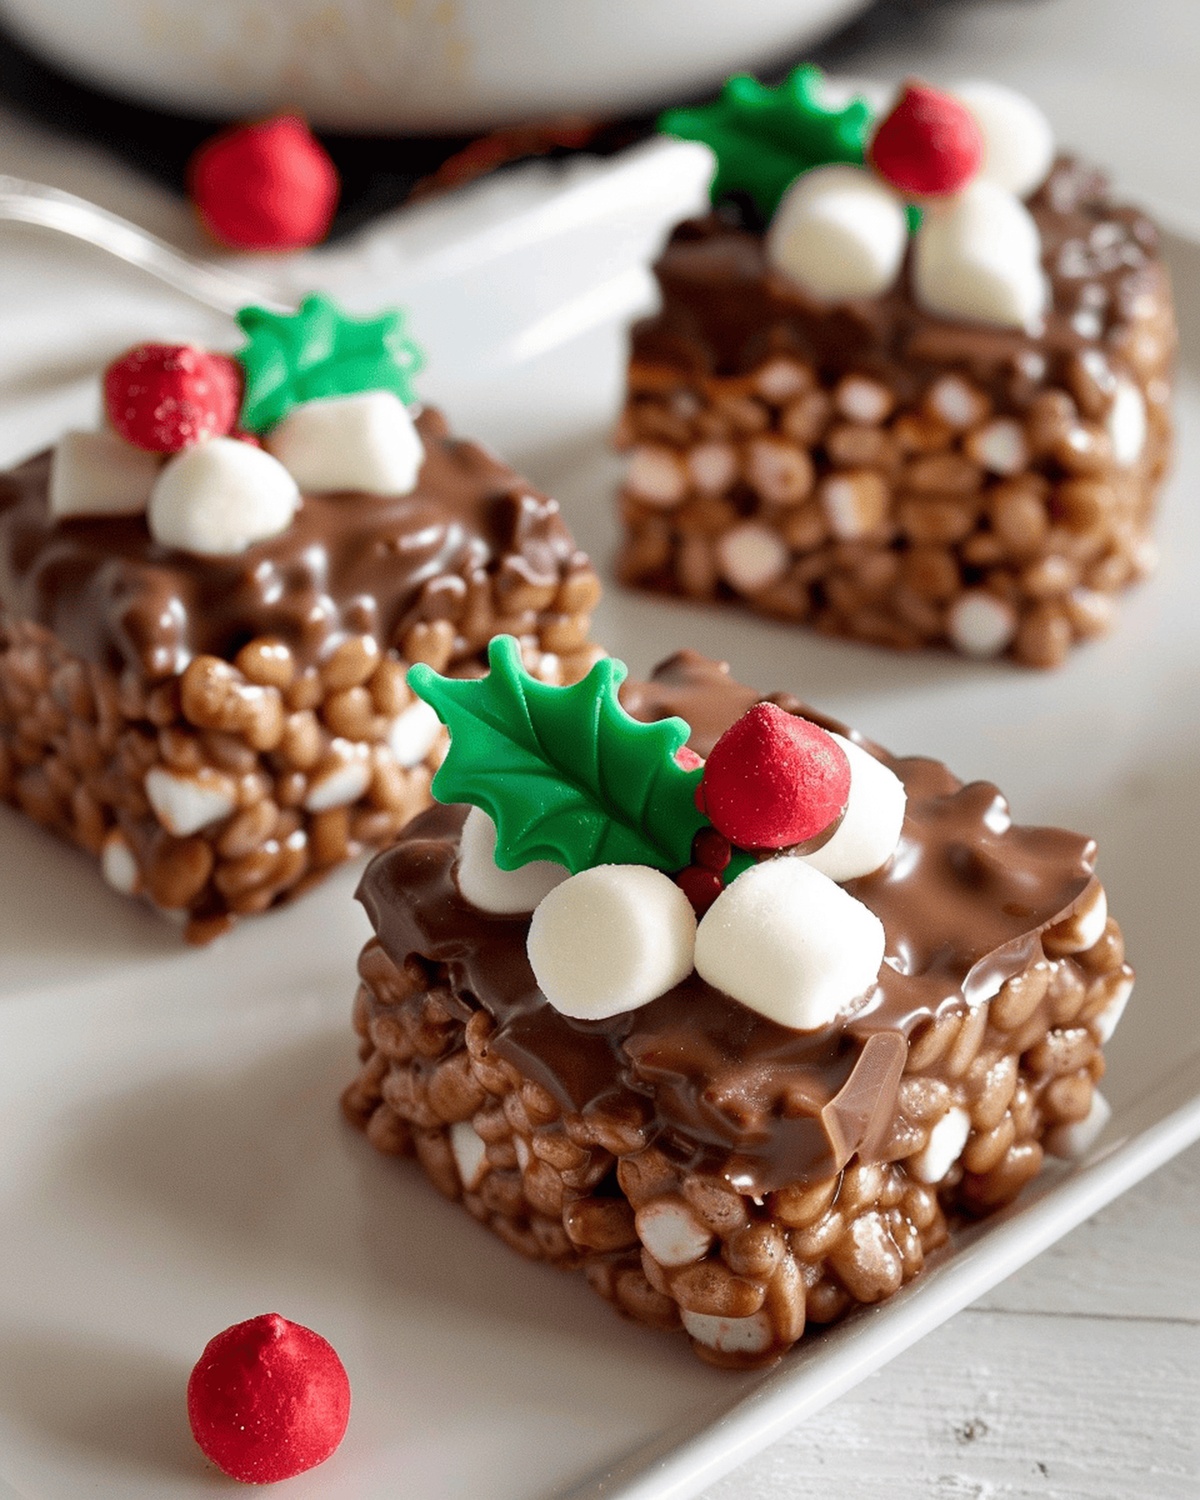
Pour the glossy chocolate marshmallow mixture over crispy rice cereal. Fold gently, ensuring every single piece gets a delicious chocolatey embrace.
Using damp hands, roll the mixture into perfect round bites. Place each delicate sphere onto a parchment-lined tray, letting them rest in the cool refrigerator.
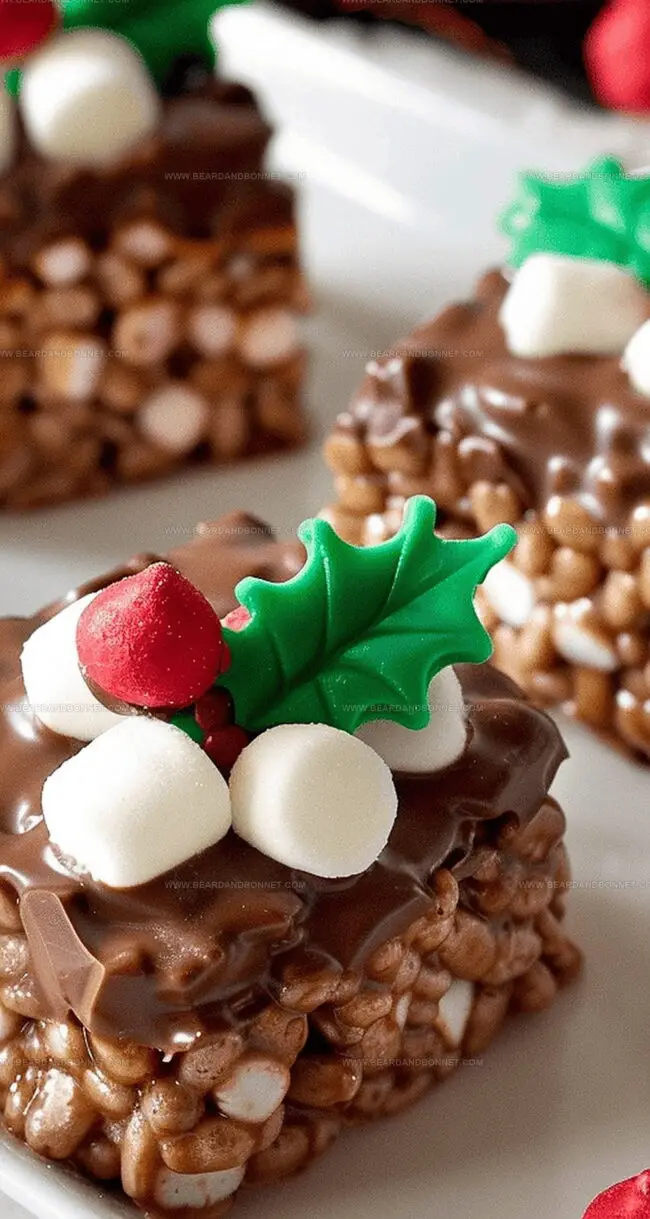
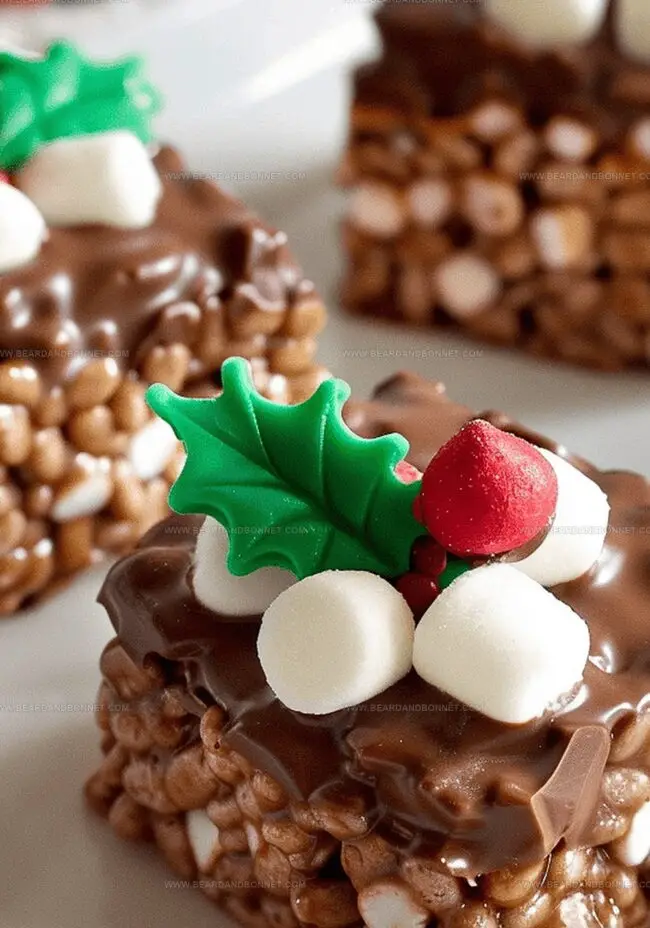
Melt white chocolate into a glossy river. Drizzle elegantly over chilled treats, creating swirling patterns. Top with handcrafted sugarpaste holly leaves and berries, pressing them softly to create a magical holiday touch.
Let treats sit at room temperature for a few minutes before serving. Watch as friends and family marvel at these delightful holiday morsels.
Tips and Options for Rice Krispie Holiday Treats
Serving Ideas for Rice Krispie Holiday Treats
Storage Solutions for Rice Krispie Holiday Treats
Print
Festive Rice Krispie Holiday Treats Recipe
- Total Time: 35 minutes
- Yield: 13 1x
Description
Festive holiday rice krispie treats bring joy to seasonal celebrations with marshmallow-coated crispiness. Colorful sprinkles and cheerful decorations make these simple desserts perfect when you want to share happiness at gatherings.
Ingredients
- 180 g (6.3 oz) mini marshmallows
- 100 g (3.5 oz) Rice Krispies or Coco Pops
- 50 g (1.8 oz) unsalted butter
- 200 g (7 oz) milk chocolate
- 50 g (1.8 oz) white chocolate
- white sugarpaste or pre-coloured sugarpaste
- green food colour gel
- red food colour gel
Instructions
- Chocolate Fusion: Melt milk chocolate and butter in a saucepan or microwave-safe bowl using low heat, stirring continuously to prevent scorching.
- Marshmallow Integration: Blend mini marshmallows into the molten chocolate mixture, stirring until achieving a completely smooth and homogeneous texture.
- Cereal Coating: Transfer the chocolate-marshmallow blend into a large mixing bowl with Rice Krispies, folding meticulously to ensure comprehensive and even coverage of each cereal piece.
- Forming Treats: Slightly cool the mixture for easier manipulation. Dampen hands with water to prevent sticking, then shape compact spherical treats using a tablespoon and place on a parchment-lined tray.
- Chilling Phase: Refrigerate the formed treats for 30 minutes to solidify their structure and enhance stability.
- Decorative Preparation: Melt white chocolate using a double boiler or microwave, ensuring a silky smooth consistency for drizzling.
- Festive Embellishment: Craft holly leaves and berries from red and green sugarpaste, carefully molding intricate decorative elements.
- Final Decoration: Remove chilled treats from refrigerator, drizzle with white chocolate using a piping bag, and delicately attach sugarpaste holly accents for a whimsical holiday presentation.
Notes
- Control Chocolate Melting: Use low, steady heat to prevent chocolate from burning or seizing, stirring constantly for smooth consistency.
- Manage Sticky Hands: Moisten hands with cool water before shaping treats to minimize marshmallow adhesion and create clean, uniform balls.
- Optimize Cooling Time: Refrigerate treats for 30 minutes to ensure proper setting and easier handling during decoration.
- Master Decoration Technique: Use a piping bag or makeshift freezer bag with trimmed corner for precise white chocolate drizzling and clean sugarpaste placement.
- Prep Time: 25 minutes
- Cook Time: 10 minutes
- Category: Desserts, Snacks
- Method: Mixing
- Cuisine: American
Nutrition
- Serving Size: 13
- Calories: 210
- Sugar: 24 g
- Sodium: 50 mg
- Fat: 10 g
- Saturated Fat: 6 g
- Unsaturated Fat: 4 g
- Trans Fat: 0 g
- Carbohydrates: 31 g
- Fiber: 0 g
- Protein: 1 g
- Cholesterol: 30 mg
Jessica Martin
Recipe Developer & Food Writer
Expertise
Recipe Development, Food Styling and Photography, Seasonal and Local Ingredients, Vegetarian and Vegan Cuisine, Culinary Education
Education
Portland Community College
Oregon Culinary Institute
Jessica Martin is a talented food writer and recipe creator who specializes in seasonal cooking and approachable home baking.
Educated at Portland Community College with additional pastry training from Oregon Culinary Institute, Jessica’s culinary journey spans nearly a decade of creating and sharing flavorful recipes.
Her deep appreciation for local ingredients shapes each of her recipes, making them both accessible and inspiring. At Beard and Bonnet, Jessica uses her cheerful, down-to-earth writing to help readers effortlessly bring new tastes and creative dishes into their daily routines.