
Easy Andes Mint Mini Cheesecakes Recipe: Dreamy Bites
Andes mint mini cheesecakes offer a decadent twist on classic dessert expectations.
Sweet and refreshing combinations can reinvent ordinary baking into something extraordinary.
Chocolate and mint create a sophisticated flavor profile that delights sophisticated palates.
Compact individual servings make these miniature treats perfect for intimate gatherings or personal indulgence.
Creamy textures blend seamlessly with cool mint undertones, promising a luxurious culinary experience.
Rich cream cheese provides a smooth foundation for the delicate mint infusion.
Sophisticated yet approachable, these miniature desserts elevate simple ingredients into a memorable confection.
Andes Mint Mini Cheesecakes That Cool and Delight
What You Need for Andes Mint Mini Cheesecakes
Crust Ingredients:Cheesecake Filling Ingredients:Topping Ingredients:How to Bake Mint Chocolate Mini Cheesecakes
Step 1: Prepare the Oven
Warm up your oven to a cozy 325°F (163°C). Grab a mini cheesecake pan and give it a quick spray of nonstick baking spray to ensure easy removal later.
Step 2: Create the Chocolate Crust
Gather your ingredients:Mix these ingredients in a bowl until well combined. Gently press the mixture into each cavity of the mini cheesecake pan, creating a solid base that will make your taste buds dance.
Step 3: Whip Up the Cheesecake Filling
Using a stand mixer, blend your cream cheese until silky smooth. Add in:Mix on low speed just until everything comes together, creating a dreamy green mixture that screams mint chocolate heaven.
Step 4: Fill and Bake
Carefully spoon the creamy filling over the chocolate crust in each pan cavity. Slide the pan into the preheated oven and bake for 20 magical minutes.
Step 5: Cool with Care
Once baking is complete, turn off the oven and crack the door open with a wooden spoon. Let the cheesecakes cool gently for 5-10 minutes. This helps prevent cracking and ensures a smooth, creamy texture.
Step 6: Chill and Set
Transfer the pan to the refrigerator and let the cheesecakes chill for several hours or overnight. Patience is key to achieving the perfect texture.
Step 7: Add the Finishing Touch
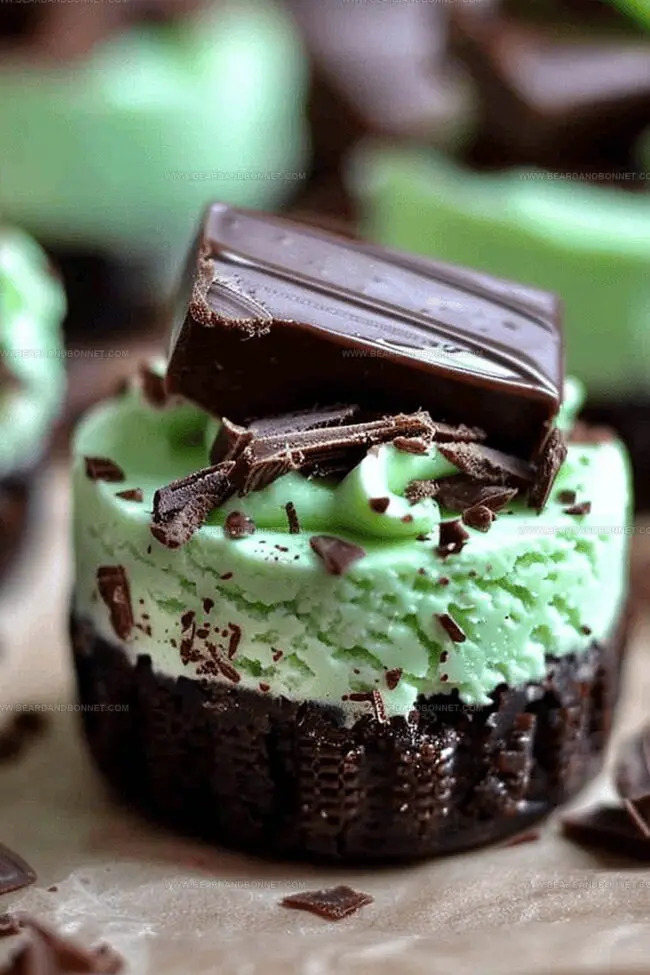
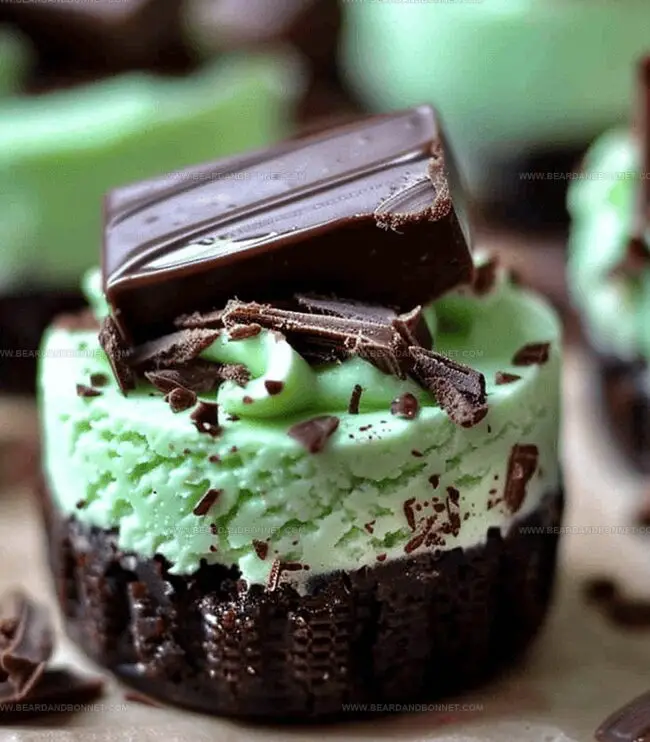
Melt chocolate chips in the microwave following package instructions. Once melted, drizzle a spoonful of chocolate over each mini cheesecake. Sprinkle chopped Andes mints on top for that extra burst of minty chocolate goodness.
Tips for Mint Flavor and Silky Texture
Chill and Store Mini Cheesecakes the Right Way
Best Pairings for Andes Mint Treats
Mint-Inspired Variations for Cheesecake Lovers
Print
Andes Mint Mini Cheesecakes Recipe
- Total Time: 35 minutes
- Yield: 12 1x
Description
Andes Mint Mini Cheesecakes bring classic mint chocolate magic to individual dessert perfection. Cool peppermint layers mingle with rich chocolate graham cracker crust, creating an irresistible treat you’ll savor with each delightful bite.
Ingredients
Main Ingredients:
- 2 (8 ounces/226 grams) boxes of cream cheese, softened
- 1 ¼ cups (200 grams) of chocolate chips
- 15 Andes mints, coarsely chopped
Crust Ingredients:
- 1 ¼ cups (150 grams) of chocolate graham cracker crumbs
- 4 tablespoons (57 grams) of butter, melted
- 2 tablespoons (25 grams) of sugar
Flavoring and Coloring Ingredients:
- 1 egg
- ¼ cup plus 2 tablespoons (75 grams) of sugar
- 1 teaspoon of mint extract
- 4 drops of green food coloring
- Nonstick baking spray
Instructions
- Prepare a mini cheesecake pan by coating it thoroughly with nonstick spray to prevent sticking during baking.
- Crush chocolate graham crackers and combine with sugar and melted butter to create a rich, compact crust foundation.
- Press the crumb mixture firmly into each pan cavity, ensuring an even and dense base for the cheesecakes.
- In a stand mixer, whip cream cheese until silky and smooth, gradually incorporating sugar for a consistent texture.
- Gently fold in the egg, carefully blending until just integrated to maintain a delicate cheesecake structure.
- Add mint extract and green food coloring, stirring minimally to create a uniform pastel green hue without overmixing.
- Carefully distribute the mint-infused cream cheese mixture over the chocolate graham cracker bases, filling each cavity evenly.
- Position the pan in a preheated oven at 325°F and bake for approximately 20 minutes, watching for subtle setting of the filling.
- After baking, turn off the oven and create a slight opening to allow gradual cooling, preventing potential cracking.
- Transfer the pan to the refrigerator and chill thoroughly for several hours or overnight to achieve optimal texture.
- Melt chocolate chips using gentle microwave techniques, stirring periodically to ensure smooth consistency.
- Drizzle melted chocolate atop each mini cheesecake and garnish with finely chopped Andes mints for a decorative finish.
Notes
- Chilling is crucial for developing rich, creamy texture and allowing flavors to meld together perfectly.
- Cooling technique prevents cracking and ensures a smooth, professional-looking mini cheesecake surface.
- Gentle handling during the entire process guarantees tender, melt-in-your-mouth dessert bites that impress every time.
- Prep Time: 15 minutes
- Cook Time: 20 minutes
- Category: Desserts
- Method: Baking
- Cuisine: American
Nutrition
- Serving Size: 12
- Calories: 250
- Sugar: 18 g
- Sodium: 200 mg
- Fat: 15 g
- Saturated Fat: 8 g
- Unsaturated Fat: 7 g
- Trans Fat: 0 g
- Carbohydrates: 28 g
- Fiber: 1 g
- Protein: 3 g
- Cholesterol: 40 mg
Alex Reed
Founder & Lead Content Writer
Expertise
Recipe Development and Testing, Culinary Education, Food Writing and Blogging, Sustainable Cooking Practices, Global Cuisine Exploration
Education
Johnson & Wales University
Le Cordon Bleu Paris
Alex Reed is an inventive chef and food creator with a passion for dishes that balance taste, health, and sustainability.
Trained at Portland Community College and holding an Advanced Pastry Arts certificate from Oregon Culinary Institute, Alex brings more than 10 years of practical culinary experience to every recipe he develops.
His background uniquely blends traditional cooking skills with modern, mindful eating principles. As the founder of Beard and Bonnet, Alex creates recipes that encourage readers to cook confidently.