Super Easy Kid-Friendly No-Bake Clusters Recipe for Little Chefs
Sweet treats don’t get easier than these delightful no-bake clusters that kids absolutely adore.
Packed with chocolatey goodness and simple ingredients, these clusters bring joy to every snack time.
Children love helping mix the ingredients and shape these fun little morsels.
No oven required means less hassle and more snacking fun for busy parents.
Each bite delivers a perfect blend of crunch and sweetness that will make young hearts happy.
You can whip up these clusters in minutes with minimal effort.
Dive into this simple recipe that promises smiles and satisfied taste buds.
Quick Recipe Overview
Kid-Friendly No-Bake Clusters Ingredient List
For Sweet Base:For Crunchy Texture:For Soft Sweetness:Tools Required For Kid-Friendly No-Bake Clusters
Steps To Make Kid-Friendly No-Bake Clusters
Get ready to create something delicious! Grab a microwave-safe bowl and start transforming chocolate chips into a smooth, dreamy river of chocolate. Gently warm the chocolate, stirring between each short burst to prevent burning.
Dump all your fun ingredients into a big bowl. Watch as the melted chocolate hugs every single piece, turning ordinary ingredients into something spectacular. Stir everything together with love and excitement.
Cover a baking sheet with parchment paper. Use a spoon to drop little mounds of your chocolate mixture, creating adorable clusters that look like yummy chocolate mountains. Make them any size you want!
Pop the baking sheet into the refrigerator. Let the magic happen as your clusters transform from gooey to perfectly firm. This is when patience becomes your secret ingredient.
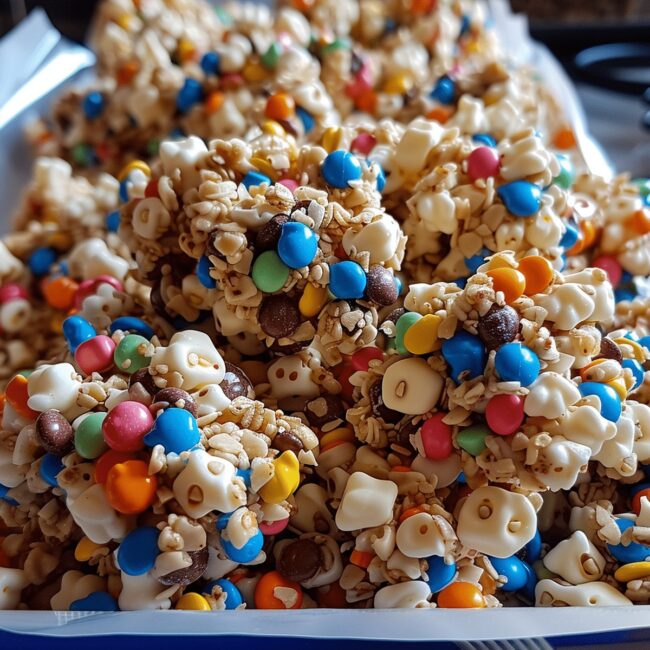
Pull out your amazing clusters and get ready to enjoy! These treats are perfect for sharing with friends or keeping all to yourself. Store them in a container where they’ll stay fresh and delightful.
Tricks And Ideas For Kid-Friendly No-Bake Clusters
Fun Ways To Serve Kid-Friendly No-Bake Clusters
How To Keep Kid-Friendly No-Bake Clusters Fresh
Keep these delightful clusters in an airtight container at room temperature for up to 5 days, ensuring maximum freshness and crunch.
Print
Tasty Kid-Friendly No-Bake Clusters Recipe
- Total Time: 40 minutes
- Yield: 11 1x
Description
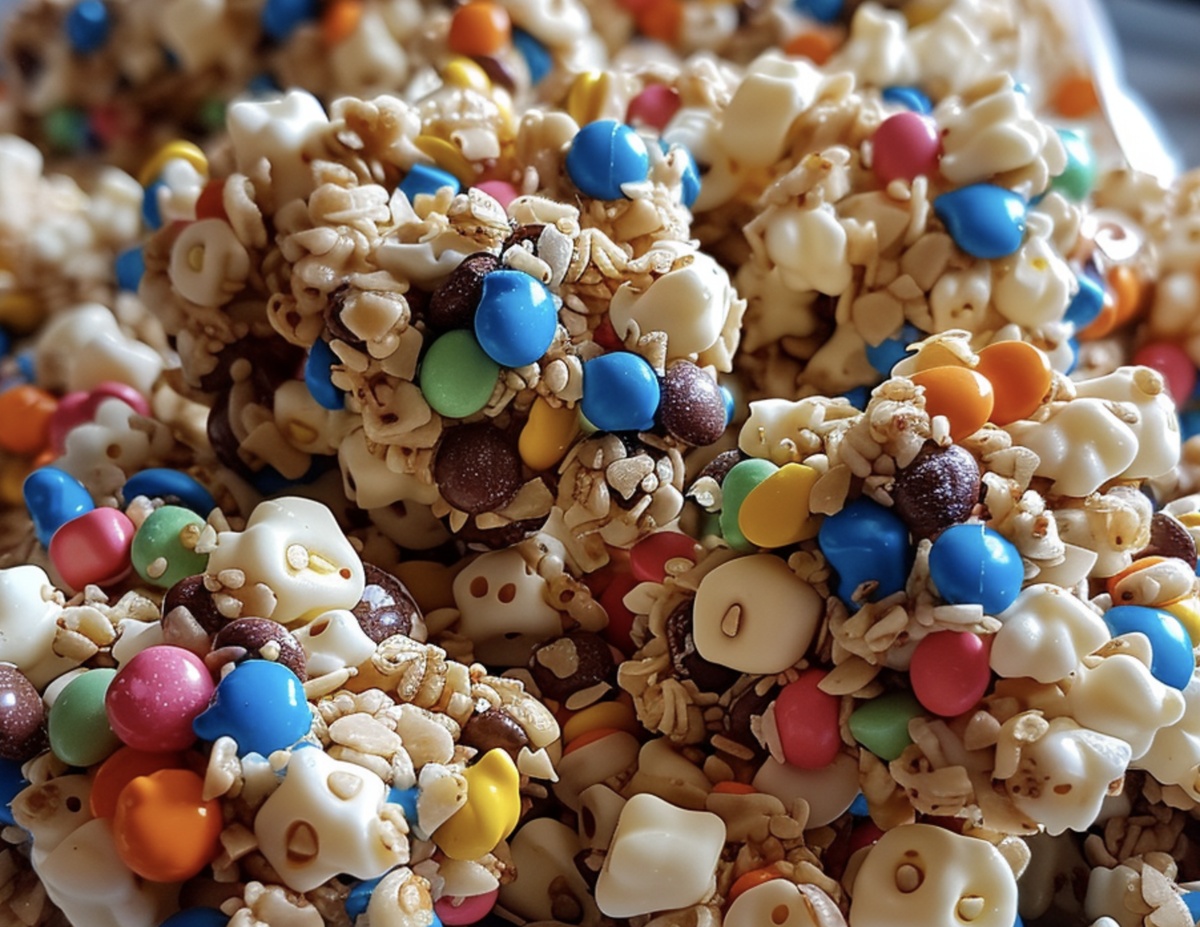
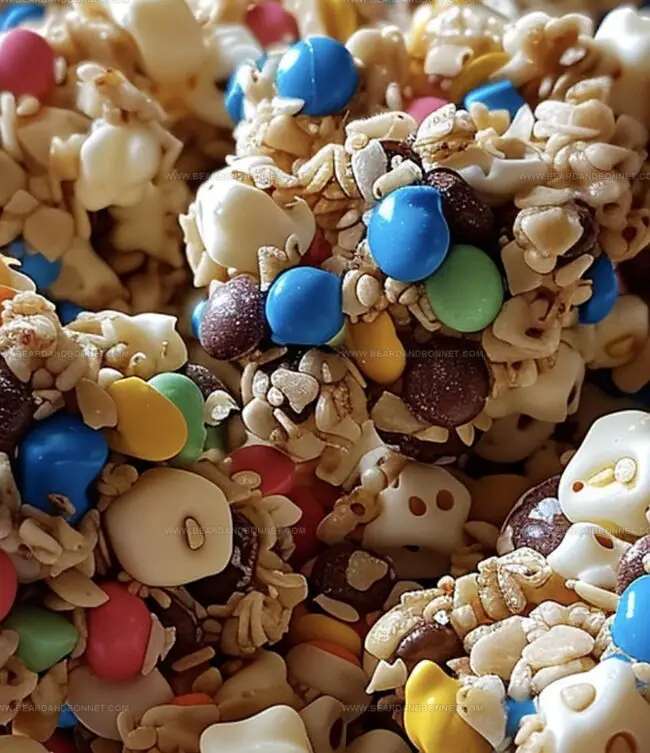
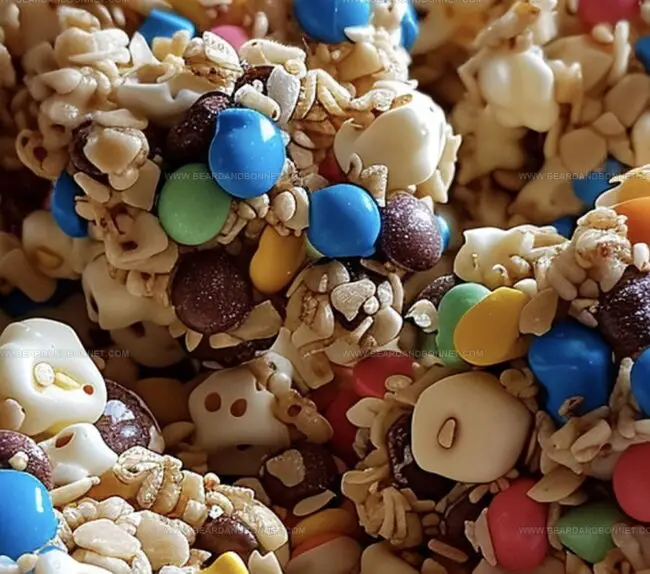
Chocolate peanut butter no-bake clusters combine classic childhood flavors in a simple sweet treat. Kids and adults will adore these quick, easy snacks that require minimal kitchen skills and deliver maximum deliciousness.
Ingredients
- 2 cups (473 ml) semi-sweet or milk chocolate chips
- ½ cup (120 ml) creamy peanut butter (optional for nut-free, can substitute with sunflower butter)
- 1 cup (237 ml) mini marshmallows
- 2 cups (473 ml) crispy rice or cornflake cereal
- ½ cup (120 ml) chopped pretzels or nuts (optional)
Instructions
- Preparation: Line a baking sheet with parchment paper to ensure easy chocolate cluster removal and minimal mess.
- Chocolate Fusion: Melt chocolate chips in the microwave, stirring at 30-second intervals until achieving a silky, uniform texture. Incorporate peanut butter, whisking until completely integrated.
- Ingredient Harmony: In a large mixing bowl, combine cereal, marshmallows, and pretzels, creating a diverse textural base. Gently fold the chocolate-peanut butter mixture into the dry ingredients, ensuring thorough and even coating.
- Cluster Formation: Utilize a cookie scoop to create consistent, rounded mounds on the prepared parchment-lined sheet, allowing each cluster to showcase its unique shape and character.
- Cooling and Setting: Refrigerate the clusters for 20-30 minutes, permitting them to solidify and develop a glossy, firm exterior that promises a delightful sensory experience.
- Storage and Serving: Transfer clusters to an airtight container. For a softer texture, keep at room temperature; for a crisp bite, store in the refrigerator. Enjoy these delectable treats as a quick, kid-friendly snack that balances sweet, salty, and crunchy elements.
Notes
- Prevent Clumping: Stir chocolate chips constantly while melting to avoid burning and ensure smooth, glossy texture without lumps.
- Balance Texture: Mix dry ingredients gently to maintain cereal’s crunchiness and distribute marshmallows evenly for perfect bite consistency.
- Temperature Control: Refrigerate clusters exactly 20-30 minutes – not longer – to achieve ideal firm yet creamy chocolate setting.
- Dietary Adaptation: Swap regular chocolate for dairy-free chips, use gluten-free cereal, and replace peanut butter with sunflower seed butter for allergy-friendly version.
- Prep Time: 10 minutes
- Cook Time: 30 minutes
- Category: Snacks, Desserts
- Method: Mixing
- Cuisine: American
Nutrition
- Serving Size: 11
- Calories: 200
- Sugar: 12 g
- Sodium: 70 mg
- Fat: 10 g
- Saturated Fat: 4 g
- Unsaturated Fat: 6 g
- Trans Fat: 0 g
- Carbohydrates: 26 g
- Fiber: 1 g
- Protein: 3 g
- Cholesterol: 0 mg
Jessica Martin
Recipe Developer & Food Writer
Expertise
Recipe Development, Food Styling and Photography, Seasonal and Local Ingredients, Vegetarian and Vegan Cuisine, Culinary Education
Education
Portland Community College
Oregon Culinary Institute
Jessica Martin is a talented food writer and recipe creator who specializes in seasonal cooking and approachable home baking.
Educated at Portland Community College with additional pastry training from Oregon Culinary Institute, Jessica’s culinary journey spans nearly a decade of creating and sharing flavorful recipes.
Her deep appreciation for local ingredients shapes each of her recipes, making them both accessible and inspiring. At Beard and Bonnet, Jessica uses her cheerful, down-to-earth writing to help readers effortlessly bring new tastes and creative dishes into their daily routines.