Dreamy Homemade Peanut Butter Pie Recipe – Silky & Sweet
Creamy, decadent peanut butter pie tantalizes taste buds with its smooth, velvety texture.
Dessert enthusiasts adore this classic treat that blends rich, nutty flavors into a delightful creation.
The peanut butter pie recipe combines simple ingredients to craft an irresistible sweet sensation.
Each forkful promises a luxurious experience that melts in your mouth.
Chocolate and peanut butter create a harmonious dance of flavors that delights every palate.
The no-bake approach means you can whip up this dessert in minutes without breaking a sweat.
Prepare to indulge in a slice of pure, creamy happiness that will have everyone asking for seconds.
Quick Recipe Overview
What’s Inside Peanut Butter Pie
For Crust:For Filling:For Garnish:Kitchen Tools For Peanut Butter Pie
How To Build A Creamy Peanut Butter Pie
Craft a delectable base by crushing chocolate cookies and blending with melted butter. Press the mixture firmly into a pie dish, creating a sturdy foundation that will cradle your creamy filling. Chill the crust while preparing the decadent center.
Whip cream cheese and peanut butter into a silky smooth mixture. Incorporate powdered sugar to enhance the sweetness, creating a luscious blend that promises pure indulgence. The key is achieving a perfectly creamy consistency that will make taste buds dance.
Transform heavy cream into a cloud-like topping by whisking until it forms elegant peaks. Gently fold this airy mixture into the peanut butter base, creating a light and fluffy texture that melts in your mouth.
Pour the dreamy filling into the chilled crust, spreading it evenly with a gentle touch. Smooth the surface to create a perfectly inviting pie that looks as amazing as it tastes.
Refrigerate the pie for several hours, allowing the flavors to meld and the texture to become perfectly set. Patience is your secret weapon in creating a truly spectacular dessert.
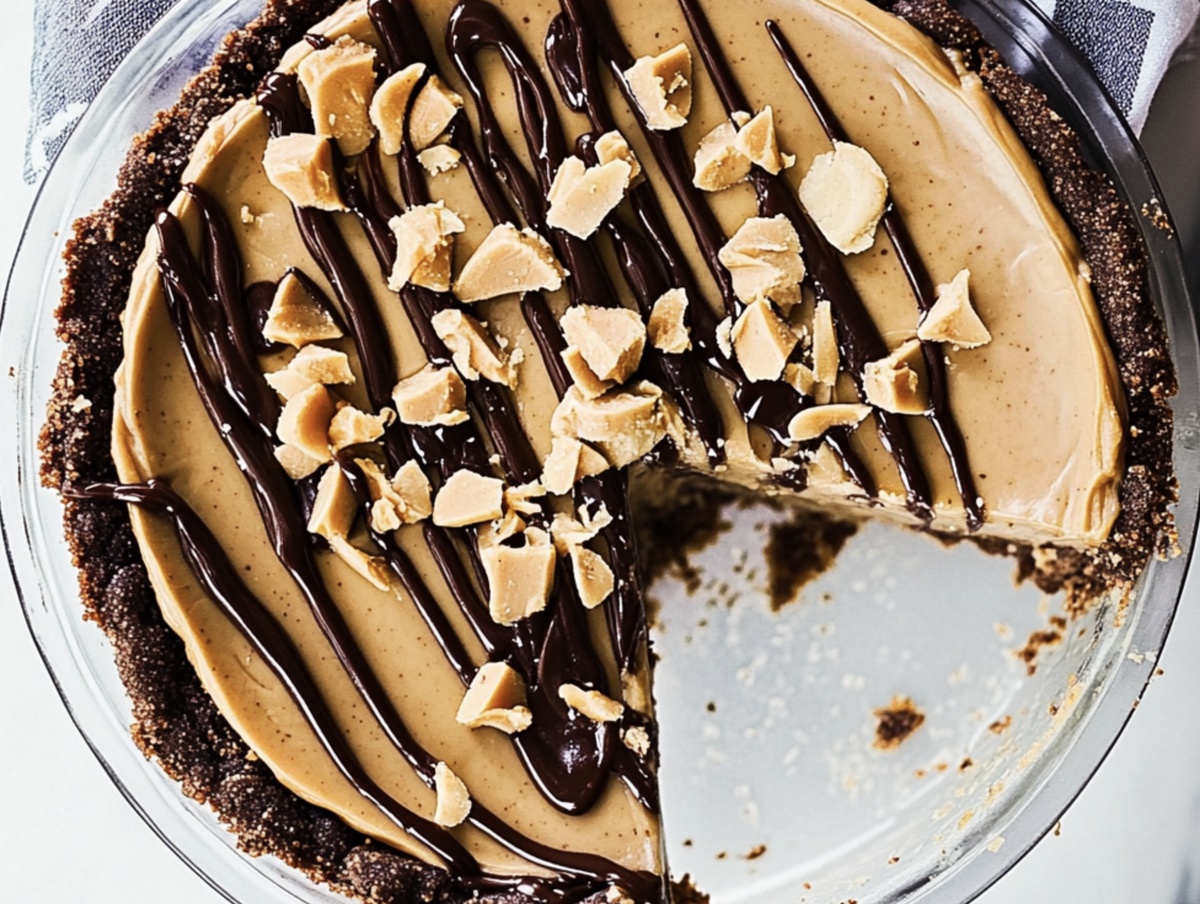
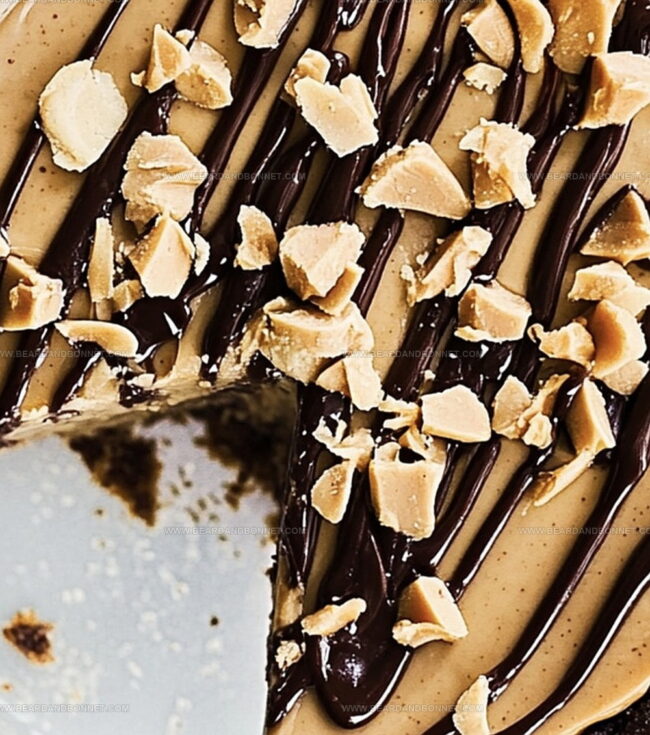
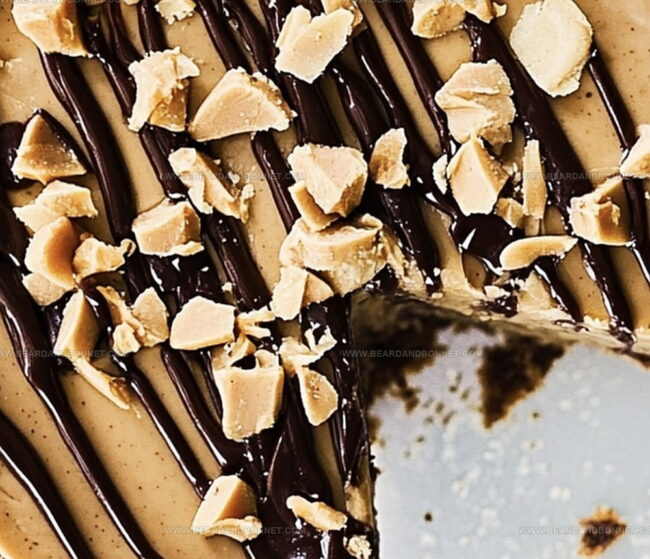
When ready to serve, add a crown of whipped cream and sprinkle with crushed peanuts or chocolate shavings. Slice into this heavenly creation and savor each decadent bite of pure pleasure.
Ideas To Make Peanut Butter Pie Even Richer
Ways To Serve Peanut Butter Pie With Ease
Keeping Peanut Butter Pie Tasty For Days
Print
Silky Peanut Butter Pie Recipe
- Total Time: 3 hours 15 minutes
- Yield: 7 1x
Description
Creamy peanut butter pie delights dessert enthusiasts with its rich, velvety texture. Chocolate graham cracker crust and silky filling create a perfect balance that will satisfy sweet cravings.
Ingredients
- 1 cup creamy peanut butter
- 8 oz (226 g) cream cheese, softened
- 1 cup heavy whipping cream, chilled
- ¾ cups powdered sugar
- 1 ½ cups chocolate cookie crumbs (Oreo crumbs)
- 6 tbsps melted butter
- Whipped cream
- Crushed peanuts or chocolate shavings (optional, for garnish)
Instructions
- Crust Preparation: Pulverize chocolate cookies into fine crumbs, amalgamating with melted butter. Press the mixture uniformly across a 9-inch pie dish, covering bottom and sides meticulously. Chill the crust to solidify while preparing the filling.
- Filling Foundation: Whip cream cheese and peanut butter until achieving a silky, uniform texture. Integrate powdered sugar systematically, eliminating potential lumps and creating a harmonious blend.
- Cream Integration: Whisk heavy cream until forming robust peaks. Gently fold whipped cream into the peanut butter mixture, maintaining its airy volume and ensuring smooth incorporation.
- Assembly and Chilling: Pour the peanut butter filling into the chilled chocolate cookie crust, spreading evenly with a spatula. Refrigerate for a minimum of three hours, preferably overnight, to optimize texture and flavor development.
- Garnishing and Serving: Adorn the pie with a delicate whipped cream layer. Sprinkle crushed peanuts or chocolate shavings across the surface, adding textural complexity and visual appeal before presenting this decadent dessert.
Notes
- Crust Compaction: Press cookie crumbs firmly and evenly to create a stable, compact base that won’t crumble when slicing the pie.
- Smooth Mixing Technique: Blend cream cheese and peanut butter gradually to prevent lumps and achieve a silky, consistent texture that ensures a luxurious mouthfeel.
- Whipping Cream Precision: Whip heavy cream to stiff peaks carefully, folding gently into the mixture to maintain its light, airy structure without deflating the volume.
- Chilling Crucial: Refrigerate the pie for at least 3 hours, preferably overnight, to allow flavors to meld and achieve the perfect set for clean, beautiful slices.
- Prep Time: 15 minutes
- Cook Time: 3 hours
- Category: Desserts
- Method: Mixing
- Cuisine: American
Nutrition
- Serving Size: 7
- Calories: 420
- Sugar: 22 g
- Sodium: 270 mg
- Fat: 34 g
- Saturated Fat: 16 g
- Unsaturated Fat: 18 g
- Trans Fat: 0 g
- Carbohydrates: 30 g
- Fiber: 2 g
- Protein: 8 g
- Cholesterol: 40 mg
Jessica Martin
Recipe Developer & Food Writer
Expertise
Recipe Development, Food Styling and Photography, Seasonal and Local Ingredients, Vegetarian and Vegan Cuisine, Culinary Education
Education
Portland Community College
Oregon Culinary Institute
Jessica Martin is a talented food writer and recipe creator who specializes in seasonal cooking and approachable home baking.
Educated at Portland Community College with additional pastry training from Oregon Culinary Institute, Jessica’s culinary journey spans nearly a decade of creating and sharing flavorful recipes.
Her deep appreciation for local ingredients shapes each of her recipes, making them both accessible and inspiring. At Beard and Bonnet, Jessica uses her cheerful, down-to-earth writing to help readers effortlessly bring new tastes and creative dishes into their daily routines.