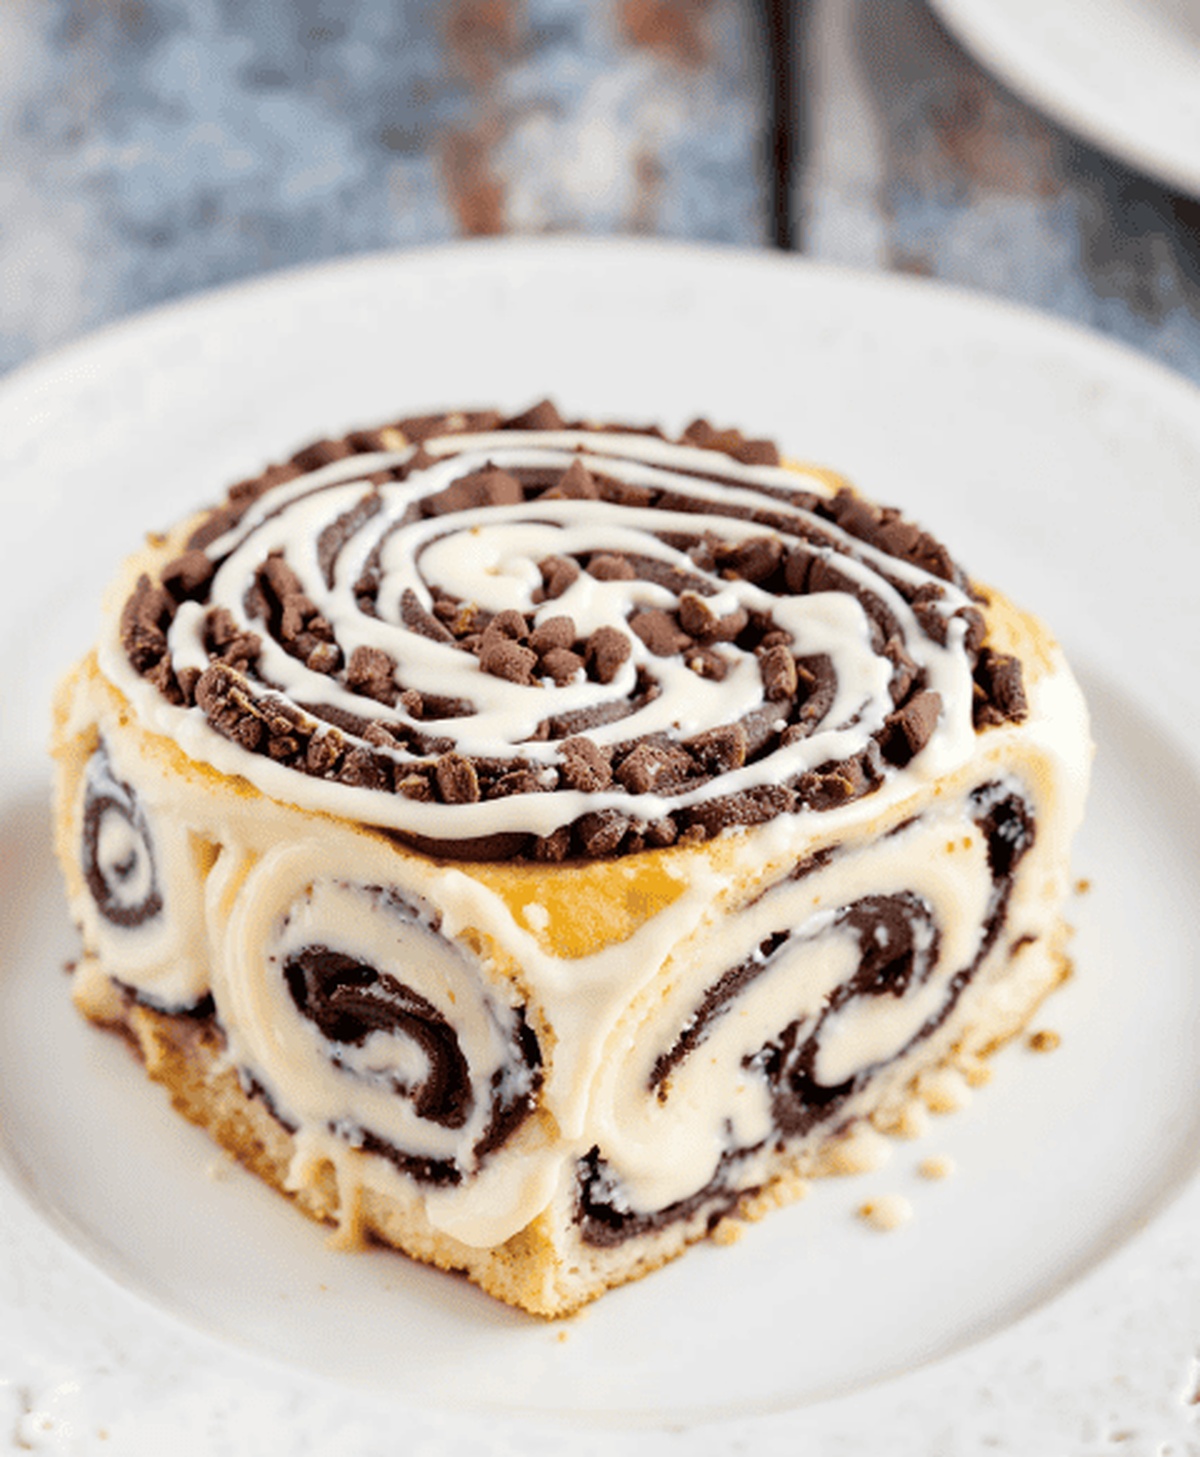
Oreo cinnamon rolls upgrade ordinary breakfast pastries into an epic dessert-meets-morning treat.
Sweet chocolate cookie crumbs dance between soft, swirling dough layers, creating a decadent morning sensation.
Bakery lovers recognize these rolls as more than just another recipe—they’re a culinary adventure waiting to happen.
Each bite promises rich, indulgent flavors that blend classic comfort with playful innovation.
Chocolate cookie chunks nestled within buttery, spiraling dough elevate traditional breakfast fare to something extraordinary.
Warm spices mingle with crumbly cookie pieces, promising a sensory experience that delights both kids and adults.
The unexpected combination challenges conventional baking norms while delivering pure, unapologetic deliciousness.
Wake Up Smiling with Oreo Cinnamon Rolls
Crunch Cookie Surprise: Crushed Oreos mixed directly into the dough and filling create unexpected texture bursts that transform traditional cinnamon rolls into a playful, exciting dessert.
Quick Weekend Treat: Relatively simple preparation method allows home bakers to create a spectacular breakfast or dessert in just over an hour, making it perfect for lazy weekend mornings or spontaneous baking adventures.
Decadent Flavor Fusion: Combining classic cinnamon roll warmth with rich chocolate Oreo elements delivers a multi-layered taste experience that bridges nostalgic comfort food with modern dessert creativity.
Family-Friendly Baking Project: Low complexity steps and fun Oreo incorporation make this recipe an excellent opportunity for cooking together, allowing even children to participate in measuring, mixing, and decorating the rolls.
Ingredient Checklist for Cookies and Spice Morning Rolls
Dough Base:
All-Purpose Flour: Soft and fine flour that provides structure and texture to the cinnamon rolls.
Instant Dry Yeast: Quick-acting leavening agent that helps dough rise smoothly and quickly.
Salt: Enhances flavor and controls yeast growth for better dough development.
Liquid and Binding Ingredients:
Whole Milk: Adds moisture, richness, and helps activate yeast for soft roll texture.
Granulated Sugar: Provides sweetness and helps yeast fermentation.
Unsalted Butter: Adds richness, tenderness, and helps create a soft, smooth dough.
Large Egg: Binds ingredients, adds structure, and provides rich flavor.
Filling and Topping Ingredients:
Light Brown Sugar: Creates deep caramel-like sweetness in the filling.
Black Cocoa: Delivers intense chocolate flavor with dark, rich color.
Ground Cinnamon: Adds warm, spicy flavor to the roll’s filling.
Powdered Sugar: Creates smooth, sweet glaze for topping.
Artificial Vanilla Extract: Adds classic sweet flavor to the glaze.
Rolling and Baking Your Oreo Cinnamon Creations
Step 1: Craft the Flavor-Packed Filling
Brown sugar
Black cocoa
Ground cinnamon
Blend these ingredients in a bowl until well combined. Set aside to let the flavors mingle and develop.
Step 2: Whip Up the Decadent Dough
Gather your ingredients:
All-purpose flour
Active dry yeast
Salt
Milk
Granulated sugar
Unsalted butter
Egg
Crushed Oreo cookies
Warm your oven to 200°F (95°C). In a large mixing bowl, combine dry ingredients. Gently warm milk, sugar, and butter in the microwave. Incorporate into dry ingredients, adding the egg to create a soft, pliable dough. Knead in crushed Oreos for extra crunch and flavor. Let the dough rest, covered, for 10 minutes to relax the gluten.
Step 3: Shape the Sensational Swirls
Dust your work surface with flour. Roll out the dough into a generous rectangle. Spread softened butter evenly across the surface. Sprinkle the reserved filling and extra crushed Oreos. Carefully roll the dough into a tight log, then slice into 9 equal portions. Nestle the rolls into a greased baking pan.
Step 4: Encourage the First Rise
Place the pan in the warm (but turned off) oven for 30 minutes. This cozy environment helps the rolls rise and become wonderfully fluffy.
Step 5: Bake to Golden Perfection
Crank up the oven to 350°F (175°C). Bake the rolls for 26-30 minutes until they turn a beautiful golden brown and fill the kitchen with an irresistible aroma.
Step 6: Create the Luxurious Vanilla Glaze
While baking, whisk together:
Softened butter
Powdered sugar
Milk
Vanilla extract
Blend until smooth and silky.
Step 7: Finish with Fabulous Flair
Let the rolls cool slightly. Drizzle generously with vanilla glaze and sprinkle with additional crushed Oreos for a show-stopping finish.
Savor the ultimate combination of classic cinnamon roll comfort and playful Oreo cookie excitement. These rolls are a celebration of texture, flavor, and pure baking joy!
Baking Secrets for Fluffy Swirls and Crunchy Oreo Bits
Control Dough Consistency: Add flour gradually to prevent a sticky or dry dough, ensuring a soft, pliable texture that’s easy to roll and shape.
Crush Oreos Strategically: Chop cookies into different sizes for varied texture- some fine crumbs, some larger chunks- to create exciting layers of flavor and crunch.
Warm Rise Technique: Use a turned-off oven with low heat to create an ideal proofing environment, helping the dough rise evenly and develop rich, tender layers.
Precise Cutting Trick: Use dental floss or a sharp serrated knife to slice rolls cleanly without squishing the delicate dough, ensuring uniform, beautiful shapes.
Glaze While Warm: Apply vanilla glaze when rolls are slightly warm but not hot, allowing it to melt slightly and create a smooth, glossy finish that seeps into the soft layers.
Storing and Reheating Rolls to Keep Them Soft
Refrigeration: Store cooled Oreo Cinnamon Rolls in an airtight container for up to 3 days. Wrap each roll individually in plastic wrap to maintain moisture and prevent them from drying out.
Freezing: Place rolls in a freezer-safe container, separating layers with parchment paper. Freeze for up to 2 months. Thaw overnight in the refrigerator before serving.
Reheating: Warm rolls in the microwave for 15-20 seconds or in a preheated oven at 300°F (150°C) for 5-7 minutes. Add a small splash of milk to restore softness and prevent them from becoming too dry.
Pair These Rolls with Coffee Tea or Milk
Pair with Cold Milk Delight: Serve these decadent Oreo Cinnamon Rolls with a chilled glass of whole milk. The creamy, cool milk perfectly cuts through the sweetness and rich chocolate flavors, creating a classic comfort combination that feels like a nostalgic childhood treat.
Complement with Espresso Kick: Enjoy these rolls alongside a shot of strong espresso or cappuccino. The bold coffee notes will wonderfully contrast the sweet Oreo and cinnamon flavors, providing a sophisticated adult twist to this dessert-like breakfast.
Match with Vanilla Cream Smoothie: Blend a smooth vanilla cream smoothie as a refreshing accompaniment. The silky drink will enhance the vanilla glaze and complement the chocolate Oreo undertones, creating a harmonious flavor experience that feels luxurious and indulgent.
Elevate with Cookies and Cream Milkshake: Create a cookies and cream milkshake that echoes the Oreo theme. This playful beverage will intensify the cookie elements and provide a cool, creamy counterpoint to the warm, freshly baked cinnamon rolls.
Transform Your Rolls with These Flavorful Variations
Peanut Butter Paradise: Swap crushed Oreos with creamy peanut butter in the filling and drizzle a peanut butter glaze on top for a nutty, rich variation.
Chocolate Chip Cookie Remix: Replace Oreo cookies with chocolate chips in the dough and filling, creating a classic chocolate chip cookie-inspired cinnamon roll experience.
Berry Bliss Rolls: Incorporate freeze-dried raspberry or strawberry pieces into the filling and glaze for a fruity, tangy alternative that adds vibrant color and fresh flavor.
Nutella Swirl Sensation: Layer Nutella between the dough and cinnamon filling, then top with a chocolate hazelnut glaze for an indulgent, decadent twist on the original recipe.
Recipe Development and Testing, Culinary Education, Food Writing and Blogging, Sustainable Cooking Practices, Global Cuisine Exploration
Education
Johnson & Wales University
Degree: Bachelor of Science in Culinary Arts
Focus: Comprehensive training in classical and contemporary cooking techniques, kitchen management, and menu development. Emphasized hands-on experience in diverse culinary traditions.
Le Cordon Bleu Paris
Program: Diplôme de Cuisine
Focus: Advanced instruction in French culinary techniques, including sauce preparation, pâtisserie, and haute cuisine.
Alex Reed is an inventive chef and food creator with a passion for dishes that balance taste, health, and sustainability.
Trained at Portland Community College and holding an Advanced Pastry Arts certificate from Oregon Culinary Institute, Alex brings more than 10 years of practical culinary experience to every recipe he develops.
His background uniquely blends traditional cooking skills with modern, mindful eating principles. As the founder of Beard and Bonnet, Alex creates recipes that encourage readers to cook confidently.
Alex Reed
Founder & Lead Content Writer
Expertise
Recipe Development and Testing, Culinary Education, Food Writing and Blogging, Sustainable Cooking Practices, Global Cuisine Exploration
Education
Johnson & Wales University
Le Cordon Bleu Paris
Alex Reed is an inventive chef and food creator with a passion for dishes that balance taste, health, and sustainability.
Trained at Portland Community College and holding an Advanced Pastry Arts certificate from Oregon Culinary Institute, Alex brings more than 10 years of practical culinary experience to every recipe he develops.
His background uniquely blends traditional cooking skills with modern, mindful eating principles. As the founder of Beard and Bonnet, Alex creates recipes that encourage readers to cook confidently.