Quick Chocolate Lava Recipe: Sweet Molten Magic
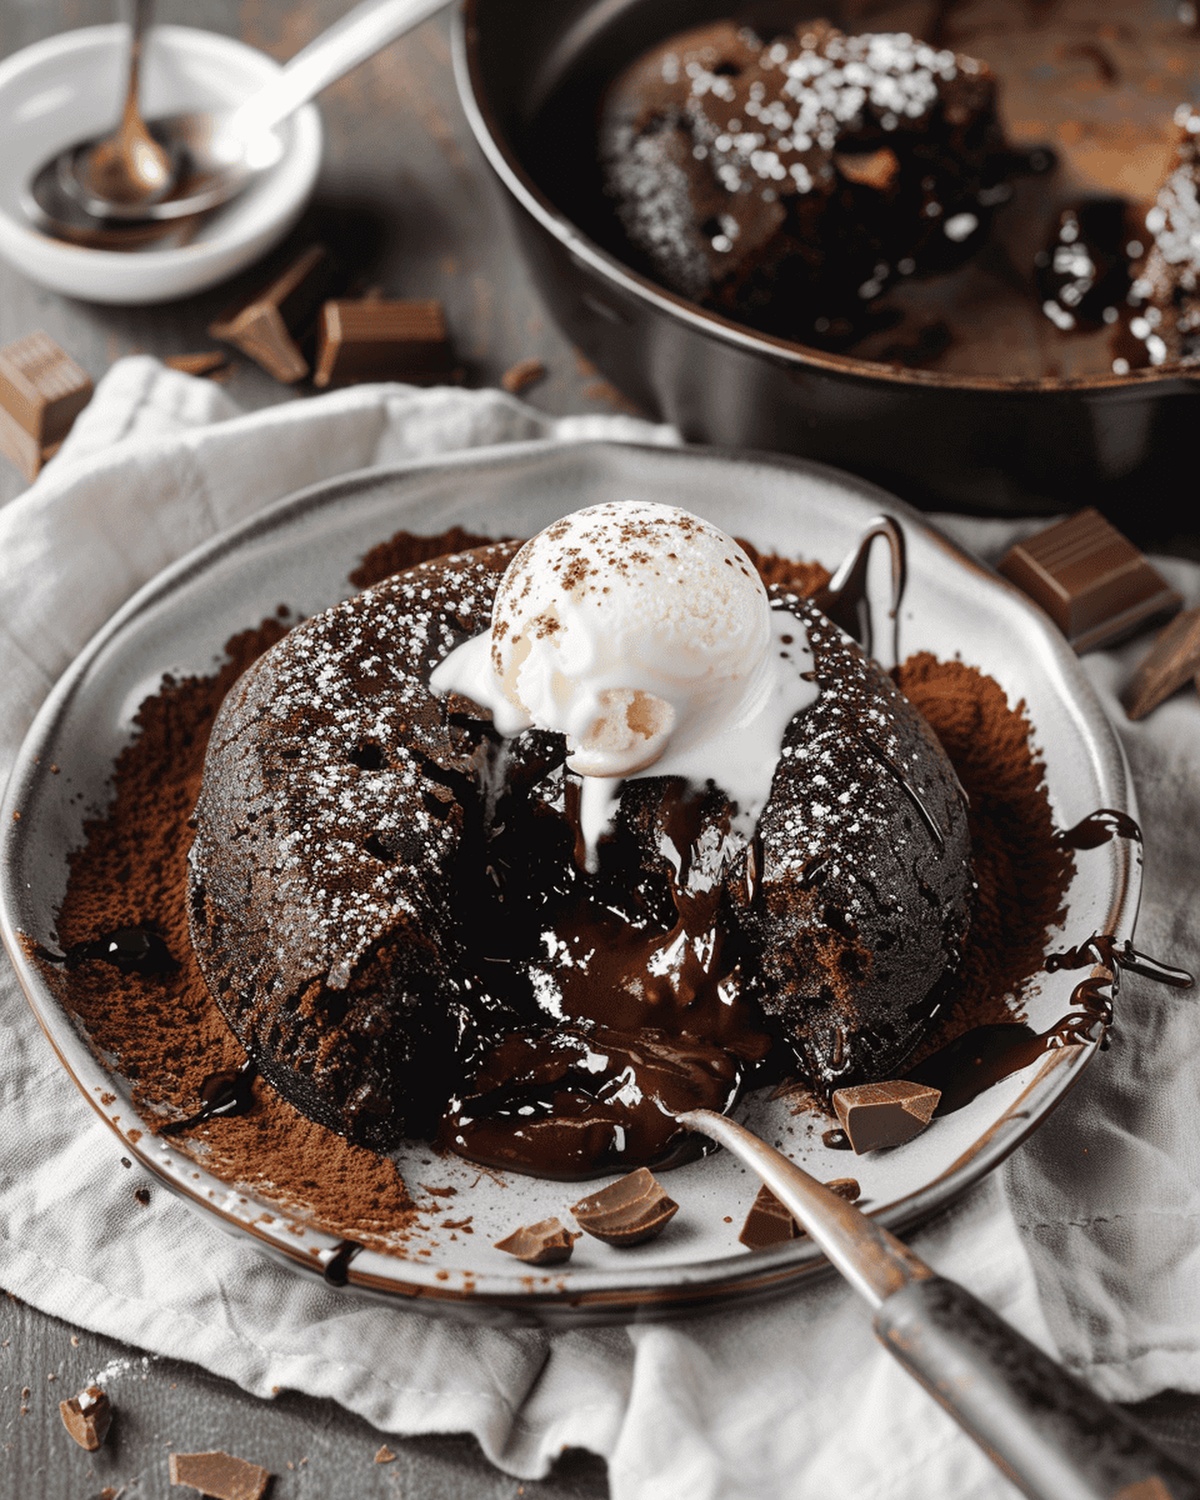
Molten chocolate oozes like liquid gold in this decadent chocolate lava delight recipe that promises pure dessert magic.
Rich, velvety chocolate creates an irresistible centerpiece for any sweet celebration.
Each spoonful delivers a tantalizing contrast between a delicate crisp exterior and a warm, gooey center.
The dessert whispers luxury with its elegant simplicity and intense chocolate flavor.
Dark chocolate melts into a silky pool that will make taste buds dance with pure pleasure.
Stunning yet surprisingly easy to prepare, this dessert turns an ordinary moment into an extraordinary indulgence.
Grab your ramekins and let the chocolate seduction begin.
Quick Recipe Overview

What’s in Chocolate Lava
For Dry Base:For Wet Ingredients:For Topping and Lava Effect:Tools That Help Make Chocolate Lava
Melting and Baking Chocolate Lava Smoothly

Chocolate Lava Magic
Get your oven cozy and ready by setting the temperature to a perfect 350 degrees. This initial step ensures your dessert will bake beautifully.
Blend your powdery ingredients in a mixing bowl, creating a silky base that will transform into a decadent chocolate dream. Whisk everything together until smooth and well-combined.
Introduce your wet components to the dry mixture, stirring gently to create a luscious batter. The goal is a velvety consistency that promises a dreamy texture.
Transfer your mixture into a round baking dish, spreading it evenly to ensure each bite will be equally delightful.
Sprinkle a luxurious topping of brown sugar and cocoa, creating a tempting blanket that will melt into pure indulgence.
Delicately pour hot water over the entire surface, allowing it to sink into the batter without disturbing the layers. This secret technique creates the signature molten center.
Slide your creation into the waiting oven, letting it bake until the top looks set with a slight crust. The aroma will fill your kitchen with anticipation.
After removing from the oven, let your dessert rest and settle. This crucial pause allows the inner chocolate to develop its signature flowing texture.
Tips for Extra Gooey Chocolate Lava
Serving Chocolate Lava for Dessert
Store Chocolate Lava Without Losing Texture
Print
Molten Chocolate Lava Recipe
- Total Time: 1 hour
- Yield: 7 1x
Description
Irresistible chocolate lava delight brings molten chocolate magic from French pastry kitchens to home dessert tables. Rich chocolate centers flow with intense flavor, promising pure indulgence for chocolate enthusiasts who crave elegant simplicity.
Ingredients
- 1 cup packed brown sugar
- ½ cup sugar
- ¼ cup cocoa powder
- 2 tablespoons cocoa powder
- 1 cup flour
- 1 ½ tsps baking powder
- ½ tsp salt
- 1 ¾ cups hot water
- ½ cup milk
- 3 tbsps vegetable oil
Instructions
- Thermal Preparation: Elevate oven temperature to 350°F, establishing the ideal thermal environment for this decadent chocolate creation.
- Dry Component Integration: Amalgamate flour, salt, baking powder, sugar, and cocoa powder in a capacious mixing bowl, whisking until achieving a uniform consistency.
- Liquid Fusion: Gently merge milk and vegetable oil into the dry mixture, stirring methodically to create a smooth, glossy batter that flows effortlessly.
- Batter Deployment: Cascade the silken mixture into a 9-inch baking dish, ensuring meticulous distribution across the entire surface.
- Luscious Topping Composition: Delicately sprinkle brown sugar and remaining cocoa powder across the batter’s expanse, creating a tantalizing flavor stratification.
- Signature Lava Technique: Artfully drizzle hot water over the prepared layer, allowing it to penetrate without disrupting the underlying batter’s structural integrity.
- Thermal Transformation: Nestle the dish into the preheated oven, allowing 40-45 minutes of culinary alchemy to create a perfectly set surface with a subtle crisp edge and molten chocolate core.
- Resting and Settling: Extract from heat and allow 20 minutes of repose, permitting the internal chocolate essence to stabilize and develop its characteristic flowing consistency.
Notes
- Precise Oven Calibration: Ensure accurate temperature by using an oven thermometer to guarantee the exact 350°F for perfect lava cake texture.
- Ingredient Temperature Matters: Use room temperature milk and oil to create a smoother, more consistent batter that blends seamlessly.
- Gentle Mixing Technique: Stir ingredients with a light hand to prevent overmixing, which can result in a dense, tough dessert texture.
- Water Pouring Precision: Stream hot water slowly and evenly across the surface to create the signature molten chocolate layer without disrupting the batter’s structure.
- Prep Time: 15 minutes
- Cook Time: 45 minutes
- Category: Desserts, Snacks
- Method: Baking
- Cuisine: American
Nutrition
- Serving Size: 7
- Calories: 280
- Sugar: 30 g
- Sodium: 150 mg
- Fat: 8 g
- Saturated Fat: 1 g
- Unsaturated Fat: 7 g
- Trans Fat: 0 g
- Carbohydrates: 52 g
- Fiber: 1 g
- Protein: 3 g
- Cholesterol: 0 mg
Jessica Martin
Recipe Developer & Food Writer
Expertise
Recipe Development, Food Styling and Photography, Seasonal and Local Ingredients, Vegetarian and Vegan Cuisine, Culinary Education
Education
Portland Community College
Oregon Culinary Institute
Jessica Martin is a talented food writer and recipe creator who specializes in seasonal cooking and approachable home baking.
Educated at Portland Community College with additional pastry training from Oregon Culinary Institute, Jessica’s culinary journey spans nearly a decade of creating and sharing flavorful recipes.
Her deep appreciation for local ingredients shapes each of her recipes, making them both accessible and inspiring. At Beard and Bonnet, Jessica uses her cheerful, down-to-earth writing to help readers effortlessly bring new tastes and creative dishes into their daily routines.