
Joy-Filled Holiday Sugar Cookie Pizza: A Festive Recipe
Soft and buttery holiday sugar cookie pizza is a sweet sensation that brings joy to every celebration.
This dessert blends the classic charm of sugar cookies with a playful pizza-style presentation.
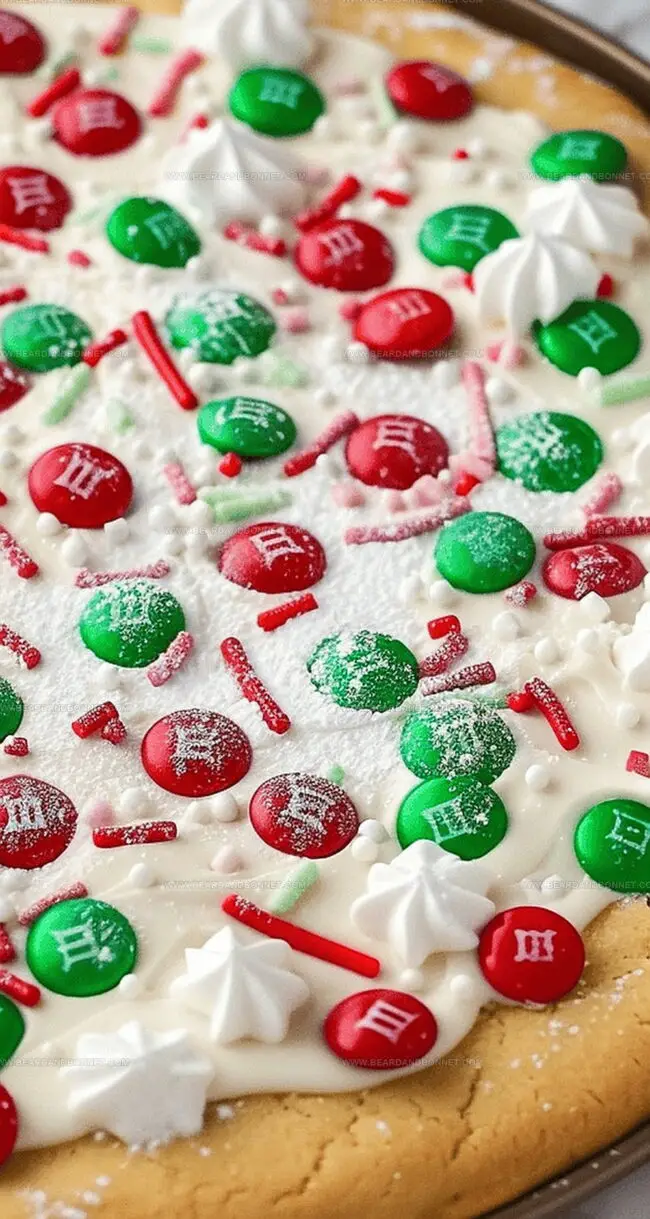
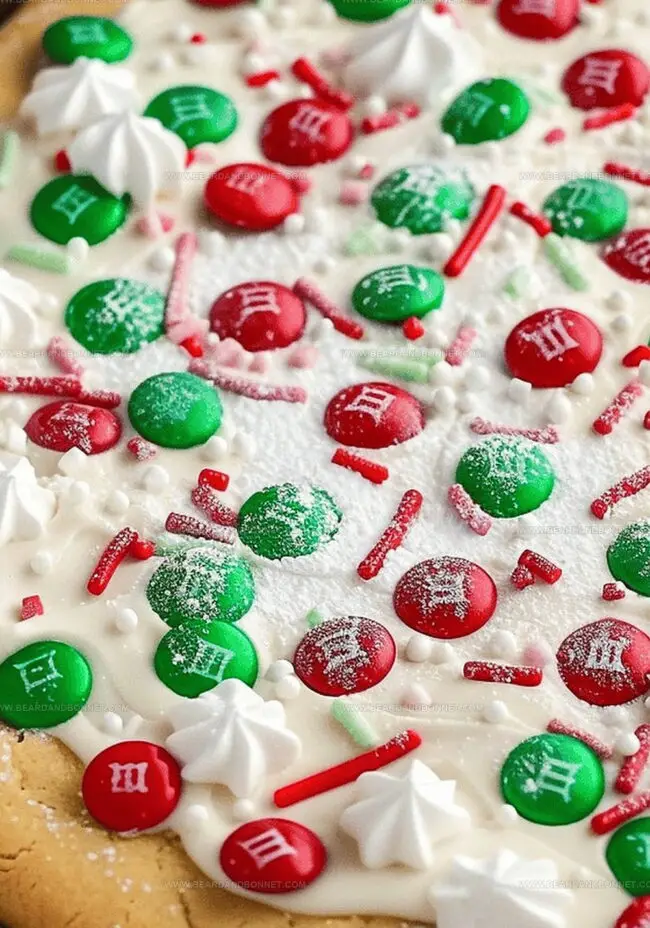
Sprinkled with colorful frosting and festive decorations, the cookie pizza becomes an instant crowd-pleaser at gatherings.
The crisp edges and tender center create a delightful texture that melts in your mouth.
Each slice promises a burst of sugary goodness that captures the spirit of the season.
Guests will love breaking apart this delectable treat and sharing moments of pure culinary happiness.
Dive into this delicious recipe and make your holiday celebrations extra special.
Quick Recipe Overview
Festive Sugar Cookie Pizza Ingredients
For Baking Base:For Decorative Toppings:For Frosting Layer:Tools for Holiday Sugar Cookie Pizza
How to Make Holiday Sugar Cookie Pizza
Festive Holiday Sugar Cookie Pizza Delight
Preheat the oven according to sugar cookie dough package directions. Place parchment paper on a baking sheet for easy cleanup and smooth baking surface.
Gently unroll sugar cookie dough onto the prepared baking sheet. Spread and shape the dough into a circular pizza form, aiming for about 12 inches wide. Press and smooth the surface to create an even thickness.
Slide the shaped dough into the preheated oven. Bake until edges turn golden and center looks set, typically 10-15 minutes. Remove and allow the cookie base to cool completely on a wire rack.
Once cooled, spread white vanilla icing across the entire cookie surface. Playfully scatter colorful M&M’s, holiday sprinkles, and crushed peppermint pieces. Add whole peppermints as elegant finishing touches for a spectacular presentation.
Tips for Decorating Cookie Pizza
Serving the Sugar Cookie Pizza
Storage Tips for Holiday Cookie Pizza
Print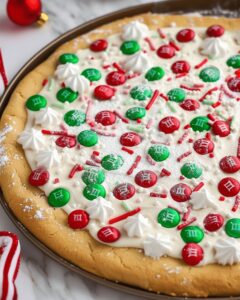
Magical Holiday Sugar Cookie Pizza Recipe
- Total Time: 25 minutes
- Yield: 13 1x
Description
Festive holiday sugar cookie pizza combines classic dessert elements into a delightful seasonal treat. Rich frosting and colorful sprinkles create a cheerful canvas for holiday celebrations that you’ll enjoy sharing with family and friends.
Ingredients
- 1 package (16.5 oz / 467 g) refrigerated sugar cookie dough
- 1 tub (16 oz / 454 g) white vanilla icing
- 0.75 cup (180 mL) red and green M&M’s chocolate candies
- 0.25 cup (60 mL) crushed starlight peppermints
- 2 tbsps holiday-colored sprinkles
- Whole starlight peppermints (for garnish)
Instructions
- Preparation: Activate the oven to the temperature specified on the sugar cookie dough package. Line a baking sheet with parchment paper or silicone mat for seamless release.
- Dough Shaping: Delicately unfurl the cookie dough onto the prepared surface, gently molding it into a circular pizza-like configuration, spreading to approximately 12 inches with uniform thickness to ensure consistent baking.
- Baking: Slide the shaped dough into the preheated oven, monitoring until the edges transform to a golden amber and the center appears thoroughly set, approximately 10-15 minutes of cooking time.
- Cooling and Icing: Allow the baked cookie base to cool completely on a wire rack. Once at room temperature, generously spread a smooth layer of white vanilla icing across the entire surface, creating a pristine backdrop for decorations.
- Decorative Finale: Embellish the iced cookie with a playful arrangement of M&M’s chocolates, festive sprinkles, and crushed peppermints. Strategically position whole peppermints as elegant accent pieces, completing the holiday-inspired dessert masterpiece.
Notes
- Customize Cookie Base: Experiment with different sugar cookie dough flavors like chocolate or cinnamon to create unique variations of this festive dessert.
- Precise Baking Timing: Watch closely during baking to prevent overcooking; cookie base should be golden but not dark brown to maintain a soft, chewy texture.
- Icing Application Trick: Use an offset spatula or the back of a spoon to spread icing evenly, creating a smooth surface that helps toppings adhere perfectly.
- Topping Design Strategy: Arrange candies and sprinkles while icing is still slightly wet to ensure they stick and create a visually stunning holiday masterpiece.
- Prep Time: 10 minutes
- Cook Time: 15 minutes
- Category: Desserts, Snacks
- Method: Baking
- Cuisine: American
Nutrition
- Serving Size: 13
- Calories: 200
- Sugar: 20 g
- Sodium: 150 mg
- Fat: 8 g
- Saturated Fat: 3 g
- Unsaturated Fat: 4 g
- Trans Fat: 0 g
- Carbohydrates: 30 g
- Fiber: 1 g
- Protein: 2 g
- Cholesterol: 10 mg
Jessica Martin
Recipe Developer & Food Writer
Expertise
Recipe Development, Food Styling and Photography, Seasonal and Local Ingredients, Vegetarian and Vegan Cuisine, Culinary Education
Education
Portland Community College
Oregon Culinary Institute
Jessica Martin is a talented food writer and recipe creator who specializes in seasonal cooking and approachable home baking.
Educated at Portland Community College with additional pastry training from Oregon Culinary Institute, Jessica’s culinary journey spans nearly a decade of creating and sharing flavorful recipes.
Her deep appreciation for local ingredients shapes each of her recipes, making them both accessible and inspiring. At Beard and Bonnet, Jessica uses her cheerful, down-to-earth writing to help readers effortlessly bring new tastes and creative dishes into their daily routines.