Joyful Festive Star Blossom Bread Recipe: Holiday Magic in Minutes
When the holiday spirit calls for a delightful star blossom bread that sparkles with warmth and nostalgia, you’ll fall in love with this show-stopping centerpiece.
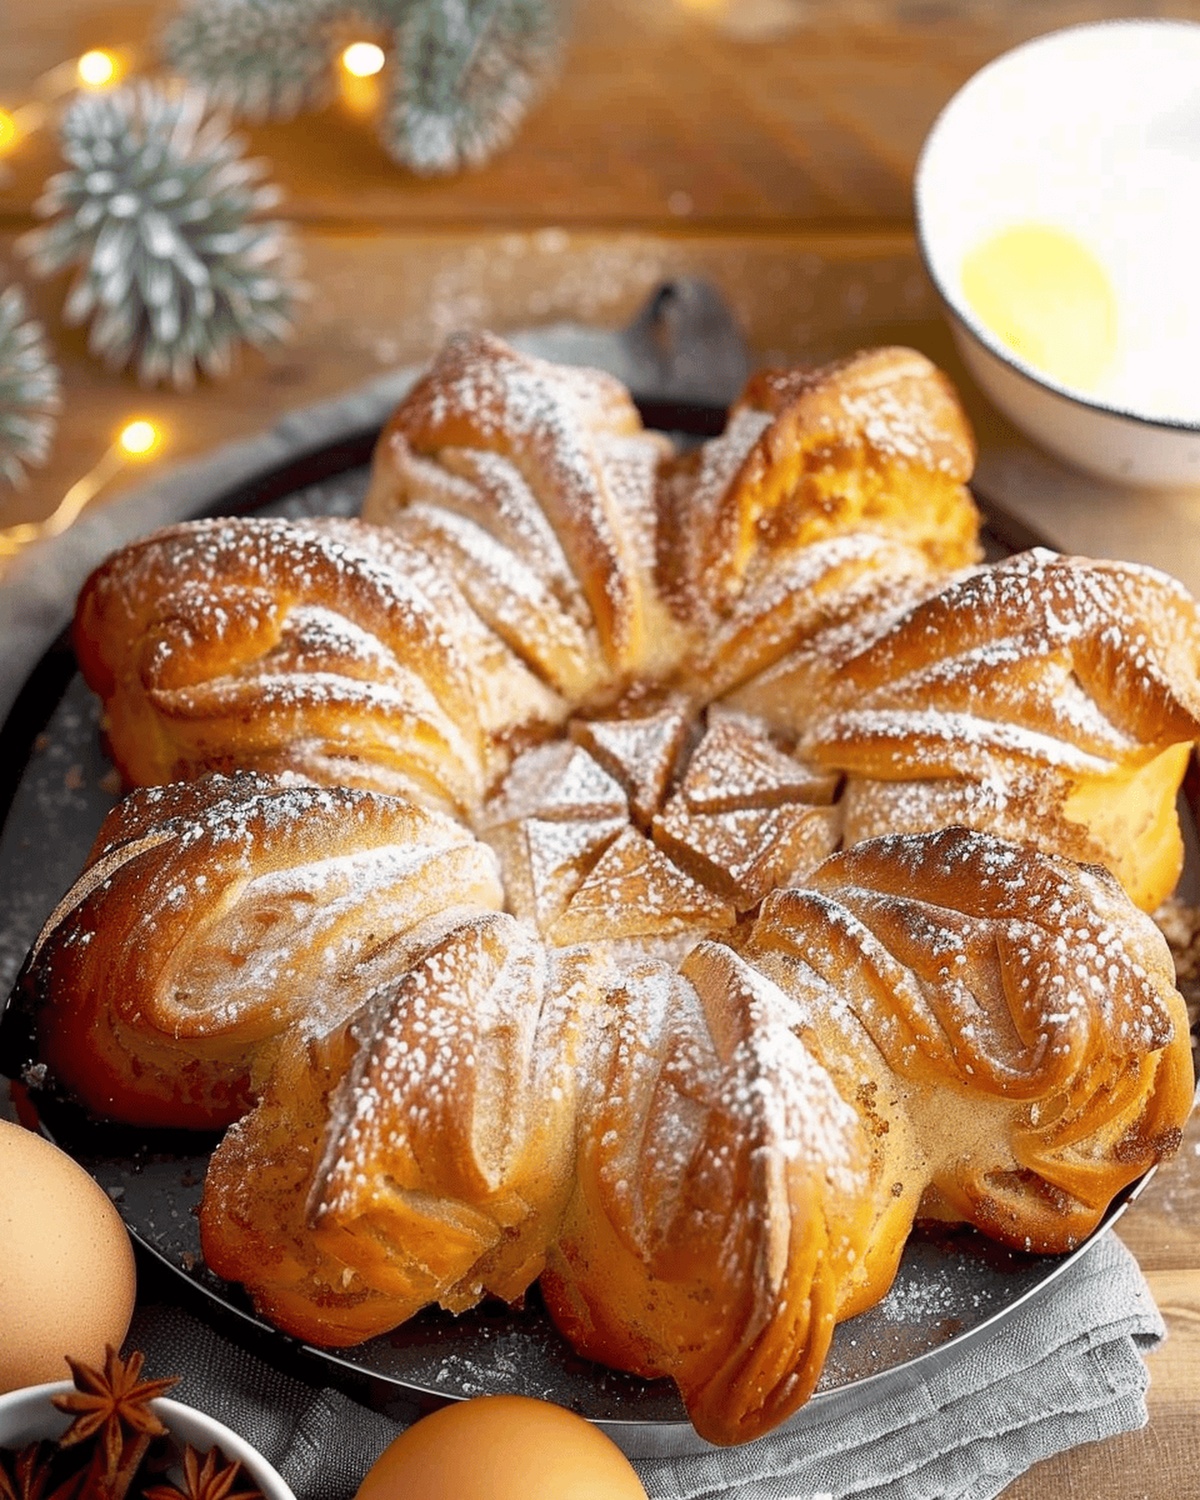
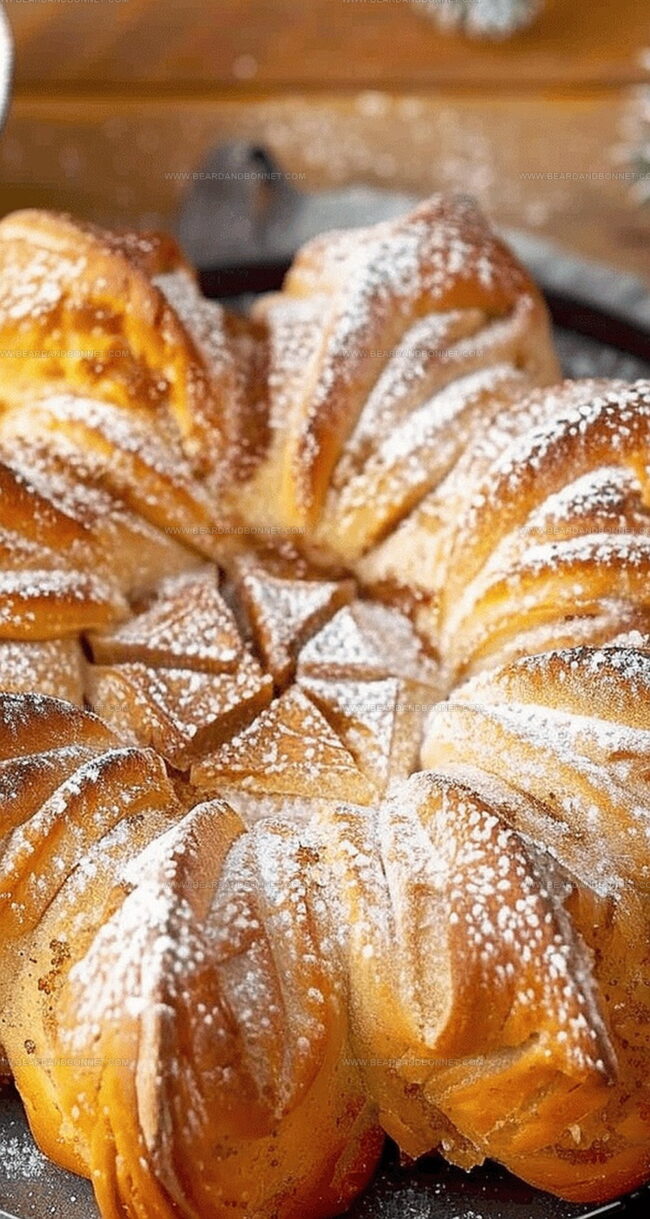
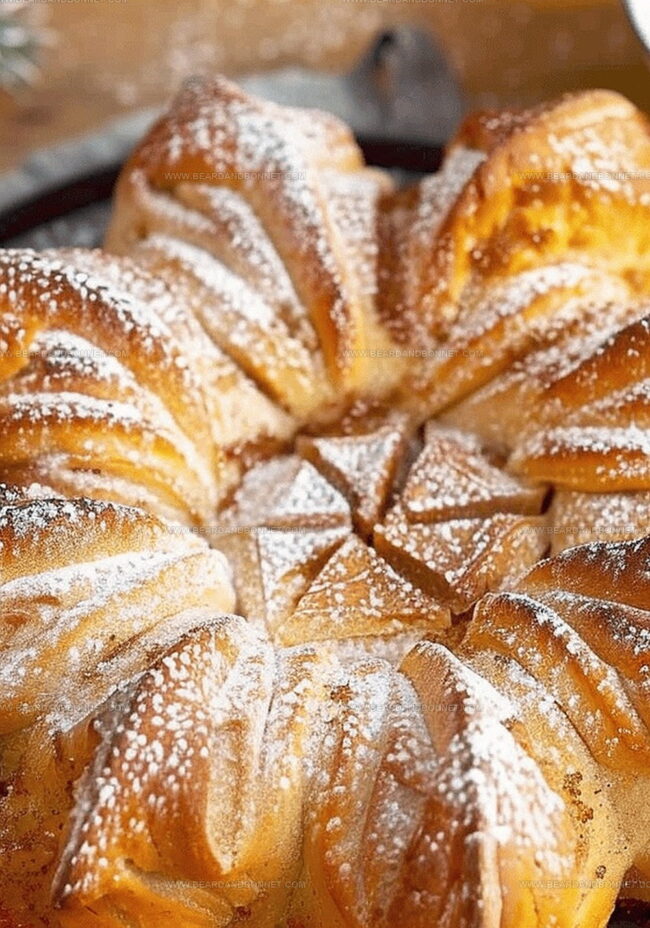
Soft, golden dough twists into a mesmerizing star shape that catches every eye at the table.
Each delicate layer promises a buttery embrace of comfort and joy.
Aromatic spices weave through the intricate folds, creating a sensory journey that connects generations.
The gentle braiding technique turns simple ingredients into an edible work of art.
Welcoming friends and loved ones becomes magical with this stunning bread at the center of your gathering.
Let your baking adventure begin with this irresistible star blossom creation that will make your celebration truly unforgettable.
Quick Recipe Overview
What’s Inside Festive Star Blossom Bread
For Bread Base:For Liquid Ingredients:For Filling and Topping:Baking Tools for Festive Star Blossom Bread
Steps to Shape Festive Star Blossom Bread Just Right
Gently heat milk and butter until comfortably warm, creating a cozy environment for the yeast to bloom. Let the mixture sit and become frothy, signaling the yeast’s awakening.
Gather your dry ingredients in a welcoming bowl, blending them with a soft touch to create a harmonious mixture that will soon transform into delightful bread.
Pour the bubbly yeast mixture into the flour landscape, introducing egg yolks and vanilla for a rich, aromatic experience. Bring everything together with gentle movements, coaxing the ingredients into a smooth, supple dough.
Transform the dough through rhythmic kneading, working it until it becomes silky and responsive. Allow the dough to whisper its readiness through its elastic texture.
Nestle the dough in a lightly oiled haven, covering it to rest and grow. Watch it expand and develop character over a few tranquil hours.
Blend butter, sugar, and cinnamon into a luscious filling that will dance between the bread’s layers, promising delectable surprises.
Roll out delicate dough discs, painting each with the cinnamon mixture. Stack them carefully, building anticipation for the final creation.
Craft the bread into a mesmerizing star shape, twisting strips and connecting them with loving precision. Each movement brings the bread closer to its stunning final form.
Allow the shaped bread a gentle rest, letting it rise and develop its character before entering the warm embrace of the oven.
Brush with a whisper of egg white, then bake until the bread turns a gorgeous golden hue, filling the kitchen with an irresistible aroma.
Ideas to Make Festive Star Blossom Bread Shine
Tips to Serve Festive Star Blossom Bread Beautifully
Save Festive Star Blossom Bread for Later Celebrations
Print
Joyful Star Blossom Bread Recipe
- Total Time: 1 hour 5 minutes
- Yield: 13 1x
Description
Mexican festive star blossom bread shines as a delightful centerpiece for holiday gatherings. Delicate layers and intricate design promise a memorable culinary experience you’ll savor with friends and family.
Ingredients
- 450 g (3 ¾ cups) bread flour
- 7 g (2 ¼ tsps) instant yeast
- 70 g (⅓ cup) white granulated sugar
- ⅓ cup light brown sugar
- 30 g (¼ cup) butter
- 6 tbsps softened unsalted butter
- 200 ml (6.8 fl oz) milk
- 2 large egg yolks
- 1 tsp pure vanilla extract
- 1 tbsp ground cinnamon
- 1/8 tsp salt
Instructions
- Yeast Activation: Warm milk and butter to body temperature, then dissolve yeast until it becomes frothy and aromatic.
- Dry Ingredient Preparation: Sift bread flour, sugar, and salt together in a large mixing bowl, creating a uniform dry base.
- Dough Formation: Create a central well in the dry ingredients, then pour in activated yeast mixture, egg yolks, and vanilla extract. Knead methodically for 10-12 minutes until the dough becomes smooth, elastic, and slightly tacky.
- First Fermentation: Transfer dough to an oiled container, cover with plastic wrap, and let rise in a warm, draft-free space until volume doubles.
- Filling Creation: Whip softened butter with brown sugar and cinnamon until smooth and well-incorporated.
- Dough Shaping: Divide dough into four equal portions, rolling each into thin circular discs. Layer the discs, spreading cinnamon-sugar mixture between layers, leaving the top layer bare.
- Star Configuration: Mark a central ring, slice the stacked dough into 16 radial strips. Twist paired strips and pinch ends together to create an intricate star-like pattern.
- Final Proofing: Cover shaped bread with a damp cloth, allowing a brief second rise to enhance volume and lightness.
- Baking Preparation: Preheat oven to 350°F. Brush the surface with egg whites to achieve a golden, glossy finish.
- Baking and Finishing: Bake for approximately 20 minutes, watching carefully to prevent over-browning, until the bread becomes a rich, amber-hued masterpiece.
Notes
- Yeast Activation Tip: Ensure milk and butter are lukewarm, not hot, to preserve yeast’s living organisms and promote proper rising.
- Kneading Technique: Develop a consistent, rhythmic motion while working the dough to develop gluten structure and achieve a smooth, elastic texture.
- Temperature Matters: Maintain a warm, draft-free environment during proofing to help the dough rise evenly and develop optimal flavor.
- Golden Finish Trick: Egg white wash creates a beautiful, shiny crust and helps achieve an even, appetizing brown color during baking.
- Prep Time: 45 minutes
- Cook Time: 20 minutes
- Category: Breakfast, Snacks, Desserts
- Method: Baking
- Cuisine: American
Nutrition
- Serving Size: 13
- Calories: 211
- Sugar: 12 g
- Sodium: 48 mg
- Fat: 8 g
- Saturated Fat: 5 g
- Unsaturated Fat: 3 g
- Trans Fat: 0 g
- Carbohydrates: 31 g
- Fiber: 1 g
- Protein: 4 g
- Cholesterol: 36 mg
Jessica Martin
Recipe Developer & Food Writer
Expertise
Recipe Development, Food Styling and Photography, Seasonal and Local Ingredients, Vegetarian and Vegan Cuisine, Culinary Education
Education
Portland Community College
Oregon Culinary Institute
Jessica Martin is a talented food writer and recipe creator who specializes in seasonal cooking and approachable home baking.
Educated at Portland Community College with additional pastry training from Oregon Culinary Institute, Jessica’s culinary journey spans nearly a decade of creating and sharing flavorful recipes.
Her deep appreciation for local ingredients shapes each of her recipes, making them both accessible and inspiring. At Beard and Bonnet, Jessica uses her cheerful, down-to-earth writing to help readers effortlessly bring new tastes and creative dishes into their daily routines.