
Dreamy Chocolate Chip Bliss Bites Recipe for Sweet Smiles
Irresistible chocolate chip bliss bites dance between decadence and pure snacking joy.
These delightful morsels pack a punch of sweet satisfaction with every single bite.
Crafted with simple ingredients and minimal effort, they promise a quick escape into pure indulgence.
No fancy equipment or complicated techniques stand between you and these delectable treats.
The recipe balances rich chocolate chips with a tender, melt-in-your-mouth texture that sparks instant happiness.
Whip up a batch and watch them disappear in moments, leaving only smiles and crumbs behind.
Grab a mixing bowl and let the delicious adventure begin.
Quick Recipe Overview
All the Ingredients for Chocolate Chip Bliss Bites
For Creamy Base:For Dry Structure:For Delightful Texture:Must-Have Tools for Chocolate Chip Bliss Bites
How to Whip Up Chocolate Chip Bliss Bites

Crank up the oven to a toasty 375°F. Grab your baking sheets and line them with parchment paper for smooth cookie magic.
Grab a mixing bowl and whip the butter, sugar, and vanilla into a cloud-like fluffy dream. Your mixer is your best friend here.
Sprinkle in the flour and salt, mixing until the dough looks like a perfect, smooth canvas ready for chocolatey goodness.
Gently fold those mini chocolate chips into the dough. Think of it like tucking delicious little treasures into a soft blanket.
If your dough feels too soft and wild, pop it in the fridge for a quick 30-minute cooldown. Let it relax and firm up.
Scoop out little dough balls and place them on your prepared sheets. Give them some breathing room. Slide into the oven and bake until the bottoms turn a gentle golden hue, about 7-10 minutes.
Once slightly cooled, roll these beauties in a snowy dusting of powdered sugar. Let them chill completely on a wire rack, transforming into irresistible morsels of joy.
Tricks to Boost Chocolate Chip Bliss Bites Flavor
How to Serve Chocolate Chip Bliss Bites for Snacking
Prep, Store, and Save Chocolate Chip Bliss Bites
Print
Irresistible Chocolate Chip Bliss Bites Recipe
- Total Time: 40 minutes
- Yield: 25 1x
Description
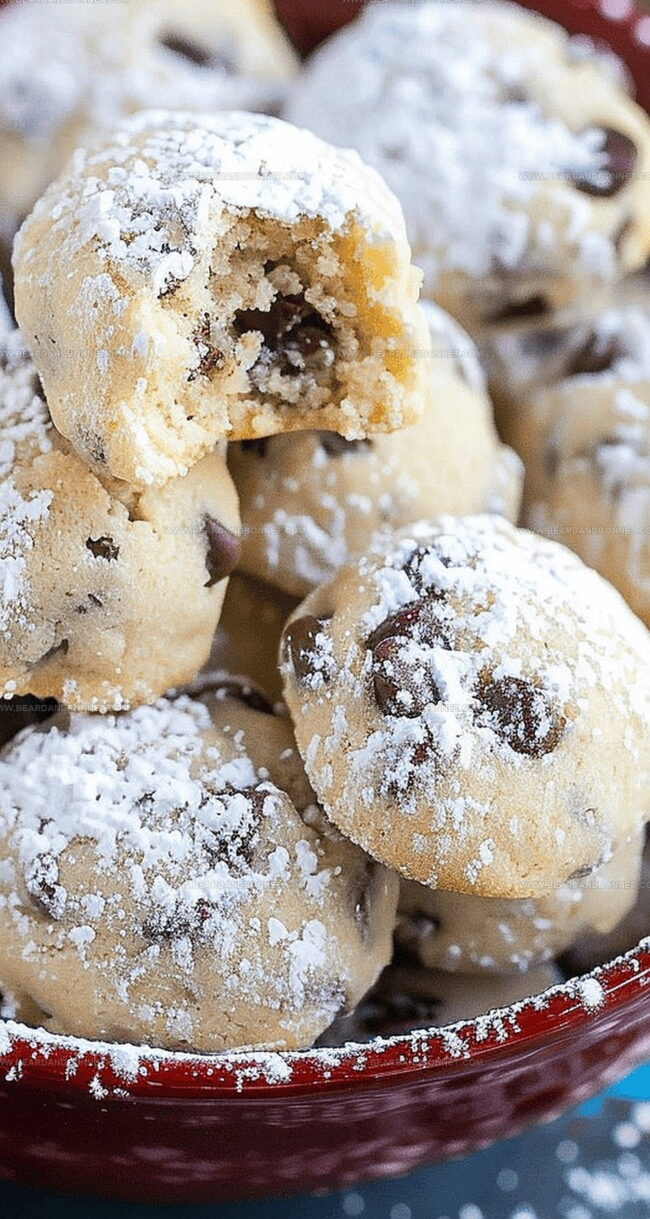
Indulgent chocolate chip bliss bites combine rich chocolate and creamy texture in a delightful treat. Crisp edges, gooey centers, and balanced sweetness make these cookies irresistible for you to savor and share.
Ingredients
- 1 cup (226g/8 oz) unsalted butter, softened
- 2 ¼ cups (279g/9.8 oz) all-purpose flour
- 1 cup (170g/6 oz) mini chocolate chips
- ½ cup (57g/2 oz) powdered sugar
- 1 tsp vanilla extract
- ½ tsp salt
- Additional powdered sugar for rolling
Instructions
- Preparation: Position oven racks in the middle and preheat to 375°F (190°C). Line two baking trays with parchment paper for easy cookie removal.
- Mixing Base: Utilize an electric mixer to cream butter, powdered sugar, and vanilla until light and fluffy, creating a smooth foundational mixture.
- Dough Formation: Sift flour and salt into the butter mixture, blending gradually to develop a uniform dough. Fold in mini chocolate chips, ensuring even distribution throughout the mixture.
- Chilling and Shaping: Allow dough to rest in the refrigerator for 20-25 minutes if too soft. Scoop uniform portions onto prepared baking sheets, spacing each mound 2 inches apart to prevent merging during baking.
- Baking Process: Slide trays into the preheated oven and bake for 8-9 minutes. Look for golden-tinged edges and a slightly set center, indicating perfect doneness.
- Finishing Touch: Immediately after removing from the oven, let cookies rest briefly. While still warm, delicately roll each cookie in powdered sugar, creating an elegant, frost-like exterior.
- Cooling and Serving: Transfer cookies to a wire rack, allowing them to cool completely and develop their signature melt-in-your-mouth texture.
Notes
- Chill Dough for Perfection: Refrigerating the dough for 20-25 minutes helps firm up the mixture, making it easier to shape and preventing overspread during baking.
- Master Chocolate Distribution: Fold mini chocolate chips gently with a spatula to ensure even distribution, guaranteeing a perfect chocolate chip in every delectable bite.
- Watch Baking Time Closely: Bake for exactly 8-9 minutes, looking for subtle golden edges and a slightly set center to achieve the ideal soft, chewy texture.
- Sugar Coating Technique: Roll warm cookies in powdered sugar immediately after baking to create a delicate, snow-like finish that adds a sweet, melt-in-your-mouth experience.
- Prep Time: 30 minutes
- Cook Time: 10 minutes
- Category: Snacks, Desserts
- Method: Baking
- Cuisine: American
Nutrition
- Serving Size: 25
- Calories: 150
- Sugar: 6g
- Sodium: 50mg
- Fat: 9g
- Saturated Fat: 5g
- Unsaturated Fat: 3g
- Trans Fat: 0g
- Carbohydrates: 17g
- Fiber: 0g
- Protein: 2g
- Cholesterol: 20mg
Jessica Martin
Recipe Developer & Food Writer
Expertise
Recipe Development, Food Styling and Photography, Seasonal and Local Ingredients, Vegetarian and Vegan Cuisine, Culinary Education
Education
Portland Community College
Oregon Culinary Institute
Jessica Martin is a talented food writer and recipe creator who specializes in seasonal cooking and approachable home baking.
Educated at Portland Community College with additional pastry training from Oregon Culinary Institute, Jessica’s culinary journey spans nearly a decade of creating and sharing flavorful recipes.
Her deep appreciation for local ingredients shapes each of her recipes, making them both accessible and inspiring. At Beard and Bonnet, Jessica uses her cheerful, down-to-earth writing to help readers effortlessly bring new tastes and creative dishes into their daily routines.