Soft, chewy, and irresistibly sweet, these peanut butter delights dance between decadence and comfort.
The classic peanut butter recipe brings nostalgic memories of childhood treats flooding back.
Rich, creamy peanut butter blends seamlessly with simple ingredients to create a mouthwatering dessert.
Each bite promises a perfect balance of sweetness and nutty warmth.
The texture melts effortlessly, promising a delightful experience for anyone who loves a quick and satisfying treat.
These delectable morsels are quick to make and even faster to disappear from the plate.
Dive into this simple yet spectacular recipe that transforms ordinary ingredients into an extraordinary indulgence.
Quick Recipe Overview
Prep Time: 30 minutes
Cook Time: 10 minutes
Total Time: 40 minutes
Calories: 120 kcal
Servings: 21
Peanut Butter Cookie Ingredients with a Simple Twist
For Peanut Butter Base:
Butter: Adds richness and helps bind ingredients smoothly.
Peanut Butter: Provides creamy, nutty core flavor with deep protein content.
Vanilla Extract: Enhances overall sweetness and adds aromatic depth.
For Binding and Texture:
Powdered Sugar: Creates smooth consistency and provides sweet structure.
For Chocolate Coating:
Chocolate: Delivers luxurious outer layer with contrasting flavor profile.
Tools You’ll Use for Homemade Peanut Butter Cookies
Large mixing bowl: essential for combining and mixing ingredients smoothly.
Baking sheet: perfect for arranging and chilling peanut butter balls.
Spatula or wooden spoon: helps stir ingredients and create consistent dough.
Freezer-safe surface: needed for chilling the peanut butter balls.
Double boiler or microwave-safe bowl: used for melting chocolate cleanly.
Measuring cups and spoons: ensures accurate ingredient proportions.
Step-by-Step Instructions for Peanut Butter Cookies
Peanut Butter Delights
Creamy Base The secret starts with blending smooth peanut butter with warm melted butter and a splash of fragrant vanilla. This creates a rich, silky foundation that’ll make your taste buds dance.
Powdery Magic Slowly fold powdered sugar into the mixture, stirring gently until the texture transforms into a dreamy, moldable dough. The consistency should feel like soft clay that holds its shape perfectly.
Ball Formation Scoop out small chunks and roll them between your palms, creating adorable little spheres. Place these delicate orbs on a clean baking sheet, giving each one enough breathing room.
Frosty Pause Pop the baking sheet into the freezer and let the peanut butter balls chill out for half an hour. This cooling period helps them firm up and prepares them for their chocolate journey.
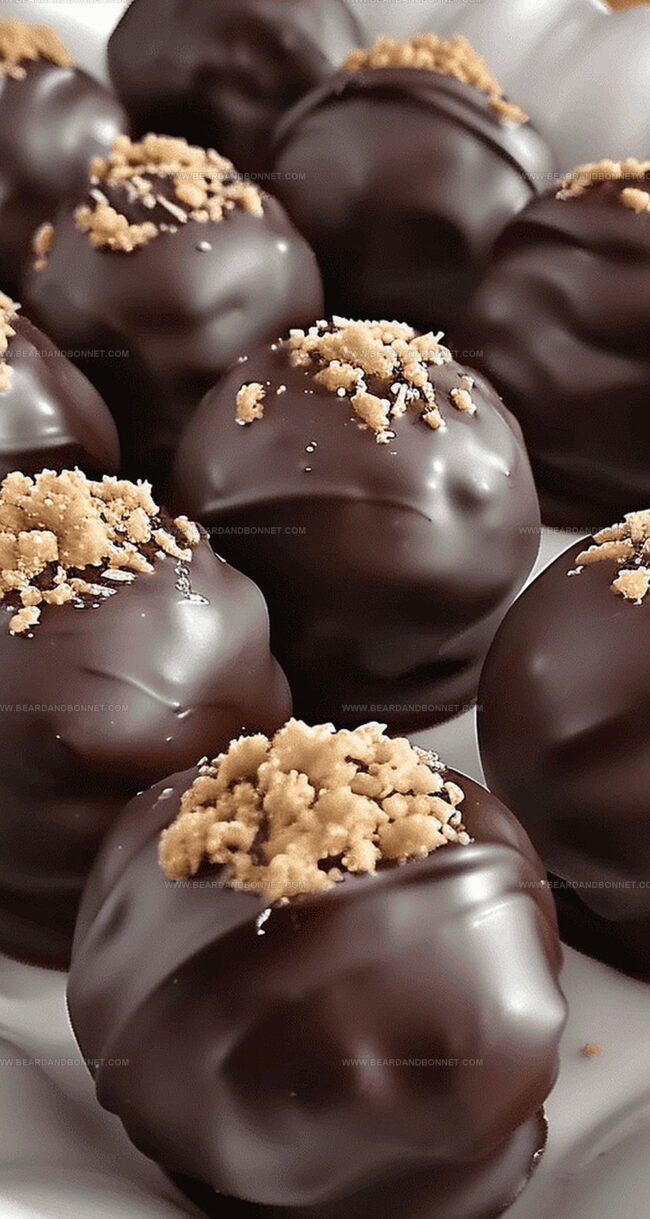
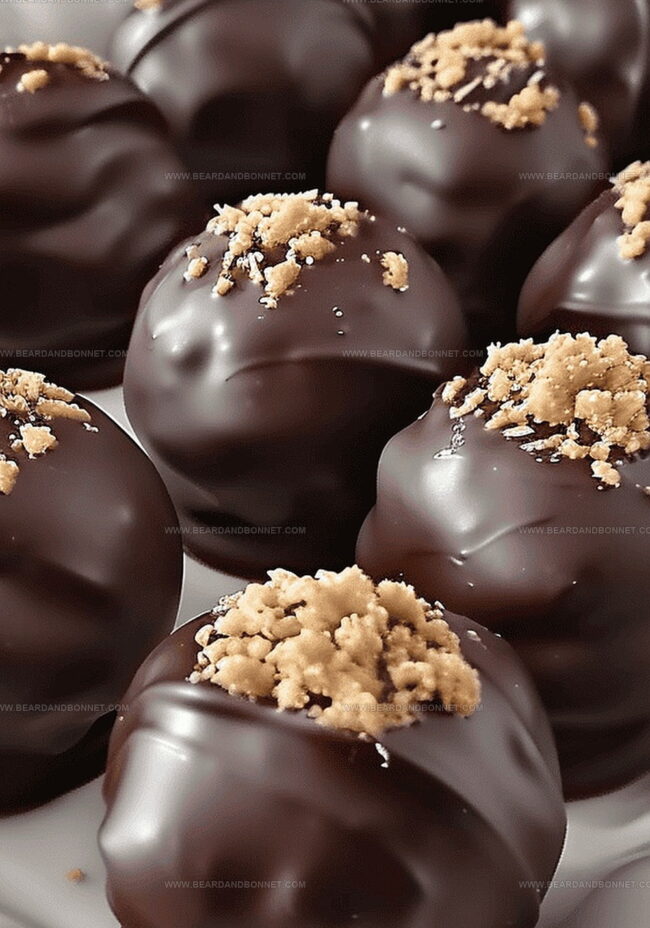
Chocolate Embrace Melt your favorite chocolate until it’s glossy and smooth. Carefully dunk each frozen ball, ensuring a complete chocolatey makeover. Gently lift and let excess chocolate drip away.
Final Resting Lay the chocolate-coated treasures back on the sheet. Let them rest at room temperature or speed things up in the refrigerator until the chocolate sets into a beautiful, crisp shell.
Tips for Texture and Sweetness Control
Chocolate Drizzle Magic: Experiment with different chocolate types like dark, milk, or white chocolate for unique flavor profiles and visual appeal.
Nutty Crunch Boost: Sprinkle chopped peanuts, almonds, or pecans on top of the chocolate coating while it’s still wet for added texture and crunch.
Flavor Twist Adventure: Mix in a pinch of sea salt, ground cinnamon, or a splash of bourbon into the peanut butter mixture for an unexpected flavor dimension.
Decorative Flair: Use colored candy melts or drizzle contrasting chocolate over the basic coating to create beautiful patterns and make your treats look professionally crafted.
When and How to Serve These Nutty Cookies
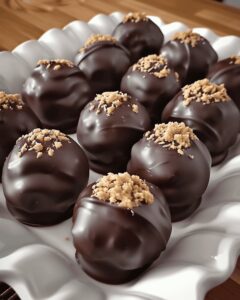
Sweet Dessert Platter: Arrange these delightful peanut butter balls on a elegant ceramic plate, garnished with fresh mint leaves or a light dusting of powdered sugar for an Instagram-worthy presentation.
Gifting Treat Boxes: Package the chocolate-covered peanut butter balls in cute mini cupcake liners inside decorative gift boxes, perfect for holiday sharing or special occasion treats.
Frozen Delight Companion: Serve these chilled peanut butter balls alongside a scoop of vanilla ice cream or as a cool complement to a warm cup of coffee for a delectable dessert experience.
Party Snack Centerpiece: Create a stunning dessert table display by arranging the peanut butter balls on tiered serving stands, mixing different chocolate coatings for visual appeal and varied flavor profiles.
How to Keep Cookies Soft After Baking
Chilled Delight Storage: Keep these peanut butter treats in an airtight container inside the refrigerator for up to 2 weeks. Cold temperatures help maintain their perfect texture and prevent chocolate from melting.
Make-Ahead Magic: Prepare the entire batch in advance and freeze uncoated balls for future quick dessert needs. Simply thaw and dip in chocolate when ready to serve, saving precious preparation time.
Smart Portion Control: Separate layers with parchment paper when storing to prevent sticking. This trick keeps each chocolate-covered ball looking pristine and makes grabbing a quick snack super easy.
Traveling Treats: Pack these goodies in a cooler with ice packs during picnics or road trips. Their solid chocolate coating and chilled core ensure they remain deliciously intact during short journeys.
Preparation: Melt butter with vanilla extract in a large mixing bowl, blending thoroughly until smooth and integrated.
Dough Formation: Fold peanut butter into the butter mixture, stirring carefully to create a consistent, lump-free texture. Gradually add powdered sugar while mixing, transforming the mixture into a firm, moldable dough that holds its shape.
Shaping: Gently roll the dough into uniform, compact spheres using clean hands, ensuring each ball is tightly packed and consistent in size.
Chilling: Arrange the dough balls on a chilled baking sheet, spacing them evenly. Freeze for 30 minutes to solidify and stabilize the spheres.
Chocolate Coating: Melt chocolate using a double boiler or microwave, stirring periodically to achieve a glossy, smooth consistency. Remove frozen peanut butter balls and fully submerge each one in the molten chocolate, allowing excess to drip off.
Setting: Place chocolate-covered spheres back on the chilled tray, allowing them to set at room temperature or expedite the process by returning to the refrigerator until the chocolate coating hardens completely.
Notes
Butter Blending Technique: Whisk melted butter and vanilla extract thoroughly to create a smooth, homogeneous base that ensures even flavor distribution.
Peanut Butter Integration: Stir peanut butter gradually and meticulously to prevent lumps, creating a consistently smooth mixture that impacts the final texture.
Dough Consistency Check: Knead powdered sugar slowly until the mixture becomes dense and moldable, testing by forming a compact ball that holds its shape without crumbling.
Chocolate Coating Pro Tip: Use room temperature chocolate for even coating and maintain a steady dipping motion to achieve a professional, smooth chocolate shell that fully covers each peanut butter sphere.
Recipe Development, Food Styling and Photography, Seasonal and Local Ingredients, Vegetarian and Vegan Cuisine, Culinary Education
Education
Portland Community College
Degree: Associate of Applied Science in Culinary Arts
Focus: Comprehensive training in culinary techniques, kitchen management, and food safety. Gained hands-on experience in preparing diverse cuisines and understanding flavor profiles
Oregon Culinary Institute
Program: Baking and Pastry Certificate
Focus: Specialized education in baking fundamentals, pastry arts, and dessert presentation. Emphasized creativity and precision in crafting baked goods.
Jessica Martin is a talented food writer and recipe creator who specializes in seasonal cooking and approachable home baking.
Educated at Portland Community College with additional pastry training from Oregon Culinary Institute, Jessica’s culinary journey spans nearly a decade of creating and sharing flavorful recipes.
Her deep appreciation for local ingredients shapes each of her recipes, making them both accessible and inspiring. At Beard and Bonnet, Jessica uses her cheerful, down-to-earth writing to help readers effortlessly bring new tastes and creative dishes into their daily routines.

Jessica Martin
Recipe Developer & Food Writer
Expertise
Recipe Development, Food Styling and Photography, Seasonal and Local Ingredients, Vegetarian and Vegan Cuisine, Culinary Education
Education
Portland Community College
Oregon Culinary Institute
Jessica Martin is a talented food writer and recipe creator who specializes in seasonal cooking and approachable home baking.
Educated at Portland Community College with additional pastry training from Oregon Culinary Institute, Jessica’s culinary journey spans nearly a decade of creating and sharing flavorful recipes.
Her deep appreciation for local ingredients shapes each of her recipes, making them both accessible and inspiring. At Beard and Bonnet, Jessica uses her cheerful, down-to-earth writing to help readers effortlessly bring new tastes and creative dishes into their daily routines.