
Crispy Golden Fried Peach Pies Recipe: Summer’s Sweet Delight
Sweet summer peaches burst with flavor in this irresistible fried peach pies recipe that captures Southern comfort in every golden, crispy bite.
Southern kitchens have long cherished these delectable hand pies, passing down generations of culinary magic.
Tender, ripe peaches caramelize into a luscious filling that nestles perfectly inside delicate, flaky pastry.
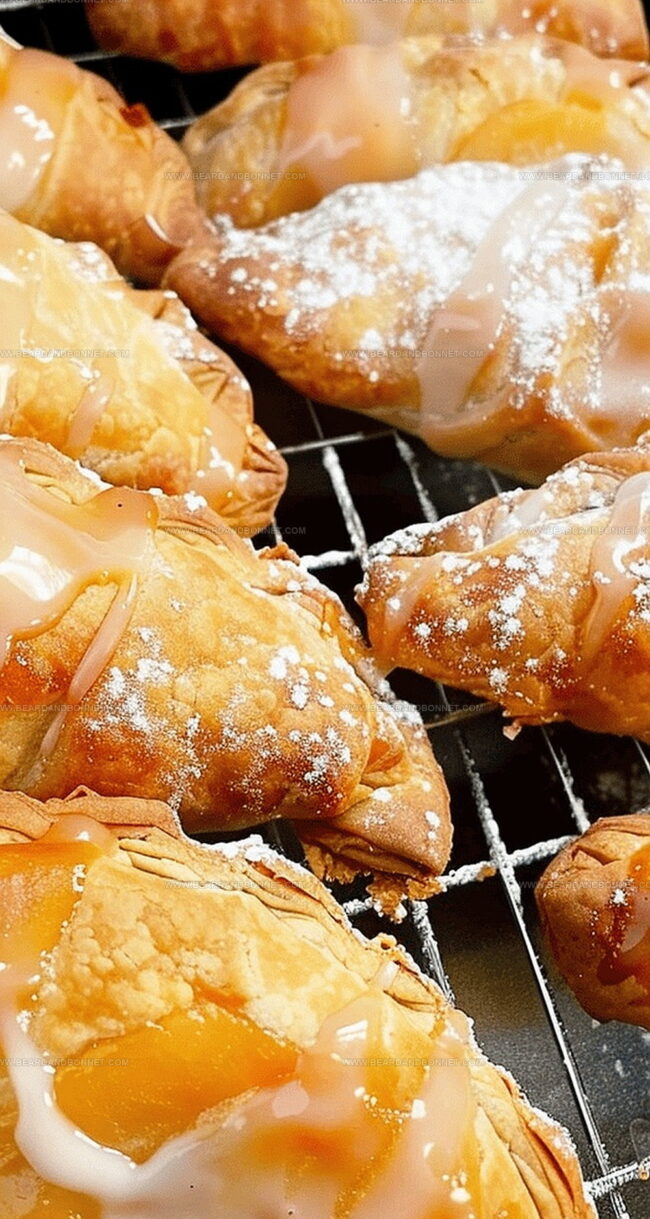
Each pie crackles with a satisfying crunch when you bite through the crisp exterior, revealing a warm, fragrant peach center.
The simple ingredients blend together effortlessly, creating a dessert that feels both nostalgic and exciting.
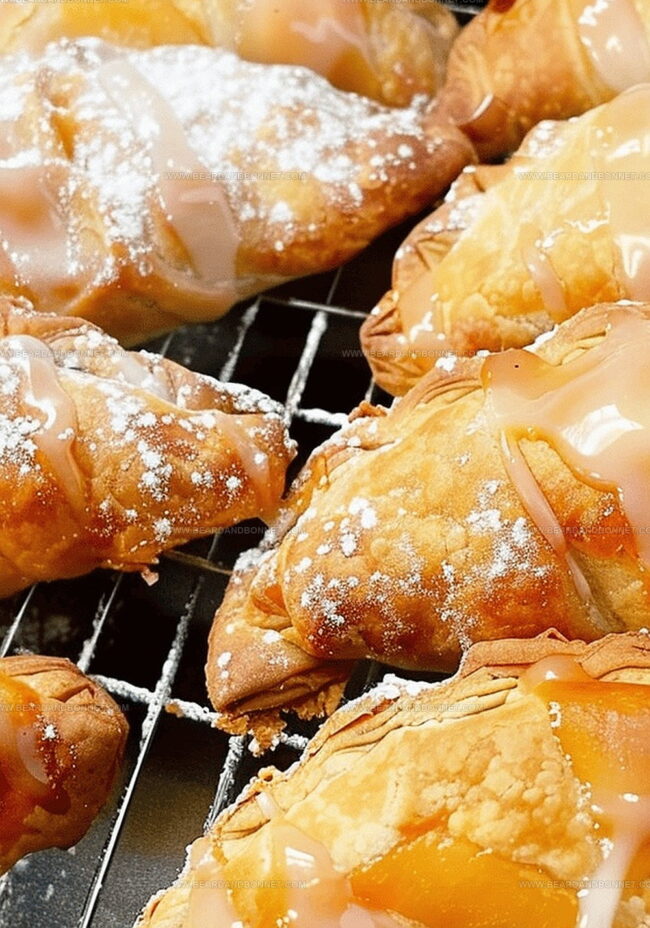
Dusted with powdered sugar, these little pockets of joy promise a delightful escape into pure, sweet indulgence.
Get ready to savor a taste of summer that will have everyone asking for seconds.
Quick Recipe Overview
Ingredients That Make Fried Peach Pies Truly Irresistible
For the Dough:For the Filling:For the Glaze:Tools to Fry and Fill Fried Peach Pies the Right Way
How to Prepare Golden Fried Peach Pies Step-by-Step
Roll out each biscuit into a circular shape using a rolling pin. Sprinkle flour if the dough becomes sticky.
Place sweet peach slices onto one half of each rolled dough circle. Carefully fold the dough over to create a half-moon shape.
Firmly press the edges of the pie with your fingers. Use a fork to crimp and seal the edges completely.
Arrange the hand pies on a parchment-lined tray. Freeze for 15 minutes to help maintain their shape during cooking.
Pour oil into a cast iron skillet. Heat to 350°F, creating the perfect frying environment.
Gently slide four pies into the hot oil. Cook until each side turns a beautiful golden brown, about 2-3 minutes per side.
Transfer the crispy pies onto a rack to let excess oil drip away. This keeps the exterior perfectly crunchy.
Mix powdered sugar with milk and almond extract. Drizzle the silky glaze over warm pies for a sweet touch.
Plate the golden, crispy hand pies while they’re still warm. Enjoy the delightful combination of crisp pastry and sweet peach filling.
Flavor Tweaks to Customize Fried Peach Pies
Serving Fried Peach Pies as a Sweet Southern Treat
How to Store Fried Peach Pies to Keep Them Crisp
Print
Heavenly Fried Peach Pies
- Total Time: 25 minutes
- Yield: 9 1x
Description
Southern fried peach pies deliver sweet summer memories with golden-brown pastry and luscious peach filling. Crisp edges and juicy centers make this classic dessert irresistible for home cooks seeking nostalgic comfort.
Ingredients
- 1 8 count can refrigerated grands biscuits
- 1 can (15 oz / 425 g) peaches, drained
- 1 cup powdered sugar
- ¼ cup (60 mL) milk
- ½ teaspoon pure almond extract
Instructions
- Preparation: Roll out biscuit dough into thin circles, lightly dusted with flour to prevent adhesion, ensuring smooth, even surfaces.
- Filling: Drain peach slices thoroughly, removing excess moisture to prevent soggy pockets.
- Assembly: Arrange peach slices on one half of each dough circle, then delicately fold over to create crescent-shaped hand pies, sealing edges meticulously by crimping with fingertips and reinforcing with fork tines.
- Chilling: Freeze assembled pies for 15 minutes to solidify structure and prevent filling leakage during frying.
- Frying: Heat vegetable oil to 350°F in a heavy skillet, carefully lowering four pies at a time without overcrowding, and fry until achieving a rich, deep golden-brown color, approximately 2-3 minutes per side, using metal tongs for precise turning.
- Draining: Transfer fried pies to a wire rack positioned over a lined baking sheet, allowing excess oil to drip away and maintaining crisp exterior.
- Glazing: Whisk powdered sugar, milk, and almond extract into a smooth, glossy glaze, then generously drizzle over slightly cooled pies.
- Serving: Present immediately while warm to maximize flavor intensity and textural contrast.
Notes
- Prep Surface Carefully: Dust work surface with flour to prevent sticky dough and ensure smooth rolling of biscuit circles.
- Drain Peaches Thoroughly: Remove excess liquid completely to prevent soggy pies and maintain crisp texture during frying.
- Maintain Oil Temperature: Keep oil consistently at 350°F for even golden-brown frying and prevent greasy or undercooked results.
- Cool Before Glazing: Allow pies to cool slightly before adding glaze to ensure proper setting and prevent runny appearance.
- Prep Time: 15 minutes
- Cook Time: 10 minutes
- Category: Desserts, Snacks
- Method: Frying
- Cuisine: Southern American
Nutrition
- Serving Size: 9
- Calories: 210
- Sugar: 9 g
- Sodium: 180 mg
- Fat: 10 g
- Saturated Fat: 2 g
- Unsaturated Fat: 8 g
- Trans Fat: 0 g
- Carbohydrates: 28 g
- Fiber: 1 g
- Protein: 3 g
- Cholesterol: 5 mg
Jessica Martin
Recipe Developer & Food Writer
Expertise
Recipe Development, Food Styling and Photography, Seasonal and Local Ingredients, Vegetarian and Vegan Cuisine, Culinary Education
Education
Portland Community College
Oregon Culinary Institute
Jessica Martin is a talented food writer and recipe creator who specializes in seasonal cooking and approachable home baking.
Educated at Portland Community College with additional pastry training from Oregon Culinary Institute, Jessica’s culinary journey spans nearly a decade of creating and sharing flavorful recipes.
Her deep appreciation for local ingredients shapes each of her recipes, making them both accessible and inspiring. At Beard and Bonnet, Jessica uses her cheerful, down-to-earth writing to help readers effortlessly bring new tastes and creative dishes into their daily routines.