Homemade Cannoli Cookie Cups Recipe: Sweet Italian Magic
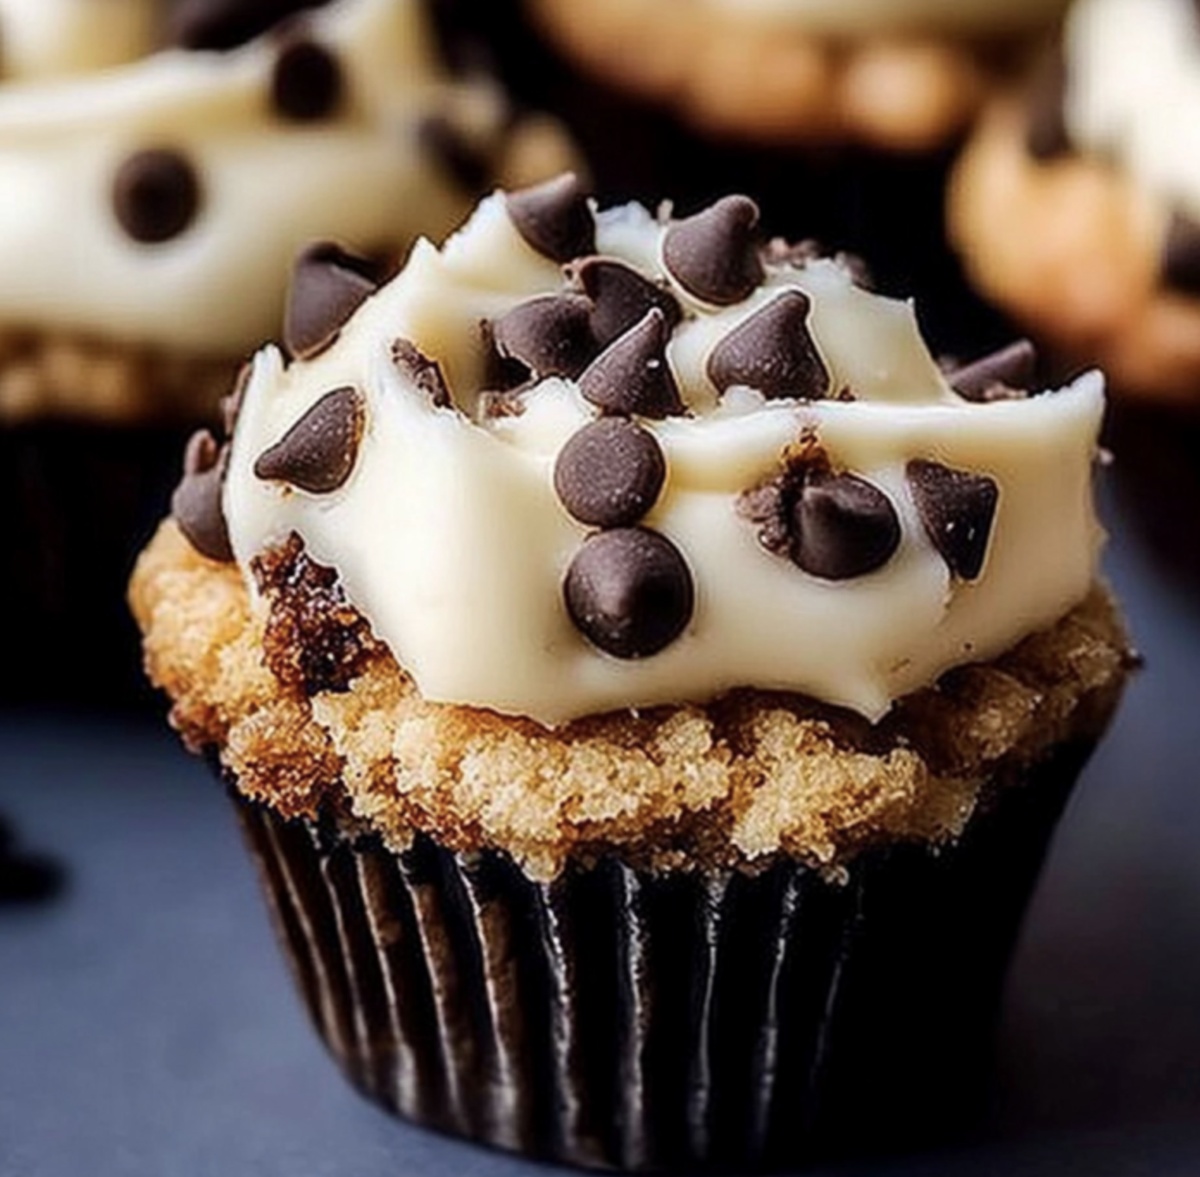
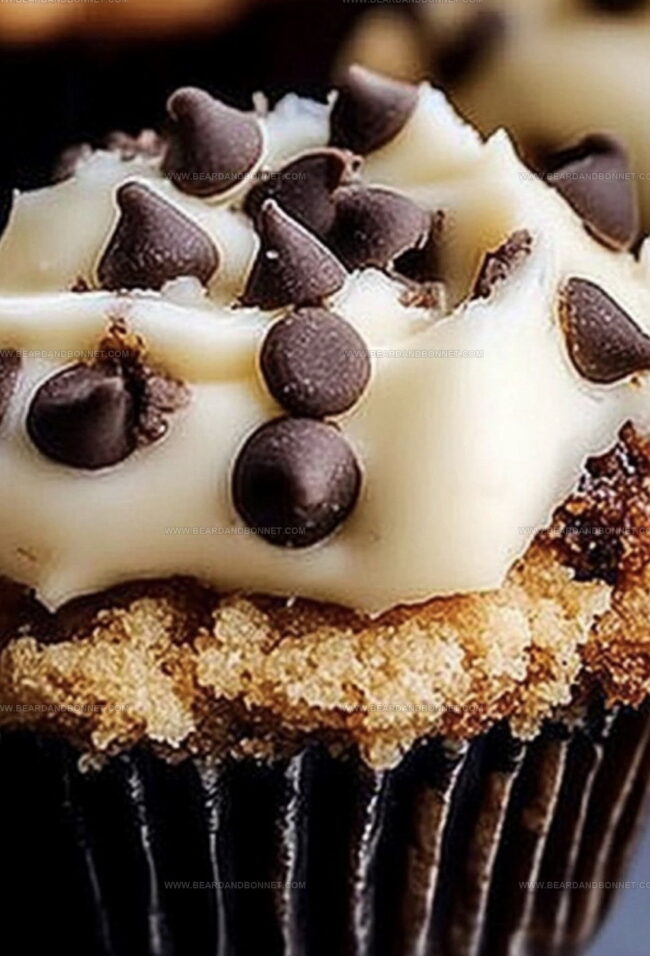
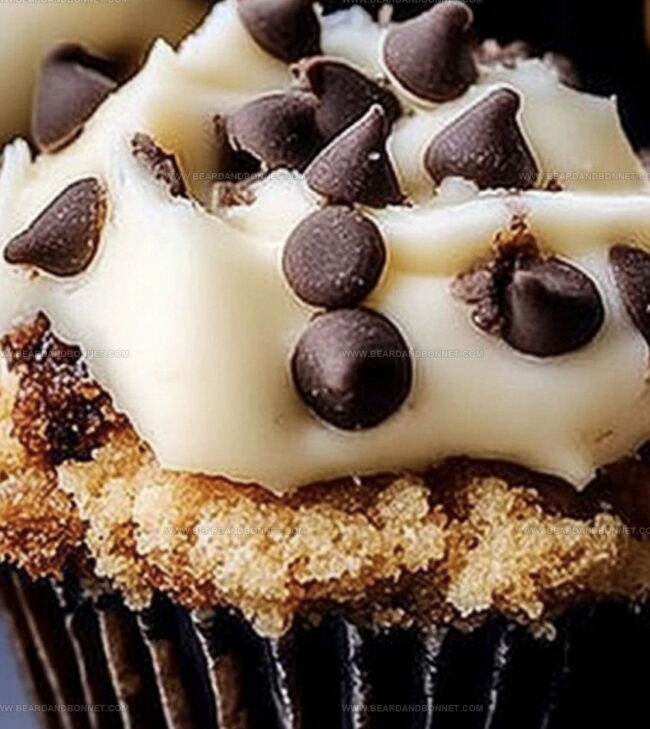
Creamy, rich ricotta fills these delightful cannoli cookie cups that blend traditional Italian dessert magic with modern baking charm.
Sweet pastry shells cradle a luscious filling inspired by classic cannoli flavors.
Crisp edges give way to a smooth, decadent center that melts in your mouth.
Chocolate chips and powdered sugar add an extra layer of indulgence to this irresistible treat.
Small enough for gatherings yet impressive enough for special occasions, these cookie cups promise to delight every palate.
Whip up a batch and watch as smiles spread around the table, celebrating the perfect marriage of cookie and cannoli.
Dive into this delectable dessert that brings a taste of Sicily right to your kitchen.
Quick Recipe Overview
Cannoli Cookie Cups Ingredient Breakdown
For Cookie Base:For Cannoli Filling:For Garnish:What You’ll Need For Cannoli Cookie Cups
How To Fill Cannoli Cookie Cups Easily
Mix soft butter with sugars until creamy. Add eggs and vanilla, blending smoothly. Combine flour, baking soda, salt, and cinnamon in another bowl. Gently fold dry ingredients into wet mixture until just incorporated.
Heat oven to 350F. Coat mini muffin tin with cooking spray. Create small dough balls, placing them inside each cup. Press centers gently to form little wells. Bake until edges turn golden, about 10-12 minutes. While warm, press centers again to maintain cup shape. Allow complete cooling in pan.
Whip ricotta and mascarpone until silky. Incorporate powdered sugar, vanilla, and orange zest. Fold in miniature chocolate chips. Chill filling for 30 minutes to set texture.
Carefully spoon or pipe cannoli mixture into cooled cookie cups. Sprinkle with extra chocolate chips or crushed pistachios. Optional powdered sugar dusting adds elegant touch.
Best enjoyed fresh. Can be stored in refrigerator for several hours before serving. Perfect for gatherings or sweet afternoon treats.
Creative Tips For Cannoli Cookie Cups
Serve Cannoli Cookie Cups In Style
Smart Storage For Cannoli Cookie Cups
Print
Heavenly Cannoli Cookie Cups Recipe
- Total Time: 42 minutes
- Yield: 23 1x
Description
Cannoli cookie cups blend Sicily’s beloved dessert with American baking traditions. Crisp pastry shells cradle rich ricotta filling, offering a delightful twist you’ll savor with each delectable bite.
Ingredients
- 2 ¼ cups (280 g) all-purpose flour
- 1 cup (225 g) unsalted butter, softened
- 2 large eggs
- ¾ cup (150 g) granulated sugar
- ½ cup (100 g) light brown sugar, packed
- ½ cup (60 g) powdered sugar
- 1 cup (250 g) ricotta cheese, drained
- ½ cup (120 g) mascarpone cheese
- ⅓ cup (60 g) mini chocolate chips
- 1 tsp vanilla extract
- ½ tsp baking soda
- ½ tsp salt
- ½ tsp ground cinnamon
- ½ tsp orange zest (optional)
- Mini chocolate chips (for garnish)
- Chopped pistachios (for garnish)
- Powdered sugar (for dusting)
Instructions
- Prepare Cookie Base: Cream butter with sugars until fluffy, then blend in eggs and vanilla extract into a smooth, homogeneous mixture.
- Combine Dry Ingredients: Sift flour, baking soda, salt, and cinnamon, then gently incorporate into the sugar mixture to create a consistent dough.
- Form and Bake Cookie Cups: Preheat oven to 350F (175C), spray mini muffin tin with cooking spray. Roll dough into small balls, place in tin cavities, and create thumb indentations to form cup shapes.
- Bake and Shape Cookies: Bake for 10-12 minutes until edges turn golden brown. Immediately upon removal, reinforce cup shape by pressing centers again. Allow to cool completely in the tin.
- Craft Cannoli Filling: Whip ricotta and mascarpone with powdered sugar, vanilla extract, and orange zest until achieving a silky smooth texture. Fold in mini chocolate chips and refrigerate to set.
- Assemble and Garnish: Fill cooled cookie cups with chilled cannoli cream using a piping bag or spoon. Decorate with additional chocolate chips, chopped pistachios, or a light dusting of powdered sugar.
- Serve and Store: Present immediately or refrigerate briefly to maintain optimal flavor and presentation.
Notes
- Prevent Dough Overworking: Mix flour mixture gently into wet ingredients to maintain a tender, soft cookie cup texture without developing tough gluten strands.
- Master Thumb Indentation: Create cup shape carefully when pressing centers, ensuring uniform depth and width for consistent filling capacity and elegant presentation.
- Cooling Technique: Let cookie cups completely cool inside muffin tin to preserve structural integrity and prevent cracking or breaking during removal.
- Temperature Control for Filling: Chill cannoli cream mixture before piping to enhance flavor complexity and achieve optimal spreadable consistency for smooth, elegant filling.
- Prep Time: 20 minutes
- Cook Time: 12 minutes
- Category: Desserts, Snacks
- Method: Baking
- Cuisine: Italian
Nutrition
- Serving Size: 23
- Calories: 210
- Sugar: 11 g
- Sodium: 80 mg
- Fat: 12 g
- Saturated Fat: 7 g
- Unsaturated Fat: 3 g
- Trans Fat: 0 g
- Carbohydrates: 24 g
- Fiber: 1 g
- Protein: 2 g
- Cholesterol: 40 mg
Jessica Martin
Recipe Developer & Food Writer
Expertise
Recipe Development, Food Styling and Photography, Seasonal and Local Ingredients, Vegetarian and Vegan Cuisine, Culinary Education
Education
Portland Community College
Oregon Culinary Institute
Jessica Martin is a talented food writer and recipe creator who specializes in seasonal cooking and approachable home baking.
Educated at Portland Community College with additional pastry training from Oregon Culinary Institute, Jessica’s culinary journey spans nearly a decade of creating and sharing flavorful recipes.
Her deep appreciation for local ingredients shapes each of her recipes, making them both accessible and inspiring. At Beard and Bonnet, Jessica uses her cheerful, down-to-earth writing to help readers effortlessly bring new tastes and creative dishes into their daily routines.