
Speedy No-Yeast Naan Bread Recipe: Gluten & Dairy-Free Delight
Bread lovers rejoice as this easy gluten free naan bread recipe breaks all traditional baking rules.
Gone are the days of complicated yeast-based preparations or hard-to-find ingredients.
We’ve crafted a simple, foolproof method that delivers soft, pillowy naan without gluten, yeast, or dairy.
The secret lies in combining just a few pantry staples to create a delightful flatbread that rivals restaurant versions.
Each bite promises a tender texture and authentic flavor that will have everyone asking for seconds.
Whether you’re managing dietary restrictions or simply seeking a delicious alternative, this naan will become your new go-to bread companion.
Dive into this delectable recipe and transform your meal with a side that’s both wholesome and irresistible.
Quick Recipe Overview
Ingredients for Gluten-Free Naan That Actually Works
For The Base Flour:For Leavening And Seasoning:For Moisture And Binding:For Optional Flavor Boosters:Tools That Help You Roll Flatbread Easily
How to Cook Naan on the Stove or Pan
Simple Gluten Free Flatbread
Gather your gluten-free flour mix and essential dry ingredients in a mixing bowl. Select a blend that guarantees smooth texture and delightful taste.
Create a silky wet mixture using eggs, warm liquid, and smooth oil. Combine ingredients until they dance together seamlessly.
Merge wet and dry components gently, forming a soft, flexible dough. Adjust consistency by adding small amounts of liquid or flour as needed.
Divide the dough into equal segments. Delicately press each portion into thin, rustic circles using gentle finger movements.
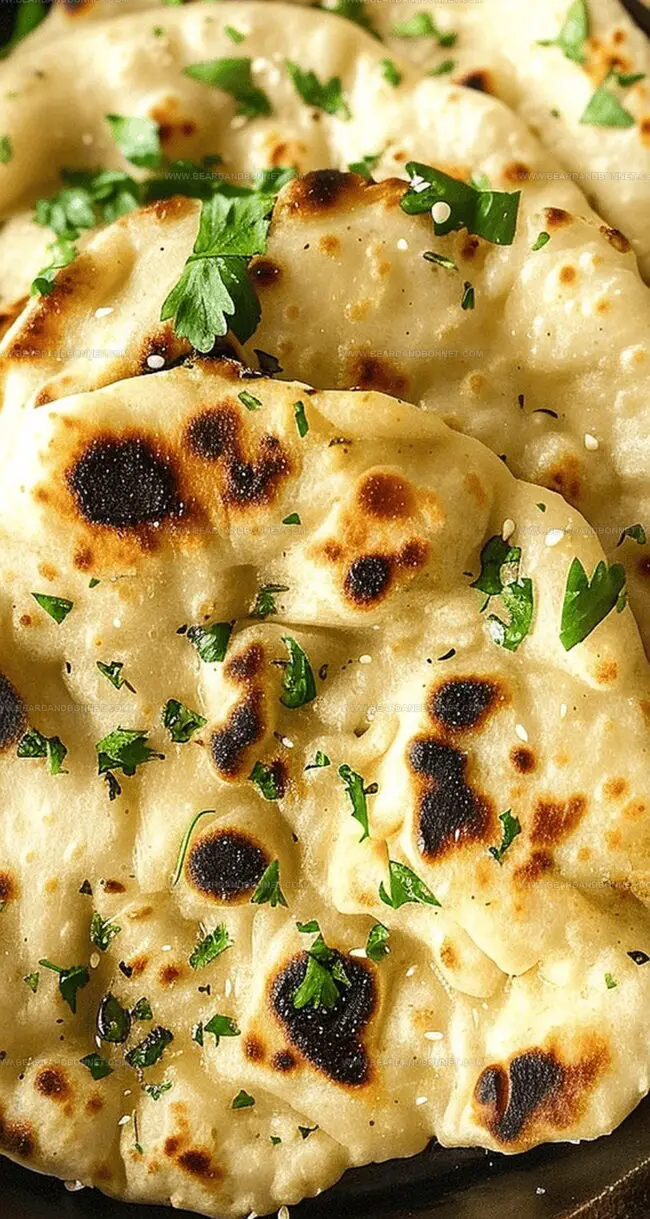
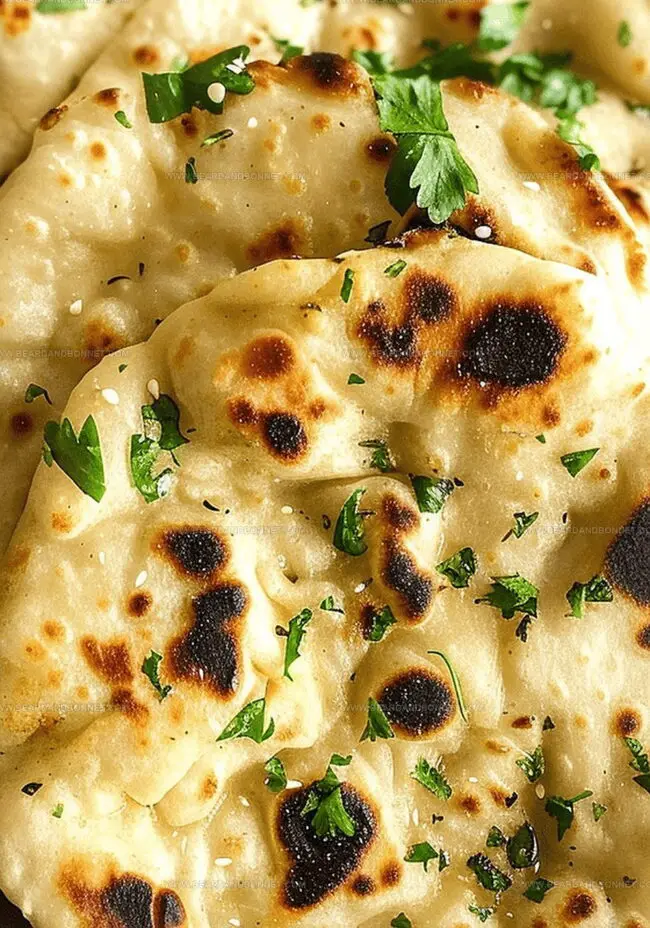
Sprinkle minced garlic and fresh herbs across the surface for an aromatic twist that elevates the flavor profile.
Heat a heavy pan until it radiates intense warmth. Brush with a light coating of oil to prevent sticking.
Cook each flatbread until gorgeous golden spots appear. Flip carefully to ensure even browning on both sides.
Stack the warm flatbreads and serve immediately, inviting everyone to enjoy their fresh, homemade creation.
Ideas to Customize Your Dough Texture or Flavor
Serve Gluten-Free Naan with Curry or Dip
Store It Warm or Refrigerated for Later Meals
Print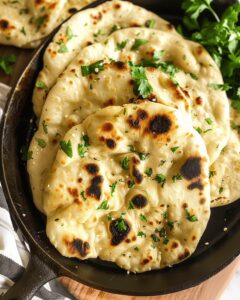
Effortless Gluten Free Naan Bread
- Total Time: 18 minutes
- Yield: 5 1x
Description
Quick Indian-style naan bread blends simple ingredients for a gluten-free flatbread miracle. Crisp edges and tender center invite you to savor each delicious bite alongside your favorite curry or dip.
Ingredients
- 1 cup (240 ml) gluten-free all-purpose flour
- ½ cup (120 ml) tapioca starch
- 2 tsps baking powder
- 1 egg
- ¼ cup (60 ml) warm water
- ½ tsp xanthan gum
- 1 tsp salt
- 1 tbsp extra virgin olive oil
- ¼ cup (60 ml) fresh minced garlic
- ¼ cup (60 ml) fresh chopped parsley
Instructions
- Preparation: Thoroughly combine gluten-free flour, xanthan gum, tapioca starch, baking powder, and salt in a large mixing bowl, ensuring even distribution of dry ingredients.
- Liquid Integration: Vigorously whisk egg, warm liquid, and olive oil until completely blended, creating a smooth, homogeneous mixture.
- Dough Formation: Gradually merge liquid components with dry ingredients, kneading consistently to develop a pliable, elastic dough. Modulate texture by incrementally adding warm water or tapioca starch as required.
- Shaping and Seasoning: Dust hands with gluten-free flour, divide dough into eight symmetrical wedges. Gently flatten each section to achieve a delicate, translucent consistency. Infuse with minced garlic and chopped parsley by pressing aromatics onto both dough surfaces.
- Cooking Process: Heat cast iron skillet on high, lightly coating with olive oil. Place dough piece into sizzling pan, allowing 40 seconds for bubble formation and caramelized bottom. Brush exposed surface with olive oil, then rapidly flip to cook opposite side for equivalent time.
- Serving: Transfer completed naan to a covered surface to preserve warmth and moisture. Repeat cooking procedure for remaining dough segments. Present immediately to maintain optimal temperature and textural qualities.
Notes
- Flour Fusion: Blend dry ingredients thoroughly to prevent clumping and ensure even distribution of gluten-free flour and leavening agents.
- Moisture Magic: Adjust liquid ingredients gradually to achieve perfect dough consistency, preventing dryness or excessive stickiness.
- Garlic Infusion: Gently press herb and garlic mixture into dough surface for maximum flavor penetration and aromatic enhancement.
- Heat Management: Use cast iron skillet on high heat for authentic charred edges and crispy texture, watching carefully to avoid burning.
- Prep Time: 10 minutes
- Cook Time: 8 minutes
- Category: Snacks, Dinner
- Method: Frying
- Cuisine: Indian
Nutrition
- Serving Size: 5
- Calories: 180
- Sugar: 1 g
- Sodium: 300 mg
- Fat: 6 g
- Saturated Fat: 1 g
- Unsaturated Fat: 5 g
- Trans Fat: 0 g
- Carbohydrates: 28 g
- Fiber: 2 g
- Protein: 4 g
- Cholesterol: 30 mg
Jessica Martin
Recipe Developer & Food Writer
Expertise
Recipe Development, Food Styling and Photography, Seasonal and Local Ingredients, Vegetarian and Vegan Cuisine, Culinary Education
Education
Portland Community College
Oregon Culinary Institute
Jessica Martin is a talented food writer and recipe creator who specializes in seasonal cooking and approachable home baking.
Educated at Portland Community College with additional pastry training from Oregon Culinary Institute, Jessica’s culinary journey spans nearly a decade of creating and sharing flavorful recipes.
Her deep appreciation for local ingredients shapes each of her recipes, making them both accessible and inspiring. At Beard and Bonnet, Jessica uses her cheerful, down-to-earth writing to help readers effortlessly bring new tastes and creative dishes into their daily routines.