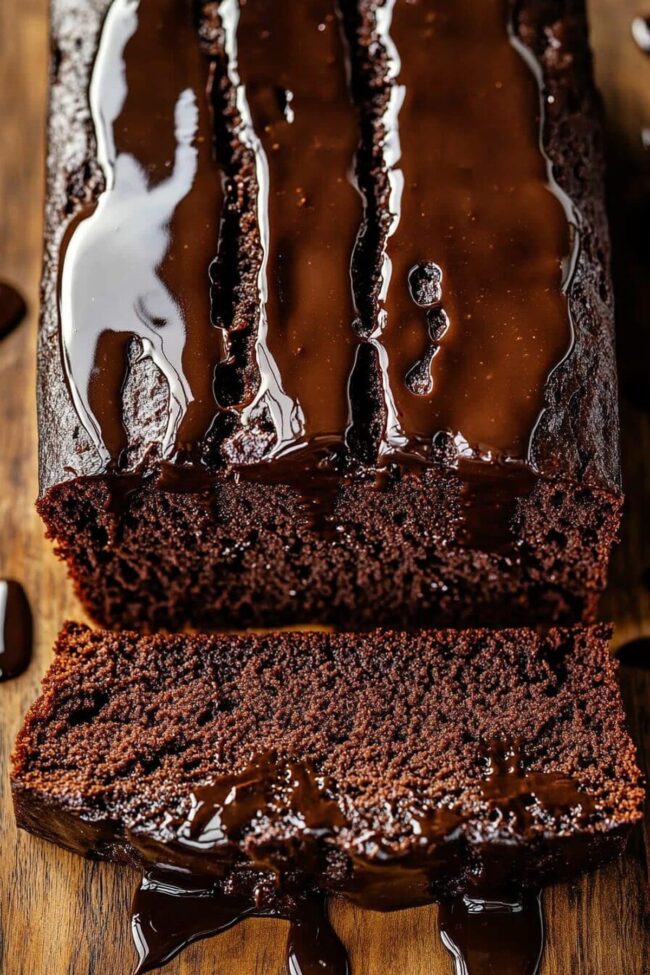
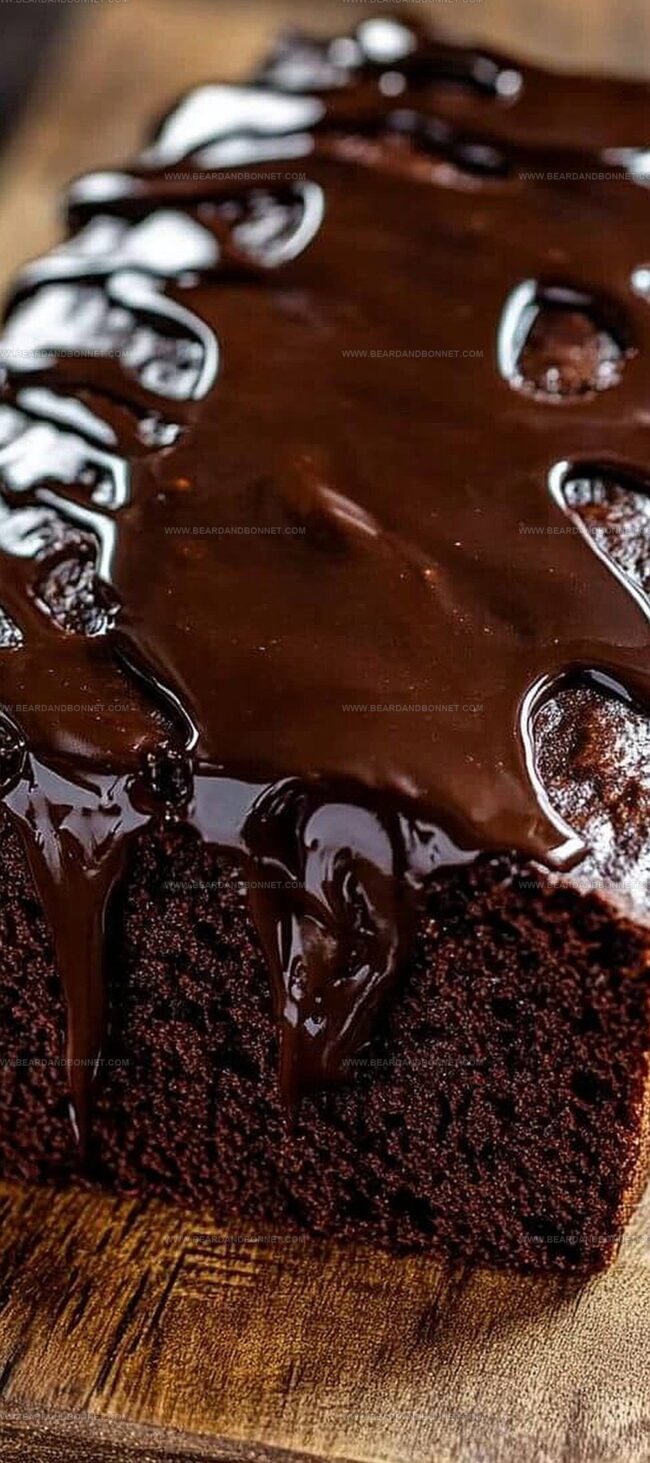
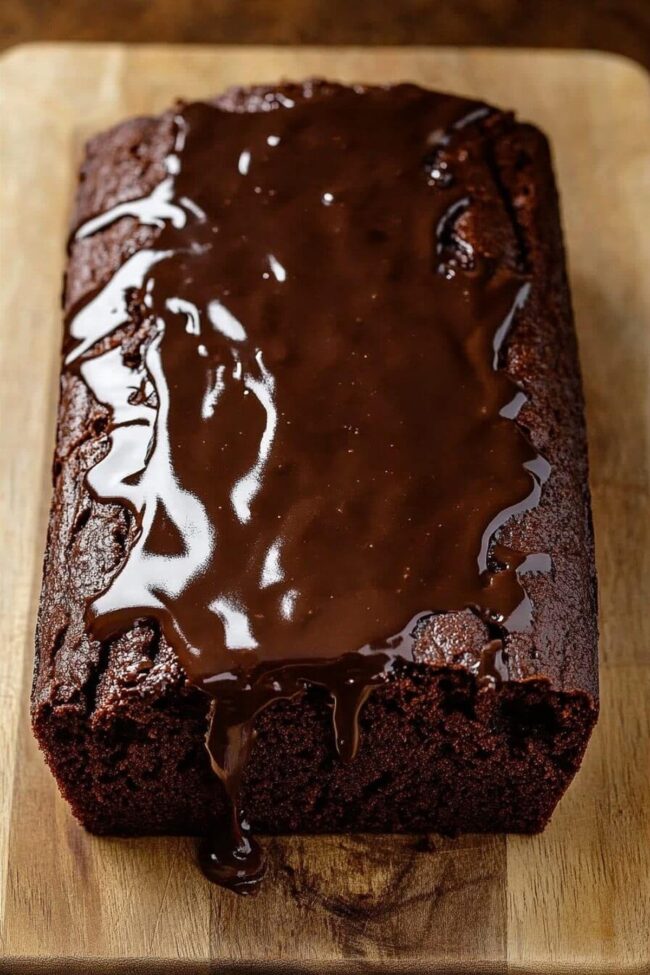
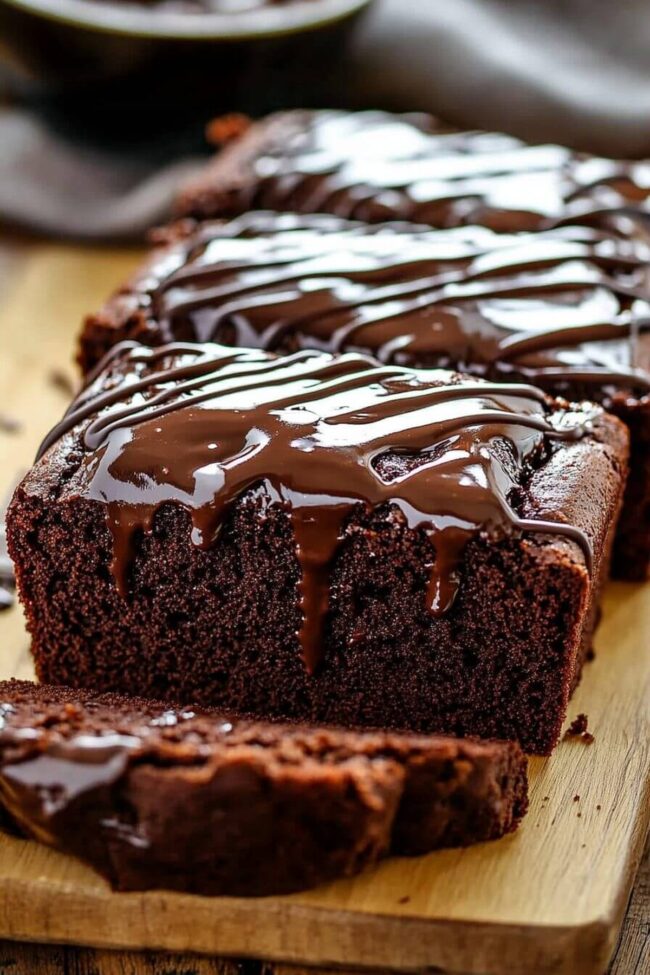
Warm, gooey chocolate fills the kitchen with an irresistible aroma when you bake this decadent brownie bread that combines two beloved desserts into one irresistible treat.
Rich chocolate lovers will fall head over heels for this incredible mashup of textures and flavors.
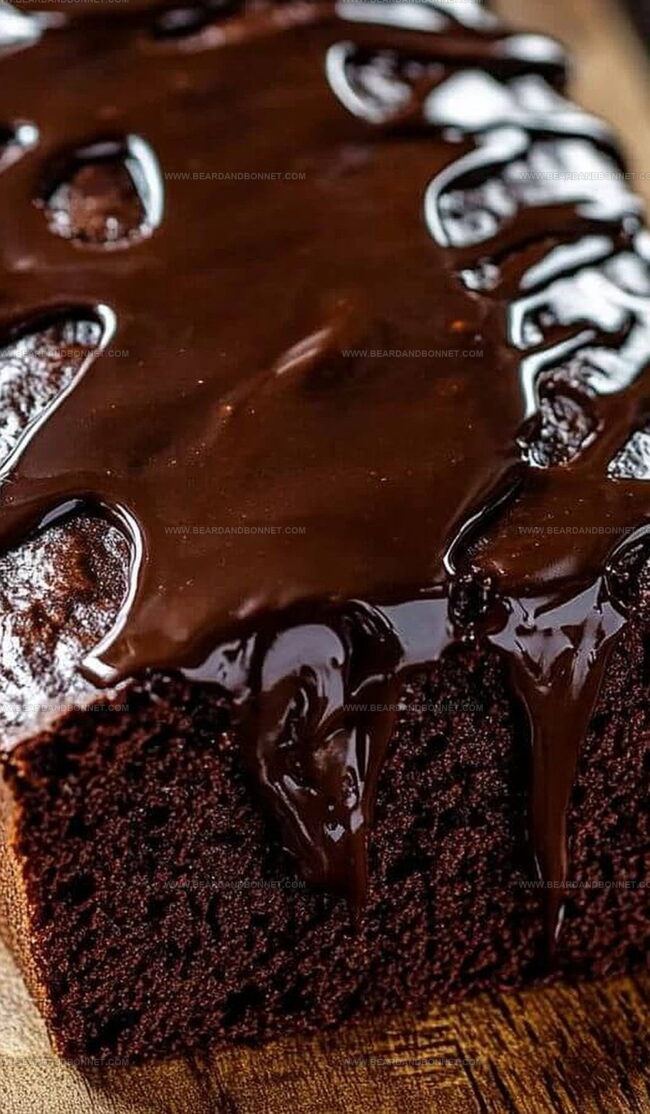
Every slice promises a dense, moist experience that blends the best qualities of classic brownies with soft, tender bread.
The recipe delivers a perfect balance between fudgy indulgence and bakery-style comfort.
Chocolate chips nestled throughout add delightful bursts of intense sweetness that elevate each bite.
This dessert works brilliantly for casual gatherings or as a special weekend baking project.
Dive into this delectable creation and savor every single chocolatey moment.
Quick Recipe Overview
Prep Time: 15 minutes
Cook Time: 55 minutes
Total Time: 1 hour 10 minutes
Calories: 320 kcal
Servings: 9
Ingredient Essentials for Brownie Bread
For Dry Ingredients:
All-Purpose Flour: Provides structure and helps bind the brownie bread together, choose unbleached flour for better texture.
Cocoa Powder: Delivers rich chocolate flavor, opt for Dutch-processed for deeper color and smoother taste.
Baking Powder: Ensures light and fluffy texture, check freshness by testing its rising capability.
Salt: Enhances overall flavor and balances sweetness, use fine-grain table salt for even distribution.
For Wet Ingredients:
Unsalted Butter: Adds moisture and richness, melt carefully to prevent burning.
Granulated Sugar: Sweetens and helps create golden-brown crust, white sugar works best for consistent results.
Brown Sugar: Introduces deep caramel notes and keeps bread moist, darker varieties offer more intense flavor.
Eggs: Bind ingredients and provide structure, use room temperature eggs for smoother mixing.
Vanilla Extract: Amplifies chocolate flavor, pure vanilla extract delivers superior taste compared to artificial versions.
For Optional Mix-Ins:
Milk or Buttermilk: Adds tenderness and helps activate leavening agents, buttermilk provides tangier taste.
Chocolate Chips: Creates delightful chocolate pockets, semi-sweet chips work wonderfully for balanced sweetness.
Brownie Bread – Tools You’ll Use
Loaf pan (9×5-inch): Essential for shaping and baking the brownie bread.
Mixing bowls (medium and large): Perfect for combining dry and wet ingredients separately.
Whisk: Ideal for blending dry ingredients and creating smooth mixtures.
Measuring cups and spoons: Crucial for accurate ingredient measurements.
Electric mixer or wooden spoon: Helps beat and mix ingredients thoroughly.
Toothpick or cake tester: Helps check if the bread is fully baked.
Wire rack: Great for cooling the bread after baking.
Spatula: Useful for folding ingredients and spreading batter evenly.
How to Bake Brownie Bread from Scratch
Chocolate Dream Loaf
Oven Warmup Cozy kitchen vibes start with preheating your oven and preparing a loaf pan with a light butter coating or parchment paper protection.
Dry Ingredient Magic Blend cocoa’s rich darkness with flour, creating a powdery canvas that will transform into a decadent dessert. Whisking helps eliminate pesky lumps.
Wet Ingredient Harmony Melt butter into a silky pool, then welcome sugars for a sweet dance. Eggs and vanilla join the party, creating a luxurious mixture that promises incredible flavor.
Batter Fusion Gently marry dry and wet ingredients, allowing them to intertwine without overmixing. Chocolate morsels can sneak in for extra indulgence if desired.
Baking Adventure Pour the velvety batter into the prepared pan, sending it into the warm oven’s embrace. Watch as golden edges form and a rich aroma fills your kitchen.
Cooling Ritual Allow the loaf to rest peacefully in the pan, then transfer to a wire rack. Patience rewards you with perfectly sliceable chocolate heaven.
Extra Tips for Brownie Bread Perfection
Baking Brilliance: Transform this brownie bread with expert tips that elevate your baking game.
Chocolate Chip Magic: Swap semi-sweet chips for dark, milk, or white chocolate varieties to create unique flavor profiles that match your mood.
Nutty Twist: Fold in chopped walnuts, pecans, or almonds for added crunch and depth, bringing delightful texture to every slice of bread.
Moisture Mastery: Replace milk with sour cream or Greek yogurt to ensure an incredibly moist and tender crumb that stays fresh longer.
Gluten-Free Option: Substitute all-purpose flour with a gluten-free blend for those with dietary restrictions, maintaining the rich chocolate essence of the original recipe.
Brownie Bread Serving Styles
Decadent Dessert Companion: Top a warm slice with a scoop of vanilla bean ice cream for a heavenly chocolate experience that melts beautifully.
Sweet Breakfast Twist: Transform this bread into a morning treat by spreading creamy peanut butter or rich Nutella across each slice for an indulgent start to your day.
Elegant Coffee Pairing: Serve thin slices alongside a steaming cappuccino or espresso, creating a sophisticated breakfast or afternoon snack that highlights the bread’s deep chocolate notes.
Festive Garnish Delight: Dust the cooled loaf with powdered sugar or drizzle with melted chocolate ganache, adding a touch of elegance and extra sweetness to each delectable slice.
How to Store Brownie Bread Properly
Quick Refrigeration Magic: Store the brownie bread wrapped tightly in plastic wrap or aluminum foil in the refrigerator for up to 5 days, maintaining its delicious moisture and rich chocolate flavor.
Freezing Friendly Technique: Slice the bread before freezing, then place individual portions in freezer-safe bags. Frozen slices will stay fresh for 2-3 months, perfect for quick snacking or unexpected guests.
Room Temperature Sweet Spot: Keep the bread at room temperature in an airtight container for 2-3 days, ensuring it remains soft and delectable without losing its incredible texture.
Moisture-Locking Pro Tip: Place a slice of bread or paper towel alongside the stored brownie bread to prevent drying, helping maintain its perfectly moist crumb and irresistible taste.
Indulgent brownie bread merges chocolate lover’s dreams with classic quick bread perfection. Rich chocolate layers create a dense, moist experience you’ll crave again and again.
Ingredients
Scale
1 cup granulated sugar
½ cup brown sugar (packed)
2 large eggs
1 cup all-purpose flour
½ cup cocoa powder
½ cup unsalted butter (melted)
½ cup milk or buttermilk
1 tsp vanilla extract
1 tsp baking powder
½ tsp salt
1 cup chocolate chips (optional)
Instructions
Prep Pan: Grease a 9×5-inch loaf pan with butter and dust with flour, or line with parchment paper for seamless removal.
Dry Ingredient Fusion: Sift flour, cocoa powder, baking powder, and salt together, ensuring a lump-free, homogeneous blend that will contribute to a velvety texture.
Wet Ingredient Harmony: Whisk melted butter with granulated and brown sugars until the mixture transforms into a silky, glossy consistency that promises rich flavor depth.
Binding Elements: Integrate eggs and vanilla extract into the sugar mixture, creating a luxurious, well-emulsified base that will provide structure and moisture to the bread.
Batter Creation: Gently fold dry ingredients into the wet mixture, alternating with milk or buttermilk, maintaining an airy, smooth batter that promises a tender crumb.
Chocolate Enhancement: Delicately fold chocolate chips throughout the batter, ensuring even distribution for surprising bursts of chocolatey indulgence in every slice.
Baking Transformation: Pour the batter into the prepared pan, leveling the surface to guarantee uniform baking and an aesthetically pleasing final product.
Oven Magic: Bake in a preheated 350°F (175°C) oven for 50-60 minutes, using the toothpick test to confirm perfect doneness – a clean pick indicates the bread is ready.
Cooling Ritual: Let the loaf rest in the pan for 10 minutes, allowing it to set, then transfer to a wire rack to cool completely, preserving its delicate internal structure.
Notes
Butter Pan Trick: Use parchment paper for guaranteed easy removal and picture-perfect slices without sticking.
Sifting Secrets: Never skip sifting dry ingredients to eliminate cocoa powder and flour lumps, ensuring a silky smooth texture.
Mixing Magic: Whisk wet ingredients thoroughly to create a uniform base, preventing uneven sugar distribution and potential clumping.
Chocolate Chip Strategy: Lightly coat chocolate chips in flour before folding to prevent sinking during baking, guaranteeing chocolate in every bite.
Recipe Development, Food Styling and Photography, Seasonal and Local Ingredients, Vegetarian and Vegan Cuisine, Culinary Education
Education
Portland Community College
Degree: Associate of Applied Science in Culinary Arts
Focus: Comprehensive training in culinary techniques, kitchen management, and food safety. Gained hands-on experience in preparing diverse cuisines and understanding flavor profiles
Oregon Culinary Institute
Program: Baking and Pastry Certificate
Focus: Specialized education in baking fundamentals, pastry arts, and dessert presentation. Emphasized creativity and precision in crafting baked goods.
Jessica Martin is a talented food writer and recipe creator who specializes in seasonal cooking and approachable home baking.
Educated at Portland Community College with additional pastry training from Oregon Culinary Institute, Jessica’s culinary journey spans nearly a decade of creating and sharing flavorful recipes.
Her deep appreciation for local ingredients shapes each of her recipes, making them both accessible and inspiring. At Beard and Bonnet, Jessica uses her cheerful, down-to-earth writing to help readers effortlessly bring new tastes and creative dishes into their daily routines.


Jessica Martin
Recipe Developer & Food Writer
Expertise
Recipe Development, Food Styling and Photography, Seasonal and Local Ingredients, Vegetarian and Vegan Cuisine, Culinary Education
Education
Portland Community College
Oregon Culinary Institute
Jessica Martin is a talented food writer and recipe creator who specializes in seasonal cooking and approachable home baking.
Educated at Portland Community College with additional pastry training from Oregon Culinary Institute, Jessica’s culinary journey spans nearly a decade of creating and sharing flavorful recipes.
Her deep appreciation for local ingredients shapes each of her recipes, making them both accessible and inspiring. At Beard and Bonnet, Jessica uses her cheerful, down-to-earth writing to help readers effortlessly bring new tastes and creative dishes into their daily routines.