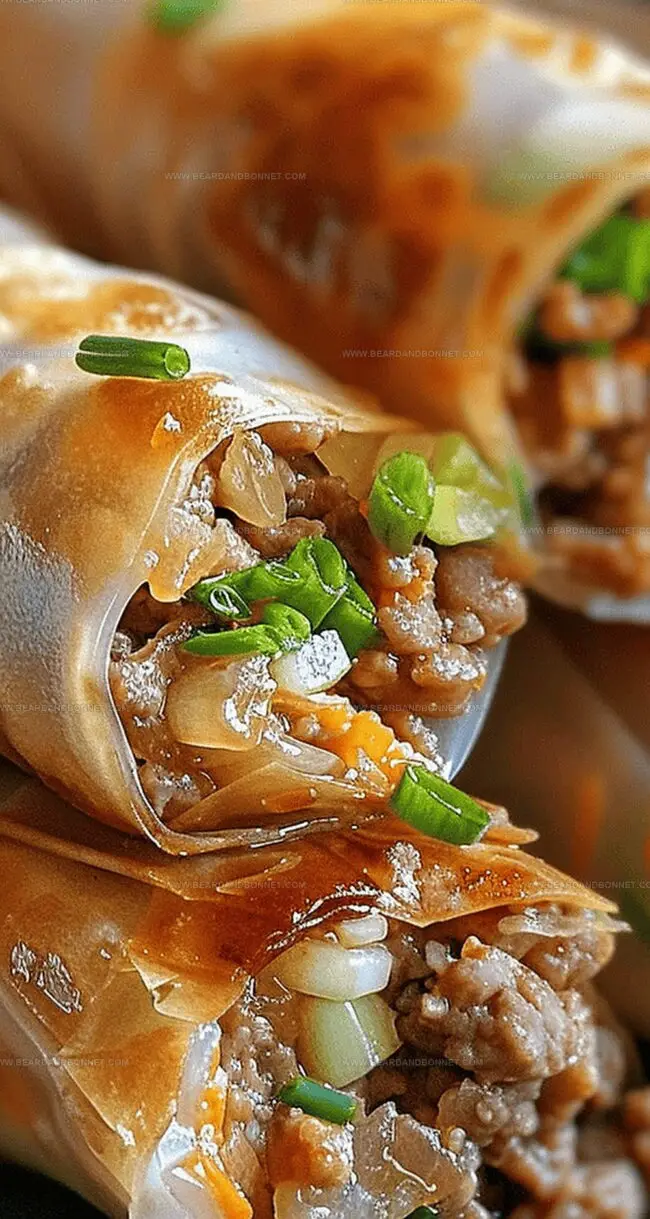
Sizzling and golden, these crispy lumpia deliver a burst of Filipino street food magic right to your plate.
Packed with a savory lumpia delight recipe that captures the essence of traditional flavors, these hand-rolled parcels promise an explosion of taste in every bite.
The delicate wrapper cradles a perfect blend of seasoned meat and vibrant vegetables.
Generations of cooks have perfected this beloved dish, passing down techniques that make each lumpia a culinary treasure.
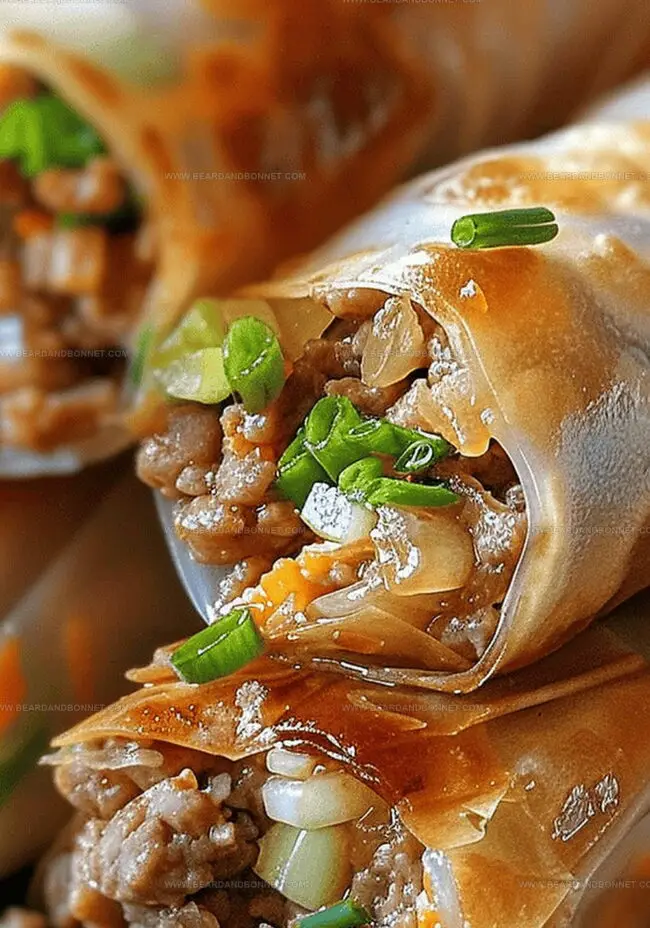
Crisp, light, and irresistibly delicious, these rolls are more than just an appetizer – they’re a celebration of Filipino culinary artistry.
Dive into this recipe and transport your taste buds to the bustling streets of Manila with every crunchy, flavor-packed bite.
Quick Recipe Overview
Prep Time: 20 minutes
Cook Time: 10 minutes
Total Time: 30 minutes
Calories: 360 kcal
Servings: 5
Lumpia Ingredient Essentials
For Meat and Protein:
Ground Pork or Beef: Provides rich, savory base for filling, choose fresh, lean meat with good fat content for juicy texture.
For Vegetables and Aromatics:
Onion, Garlic: Builds deep, aromatic flavor foundation, select firm onions and fresh garlic for maximum taste punch.
Carrots, Green Beans: Adds vibrant color and nutritional boost, pick crisp, bright-colored vegetables for best crunch and sweetness.
For Seasoning and Binding:
Soy Sauce: Delivers umami depth and saltiness, opt for authentic Asian brands for genuine flavor profile.
Sugar: Balances savory notes and helps create golden caramelization, use white or brown sugar based on preference.
Black Pepper, Salt: Enhances overall seasoning, freshly ground black pepper provides more intense flavor.
For Wrapping and Frying:
Lumpia Wrappers: Creates crispy exterior shell, choose thin, flexible wrappers that won’t crack during rolling.
Vegetable Oil: Enables perfect golden-brown frying, use neutral oil with high smoke point for consistent results.
Lumpia Equipment Checklist
Large pan: Essential for cooking meat and sautéing vegetables with even heat distribution.
Cutting board: Needed for chopping onions, garlic, carrots, and green beans safely.
Sharp knife: Crucial for precise and clean vegetable and ingredient preparation.
Wooden spoon or spatula: Perfect for stirring and mixing ingredients while cooking.
Paper towels: Helps drain excess oil from fried lumpia, keeping them crisp.
Deep pan or fryer: Necessary for achieving golden, crispy lumpia with proper oil depth.
Measuring tablespoon: Helps portion filling accurately for consistent lumpia size.
Making Lumpia in Your Kitchen
Lumpia Magic
Meat Preparation Sizzle up ground pork or beef in a large pan with a splash of oil until it transforms into a rich, golden brown masterpiece.
Flavor Explosion Toss in aromatic onions and garlic, letting them dance and release their enticing fragrance. Quickly follow with crisp carrots and tender green beans, stirring them into a vibrant medley.
Seasoning Symphony Drizzle in soy sauce, sprinkle some sugar, and add a whisper of black pepper and salt. Let the mixture simmer and mingle, developing deep, complex flavors.
Wrapper Artistry Spread out delicate lumpia wrappers and lovingly cradle a generous spoonful of the cooled filling near the edge of each sheet.
Rolling Technique Carefully wrap and fold each lumpia, creating tight little parcels that promise a crispy, delicious surprise.
Golden Fry Bath Submerge the lumpia in bubbling hot oil, watching them transform into golden-brown treasures of crunchiness. Once they reach perfect crispy perfection, rescue them onto paper towels to drain.
Helpful Ideas to Customize Lumpia
Flavor Boosters: Experiment with different protein options like ground chicken, shrimp, or even tofu for a unique twist on traditional lumpia. Each protein brings its own delightful flavor profile to the dish.
Sauce Sensations: Create a quick dipping sauce by mixing sweet chili sauce, vinegar, soy sauce, and a touch of minced garlic. This tangy companion elevates the crispy lumpia’s taste to new heights.
Freezer-Friendly Hack: Prepare extra lumpia rolls and freeze them uncooked on a baking sheet. Once frozen, transfer to a sealed bag for quick future meals. Fry directly from frozen, adding just an extra minute to cooking time.
Veggie Power-Up: Sneak in extra vegetables like bean sprouts, finely chopped cabbage, or mushrooms to boost nutrition and add exciting texture to the filling. Chop them super fine so they blend seamlessly into the mixture.
Make-Ahead Magic: Prepare the filling a day in advance and store in the refrigerator. This technique allows flavors to meld and makes assembly faster when you’re ready to cook. The filling stays fresh and becomes even more delicious overnight.
Serving Lumpia the Smart Way
Flavor Explosion Plating: Arrange golden-brown lumpia on a vibrant platter with a zigzag drizzle of sweet chili sauce, creating an eye-catching presentation that makes mouths water instantly.
Dipping Sauce Fiesta: Prepare a trio of complementary dipping sauces – classic sweet chili, tangy vinegar with chopped garlic, and spicy sriracha mayo – allowing guests to customize their lumpia experience with exciting flavor combinations.
Fresh Garnish Boost: Sprinkle finely chopped green onions, cilantro, and toasted sesame seeds over the lumpia to add fresh texture, color, and an extra layer of aromatic complexity that elevates the entire dish.
Party Starter Platter: Create a social dining experience by serving lumpia as an interactive appetizer, placing them on a large wooden board with multiple dipping sauces, encouraging guests to sample and share these crispy delights.
Storing Lumpia with Care
Smart Storage Solutions: Refrigerate leftover lumpia in an airtight container for up to 3 days, keeping them crisp and delicious.
Freezing Master Plan: Wrap uncooked rolled lumpia individually in plastic wrap, then store in freezer bags for convenient future meals. They’ll stay fresh for 2-3 months.
Reheating Tricks: Revive refrigerated lumpia in an air fryer or oven at 375°F for 5-7 minutes to restore their original crunchiness. Avoid microwave to maintain crispy texture.
Prep-Ahead Strategy: Assemble lumpia rolls in advance and store them uncooked in the refrigerator for up to 24 hours. This allows for quick cooking when unexpected guests arrive or during busy weeknights.
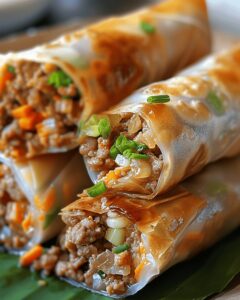
Filipino lumpia delight wraps fresh ingredients in delicate pastry, creating a crispy appetizer that celebrates Philippines’ culinary traditions. Crisp wrappers and savory fillings invite you to savor each delectable bite of this classic street snack.
Ingredients
Scale
1 lb (453 g) ground pork or beef
1 pack lumpia wrappers (spring roll wrappers)
1 onion, finely chopped
2 cloves garlic, minced
½ cup (60 g) carrots, finely shredded
½ cup (75 g) green beans, finely chopped
¼ cup (60 ml) soy sauce
1 tbsp (15 ml) vegetable oil
1 tsp (5 g) sugar
½ tsp ground black pepper
¼ tsp salt
Vegetable oil for frying
Instructions
Meat Transformation: Sizzle ground pork or beef in a medium-heated skillet with vegetable oil until achieving a uniform, rich brown color.
Aromatic Infusion: Blend diced onions, minced garlic, shredded carrots, and chopped green beans into the meat, creating a vibrant vegetable-laden mixture.
Flavor Harmonization: Integrate soy sauce, sugar, black pepper, and salt, allowing the ingredients to simmer and meld together, developing a robust taste profile.
Filling Preparation: Cool the seasoned mixture to room temperature, preserving its savory essence and ensuring optimal wrapping consistency.
Wrapper Assembly: Distribute filling precisely along the lumpia wrapper’s edge, rolling with calculated technique and securing side edges to form compact, sealed parcels.
Crispy Immersion: Heat vegetable oil in a deep pan to medium temperature, gently submerging lumpia in small batches to achieve a uniform golden-brown exterior.
Finishing Touch: Drain freshly fried lumpia on absorbent paper towels, allowing excess oil to dissipate while maintaining their signature crisp texture.
Notes
Meat Selection Matters: Choose ground pork or beef with moderate fat content for juicier, more flavorful filling that won’t become dry during cooking.
Wrapper Wisdom: Keep lumpia wrappers covered with a damp cloth to prevent drying out and cracking during preparation, ensuring smooth rolling.
Temperature Control: Maintain consistent medium heat while frying to achieve even golden-brown color without burning the delicate wrapper exterior.
Cooling Technique: Let filling cool completely before wrapping to prevent wrapper soginess and ensure crisp, tight rolls during frying.
Recipe Development, Food Styling and Photography, Seasonal and Local Ingredients, Vegetarian and Vegan Cuisine, Culinary Education
Education
Portland Community College
Degree: Associate of Applied Science in Culinary Arts
Focus: Comprehensive training in culinary techniques, kitchen management, and food safety. Gained hands-on experience in preparing diverse cuisines and understanding flavor profiles
Oregon Culinary Institute
Program: Baking and Pastry Certificate
Focus: Specialized education in baking fundamentals, pastry arts, and dessert presentation. Emphasized creativity and precision in crafting baked goods.
Jessica Martin is a talented food writer and recipe creator who specializes in seasonal cooking and approachable home baking.
Educated at Portland Community College with additional pastry training from Oregon Culinary Institute, Jessica’s culinary journey spans nearly a decade of creating and sharing flavorful recipes.
Her deep appreciation for local ingredients shapes each of her recipes, making them both accessible and inspiring. At Beard and Bonnet, Jessica uses her cheerful, down-to-earth writing to help readers effortlessly bring new tastes and creative dishes into their daily routines.

Jessica Martin
Recipe Developer & Food Writer
Expertise
Recipe Development, Food Styling and Photography, Seasonal and Local Ingredients, Vegetarian and Vegan Cuisine, Culinary Education
Education
Portland Community College
Oregon Culinary Institute
Jessica Martin is a talented food writer and recipe creator who specializes in seasonal cooking and approachable home baking.
Educated at Portland Community College with additional pastry training from Oregon Culinary Institute, Jessica’s culinary journey spans nearly a decade of creating and sharing flavorful recipes.
Her deep appreciation for local ingredients shapes each of her recipes, making them both accessible and inspiring. At Beard and Bonnet, Jessica uses her cheerful, down-to-earth writing to help readers effortlessly bring new tastes and creative dishes into their daily routines.