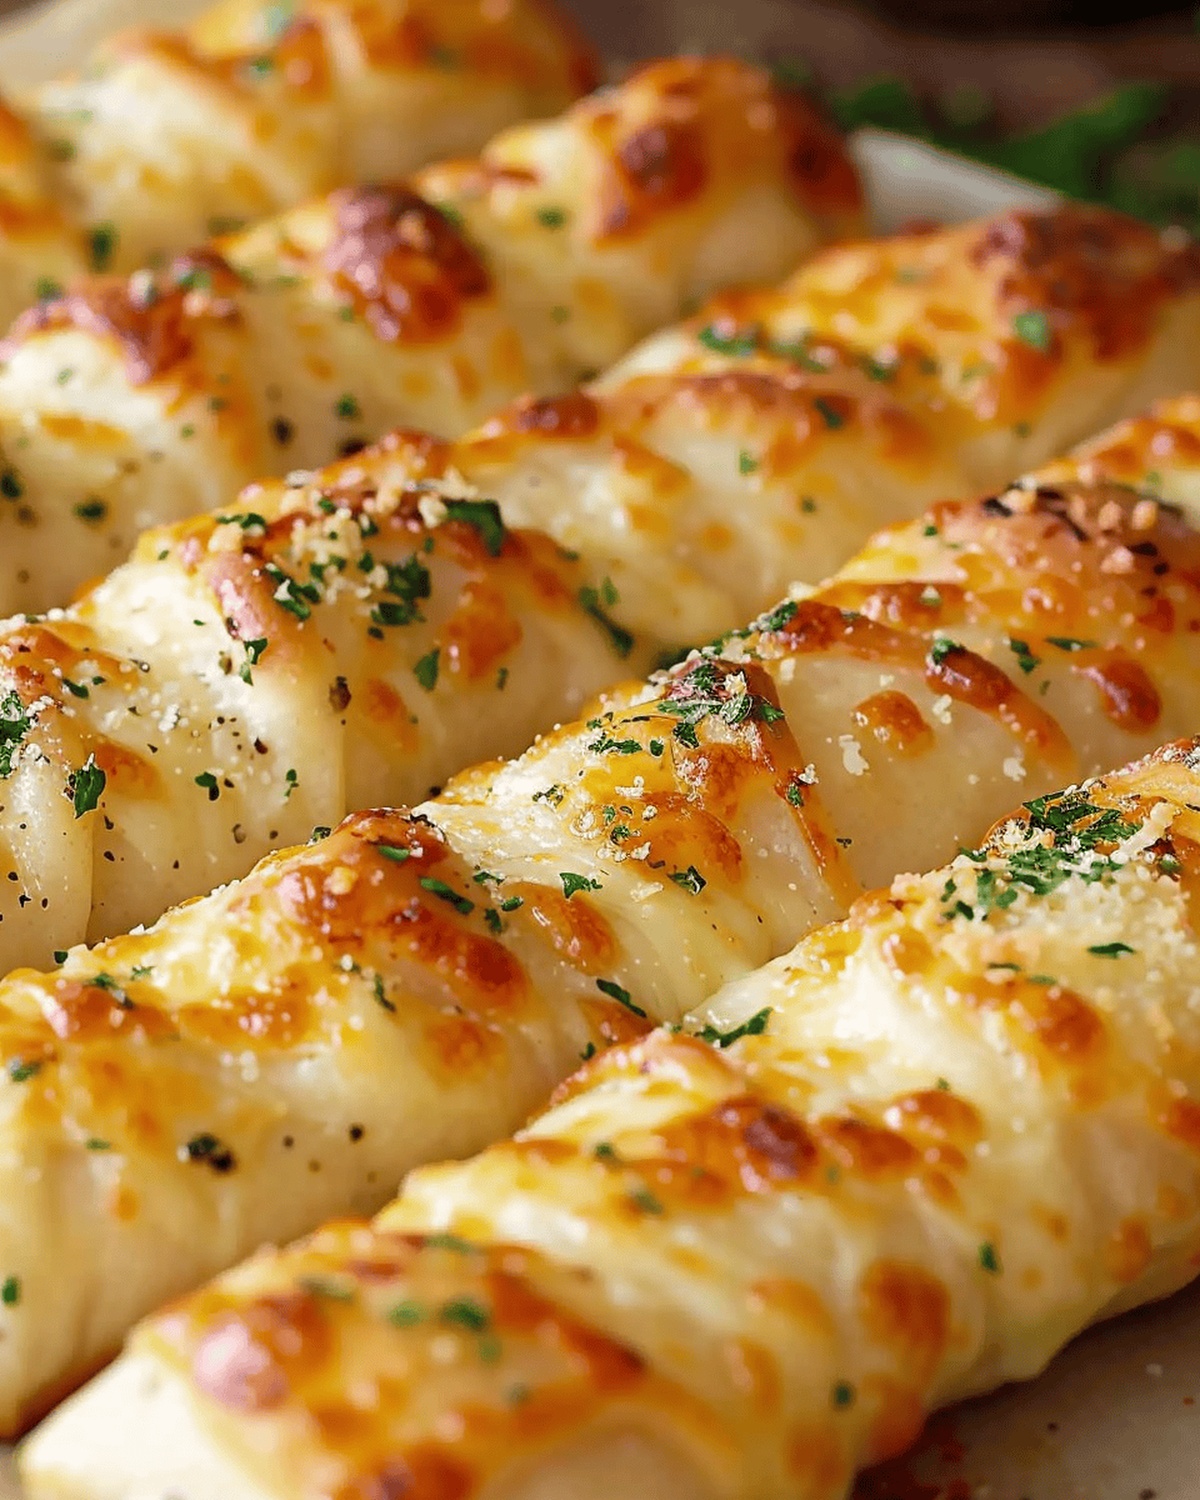
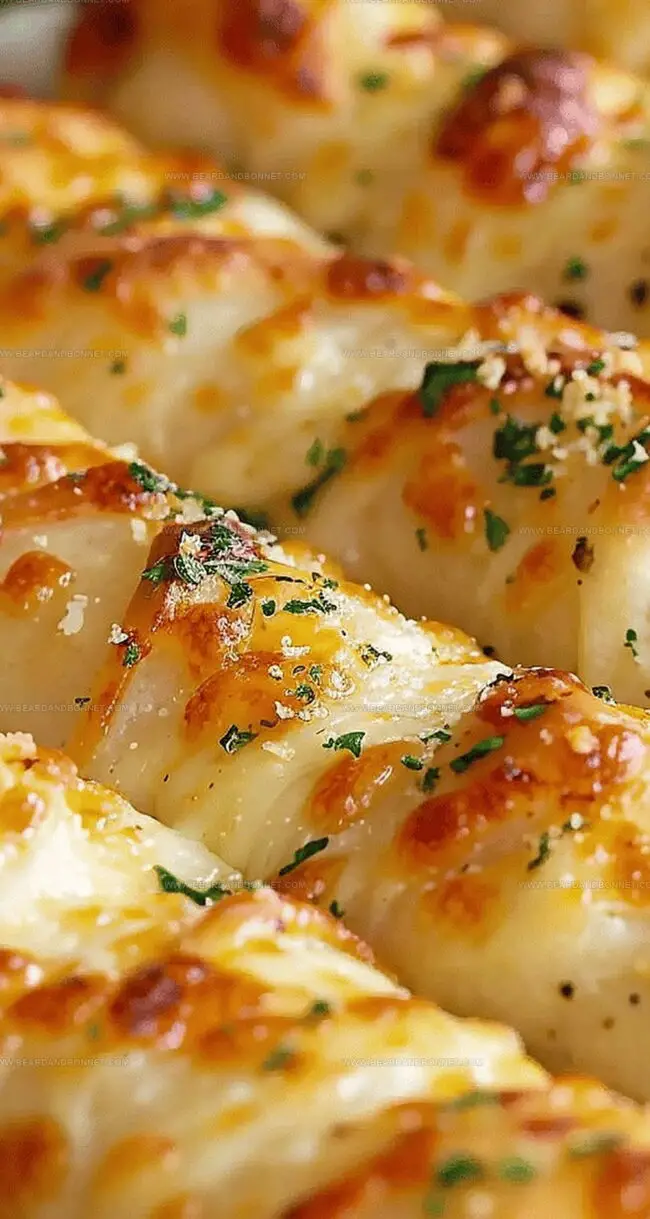
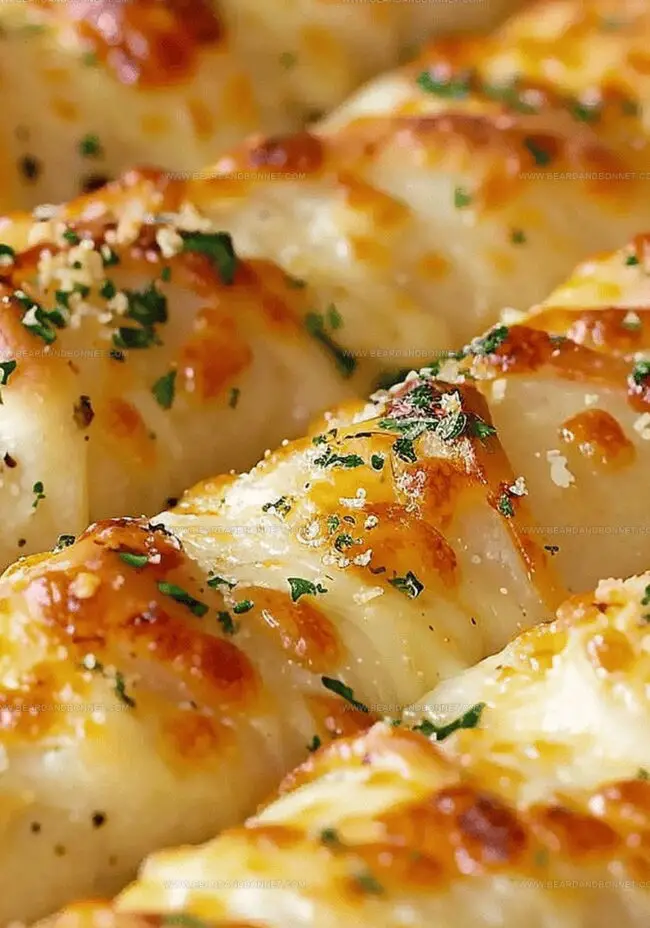
Warm, gooey, and utterly irresistible, these homemade cheesy garlic bread twists combine the best of comfort food in one delectable bite.
Soft dough spirals packed with zesty garlic and melted cheese create a mouthwatering appetizer that steals the show at any gathering.
Restaurant-quality flavor meets simple kitchen magic in this crowd-pleasing recipe.
Golden-brown twists emerge from the oven with a crispy exterior and tender, cheesy center that beckons everyone to the table.
Each twist promises a perfect balance of savory garlic and rich, gooey cheese that melts in your mouth.
The aroma alone will have everyone hovering near the kitchen, eager to snag these irresistible treats.
Dive into this easy recipe and watch these garlic bread twists become your new favorite go-to snack.
Quick Recipe Overview
Prep Time: 10 minutes
Cook Time: 20 minutes
Total Time: 30 minutes
Calories: 223 kcal
Servings: 9
Ingredients for Garlic Bread Twists
For Dough Base:
Pizza Dough: Soft, stretchy foundation that creates a pillowy texture with delightful chewiness, choose fresh dough for best results.
Flour: Prevents sticking during rolling and helps create smooth dough surface.
For Cheese Filling:
Cheese Sticks: Provides gooey, melty center that stretches when pulled, select full-fat mozzarella for maximum flavor.
Parmesan Cheese: Adds sharp, nutty accent that elevates overall taste profile, grate fresh for most intense flavor.
For Seasoning and Flavor:
Butter: Delivers rich, golden coating that enhances browning and adds luxurious moisture, use unsalted for better control.
Garlic Powder: Infuses deep, aromatic warmth without overwhelming raw garlic intensity.
Italian Seasoning: Introduces herbaceous complexity with blend of dried herbs like oregano, basil, and thyme.
Marinara Sauce: Provides zesty, tangy dipping companion that complements the cheesy breadsticks.
Tools for Shaping & Baking Bread Twists
Mixing bowl: For combining butter, garlic powder, and seasoning.
Pastry brush: To generously coat breadsticks with seasoned butter.
Baking sheet: For even baking of breadsticks.
Parchment paper: Prevents sticking and makes cleanup easy.
Rolling pin: Helps roll dough into perfect rectangles.
Small bowl: For mixing butter and seasonings.
Knife or pizza cutter: To divide pizza dough into equal pieces.
Bread Twist Baking Instructions
Gooey Cheese Bread Pillows
Dough Preparation Rolling out soft pizza dough into delicate rectangles on a lightly dusted surface.
Cheese Embrace Carefully wrapping each cheese slice inside tender dough pockets, sealing edges with gentle pinches to create delightful little bundles.
Flavor Magic Whisking melted butter with aromatic garlic powder and vibrant Italian herbs, then lovingly brushing the mixture across each golden bread pillow.
Oven Transformation Sliding the bread pillows into a preheated 375°F oven, watching them transform into crispy, bubbling treasures with a gorgeous golden exterior.
Delicious Finale Letting the bread pillows rest momentarily before serving, accompanied by zesty marinara sauce for an irresistible dipping experience.
Variations for Cheesy Garlic Bread Flavors
Cheese Swapping Adventure: Experiment with different cheese types like mozzarella, provolone, or sharp cheddar to create unique flavor profiles for your bread twists.
Herb Garden Twist: Enhance the seasoning by adding fresh chopped herbs like basil, oregano, or parsley directly into the butter mixture for a more vibrant taste experience.
Make-Ahead Magic: Prepare the cheese-filled dough twists up to a day in advance and store them covered in the refrigerator. When ready to serve, simply brush with seasoned butter and bake for a quick appetizer.
Spice Level Boost: Kick up the heat by mixing some red pepper flakes or a dash of cayenne pepper into the melted butter for those who enjoy a spicy kick with their cheesy bread.
Dipping Sauce Delight: Beyond marinara, try serving these twists with ranch dressing, garlic aioli, or a homemade cheese sauce to create an irresistible appetizer that will wow your guests.
Best Way to Serve Garlic Bread Twists
Dip Delight: Serve these cheesy garlic bread twists with a zesty marinara sauce that complements the rich, garlicky flavor and adds a tangy kick to each bite.
Party Platter Perfection: Arrange the twists on a rustic wooden board with small dipping bowls, creating an inviting appetizer spread that’s perfect for game nights or casual gatherings.
Soup and Salad Sidekick: Pair these crispy, cheesy breadsticks alongside a warm tomato soup or fresh garden salad to elevate your meal with a delicious, comforting touch that brings extra warmth to the dining experience.
Movie Night Munchies: Stack the twists on a platter next to some fresh veggies and dips for a crowd-pleasing snack that’ll make movie nights extra special and satisfying.
Tips for Keeping Twists Fresh & Crisp
Quick Refrigeration Strategy: Store leftover cheesy garlic bread twists in an airtight container within the refrigerator for up to 3 days. Wrap each twist individually in aluminum foil to maintain moisture and prevent them from drying out.
Freezing Technique: Freeze unbaked or baked breadsticks by placing them on a baking sheet, then transferring to a freezer-safe bag. Frozen twists remain delicious for 2 months. Thaw overnight in the refrigerator before reheating.
Reheat with Crispiness: Revive cold breadsticks by warming them in a preheated oven at 350°F for 5-7 minutes. This method restores their crispy exterior and melty cheese interior, making them taste freshly baked.
Smart Portion Control: Separate breadsticks into single-serving portions before storing. This approach allows easy grab-and-go snacks and prevents unnecessary reheating of the entire batch.
Homemade cheesy garlic bread twists combine crispy, golden dough with rich parmesan and herbs. Simple ingredients create a delightful side that pulls you into comfort and warmth.
Ingredients
Scale
1 lb (454 g) pizza dough (homemade or store-bought)
12 sticks (12 oz or 340 g) string cheese or favorite cheese, cut into sticks
2 tbsps (30 mL) unsalted butter, melted
1 tsp (5 g) garlic powder
1 tsp (3 g) Italian seasoning
¼ cup (25 g) grated Parmesan cheese
Marinara sauce
Instructions
Preparation: Dust the countertop lightly and divide pizza dough into 12 uniform segments, creating a clean workspace.
Dough Shaping: Stretch each dough portion into a slender 4×3 inch rectangular shape, positioning a cheese stick vertically along the shorter edge.
Rolling Technique: Carefully spiral the dough around the cheese, applying gentle pressure and sealing edges completely to prevent cheese from escaping.
Flavor Coating: Whisk melted butter with garlic powder and Italian seasoning, then generously brush the mixture over each twisted breadstick, ensuring full coverage.
Optional Enhancement: Sprinkle grated Parmesan cheese over the buttered twists for additional flavor depth.
Oven Preparation: Preheat oven to 375°F (190°C) and line a baking sheet with parchment paper, spacing the cheese-filled twists to allow even browning.
Baking Process: Cook for 15-20 minutes until breadsticks transform into a golden, crispy texture with a perfectly melted cheese interior.
Serving: Allow breadsticks to cool briefly, then present alongside marinara sauce for an irresistible dipping experience.
Notes
Dough Prep Tip: Use room temperature pizza dough for easier stretching and better texture.
Cheese Sealing Technique: Pinch dough edges firmly to prevent cheese from leaking during baking.
Butter Coating Trick: Generously brush butter mixture while twists are still warm for maximum flavor absorption.
Serving Suggestion: Best enjoyed immediately after cooling to maintain crispy exterior and melty cheese interior.
Recipe Development, Food Styling and Photography, Seasonal and Local Ingredients, Vegetarian and Vegan Cuisine, Culinary Education
Education
Portland Community College
Degree: Associate of Applied Science in Culinary Arts
Focus: Comprehensive training in culinary techniques, kitchen management, and food safety. Gained hands-on experience in preparing diverse cuisines and understanding flavor profiles
Oregon Culinary Institute
Program: Baking and Pastry Certificate
Focus: Specialized education in baking fundamentals, pastry arts, and dessert presentation. Emphasized creativity and precision in crafting baked goods.
Jessica Martin is a talented food writer and recipe creator who specializes in seasonal cooking and approachable home baking.
Educated at Portland Community College with additional pastry training from Oregon Culinary Institute, Jessica’s culinary journey spans nearly a decade of creating and sharing flavorful recipes.
Her deep appreciation for local ingredients shapes each of her recipes, making them both accessible and inspiring. At Beard and Bonnet, Jessica uses her cheerful, down-to-earth writing to help readers effortlessly bring new tastes and creative dishes into their daily routines.

Jessica Martin
Recipe Developer & Food Writer
Expertise
Recipe Development, Food Styling and Photography, Seasonal and Local Ingredients, Vegetarian and Vegan Cuisine, Culinary Education
Education
Portland Community College
Oregon Culinary Institute
Jessica Martin is a talented food writer and recipe creator who specializes in seasonal cooking and approachable home baking.
Educated at Portland Community College with additional pastry training from Oregon Culinary Institute, Jessica’s culinary journey spans nearly a decade of creating and sharing flavorful recipes.
Her deep appreciation for local ingredients shapes each of her recipes, making them both accessible and inspiring. At Beard and Bonnet, Jessica uses her cheerful, down-to-earth writing to help readers effortlessly bring new tastes and creative dishes into their daily routines.